Overview
The VRM (Vendor Relationship Management) section is your centralised hub for all vendor data in Olive. It brings together your solutions, companies, and contacts into a single source of truth — enabling contract tracking, AI-powered recommendations, and powerful filtering across your vendor portfolio.
To access the VRM, navigate to it from the main Olive navigation. The VRM contains three main tabs:
|
Tab |
What you manage |
Use it when… |
|
Solutions |
Manage your vendor and solution repository |
Building or maintaining your library of software solutions |
|
Companies |
Store company-level information for vendor organisations |
Associating solutions with their parent vendor companies |
|
Contacts |
Maintain a directory of vendor contacts |
Managing the people you work with at each vendor |
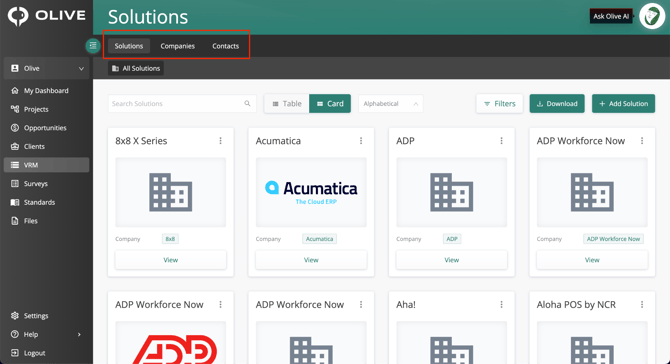
Figure 1: The VRM section — Solutions, Companies, and Contacts tabs
Solutions Tab
The Solutions tab is where you build and manage your vendor repository. From here you can add, upload, download, filter, merge, and view detailed solution records.
Adding Solutions
Click the + Add Solution button. In the Add Solution modal, enter the solution name and click Add Solution — or select from Olive's suggested matches using + Add.
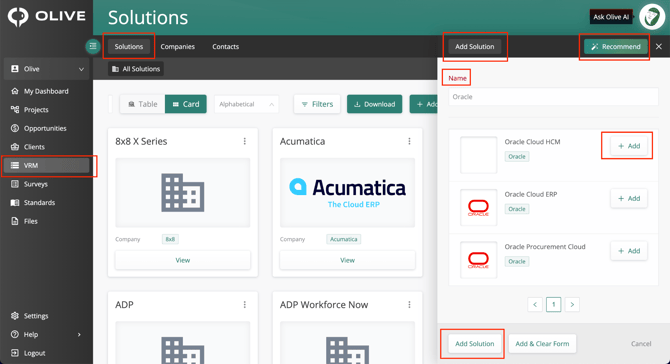
Figure 2: The Add Solution modal
|
💡 Tip: Use the Recommend feature on the Add Solution modal to open Ask Olive. Describe what you are looking for and Ask Olive will suggest relevant solutions — and can add them to your VRM directly. |
Download
Click the Download button to generate and automatically download a spreadsheet of all solution data. Olive will prompt for confirmation before generating the file.
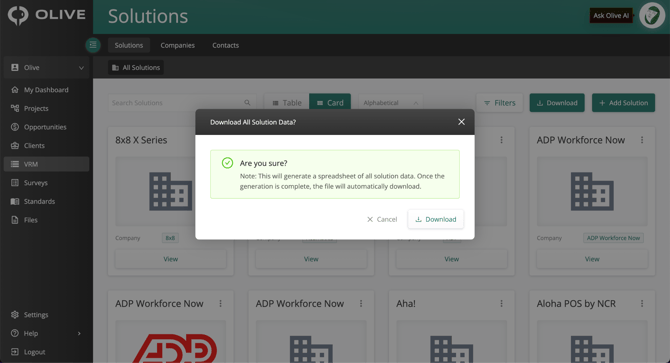
Figure 3: The Download confirmation modal — generates a spreadsheet of all solution data
Bulk Upload
Hover over the + Add Solution button to reveal the Upload button. Click it to import a spreadsheet of solutions. For best results:
- Consolidate and standardise your vendor data in a single spreadsheet before uploading
- Create matching properties in Olive first
- Map your spreadsheet columns to Olive properties during the upload process
|
📌 Note: Use structured property types such as Yes/No or Multi-select wherever possible. These unlock advanced filtering; plain text fields do not. |
Merge Solutions
The Merge Solutions feature lets you consolidate multiple solution records into one primary record — useful for removing duplicates or combining related entries.
Steps to merge solutions:
- Switch to Table view on the Solutions tab
- Select the solutions to merge using the checkboxes
- Click Merge Selected — a wizard opens
- Click Set Primary on the solution you want to keep as the main record
- Review the Active Projects column — this shows which projects each solution is currently used in
- Click Merge Solutions to complete the merge
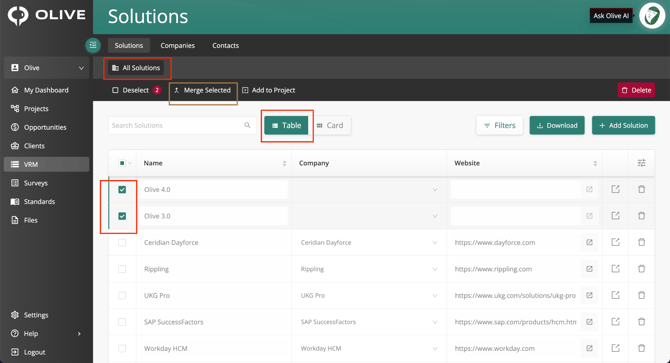
Figure 4: The Merge Selected feature — select solutions in Table view
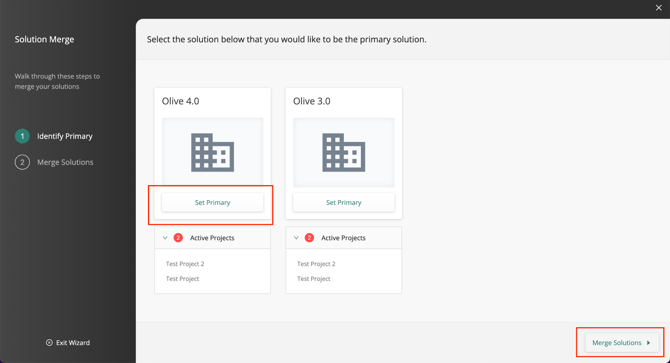
Figure 5: The Merge Solution Wizard — set a primary record and confirm
|
⚠️ Important: Merging solutions is irreversible. All selected solutions will be flattened into the primary record. Review your selection carefully before confirming. |
Filtering
Click the Filter button to open the Filter Solutions modal. Select a property, choose the values to include, and the list updates instantly. Click Save Filter to reuse it later, or clear it using the Filter x button.
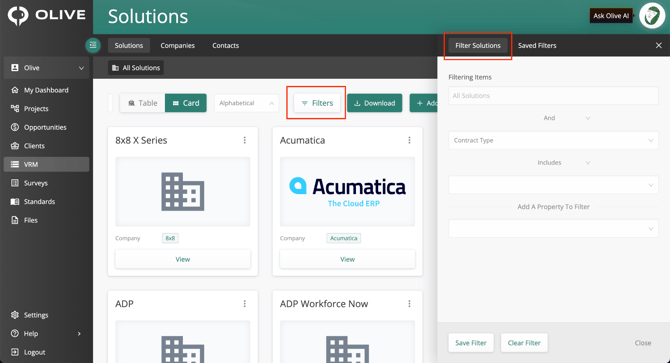
Figure 6: The Filter Solutions modal — filter by any property value
Card and Table View
Toggle between Card view and Table view using the view selector. Table view is required for bulk actions such as merging solutions.
Delete a Solution
Click the three-dot menu on a Solution Card and select Delete.
|
⚠️ Important: Deleting a solution is permanent. Confirm you no longer need the record before proceeding. |
Add to Project
You can add a solution directly to an Olive project from the VRM. Click the three-dot menu on the Solution Card, select Add to Project, choose the Destination Project from the dropdown, and click Add to Project.
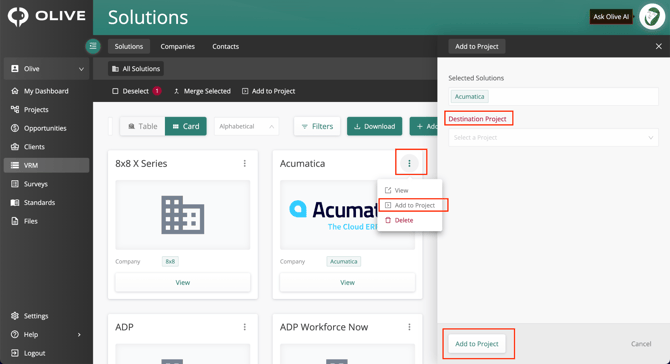
Figure 7: The Add to Project panel — select a destination project
Viewing Solution Details
Click the View button on any Solution Card to access its three detail pages.
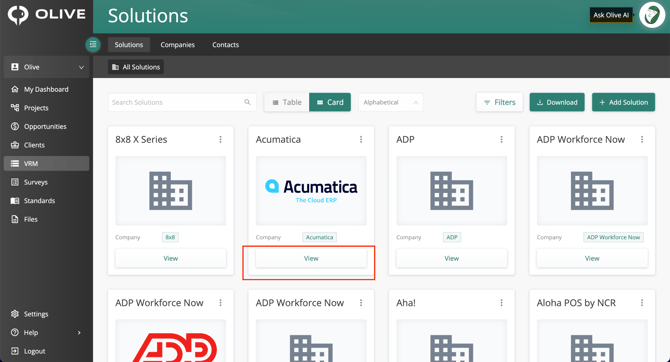
Figure 8: The View button on a Solution Card
|
Page |
What it contains |
Key action |
|
Details |
Solution name, logo, website, property groups (Basic, Financials, Security, etc.), and client-specific versions |
Edit solution info; click Manage Properties to navigate to the Properties page |
|
Associations |
Associated Contacts, Associated Solutions, and Associated Companies |
View all records linked to this solution |
|
Files |
Files and documents related to this solution |
Upload and manage relevant documents |
Details Page
The Details page lets you edit the solution name, logo, and website, add client-specific versions, and view all property groups such as Basic, Financials, and Security. Click Manage Properties to navigate to the Properties page where you can add, edit, and manage properties.
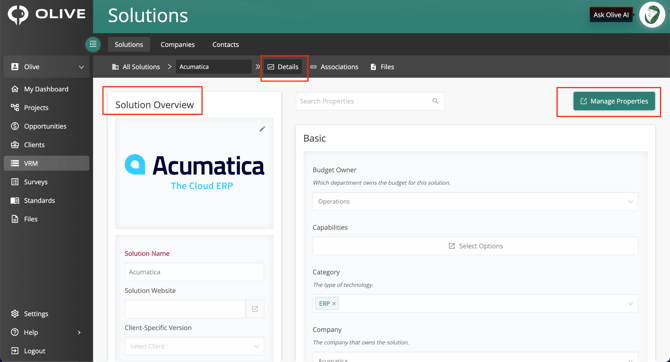
Figure 9: The Details page — edit solution info and manage property groups
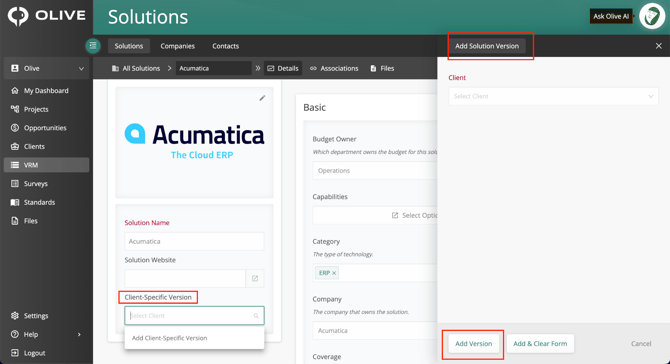
Figure 10: The Add Client-Specific Version modal
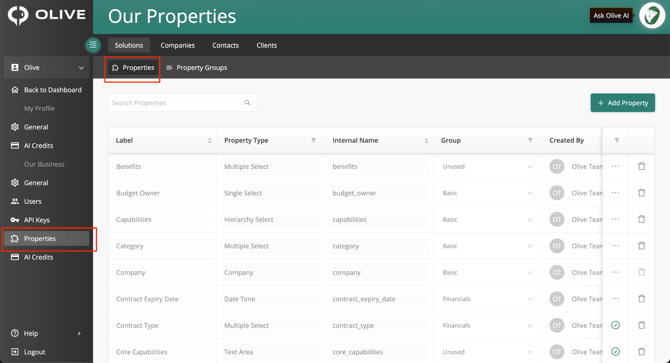
Figure 11: The Properties page — manage all solution properties
Associations Page
The Associations page displays all records linked to this solution — Associated Contacts, Associated Solutions, and Associated Companies — giving you a complete view of the vendor relationship.
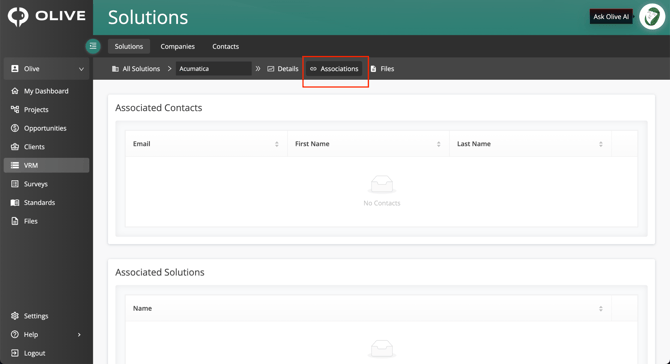
Figure 12: The Associations page — view all linked contacts, solutions, and companies
Files Page
The Files page lets you upload and manage any files or documents related to this solution, keeping all relevant documentation in one place.
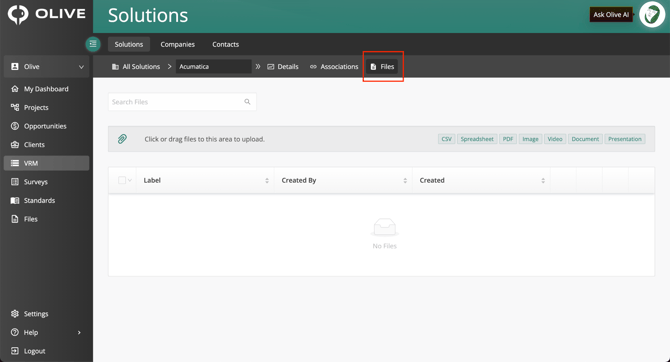
Figure 13: The Files page — attach and manage files for this solution
Companies Tab
The Companies tab works identically to the Solutions tab, but stores information at the company level rather than the solution level. This is useful because a single vendor company may supply multiple solutions. All features — add, upload, download, filter, view, delete — work the same way as in the Solutions tab.
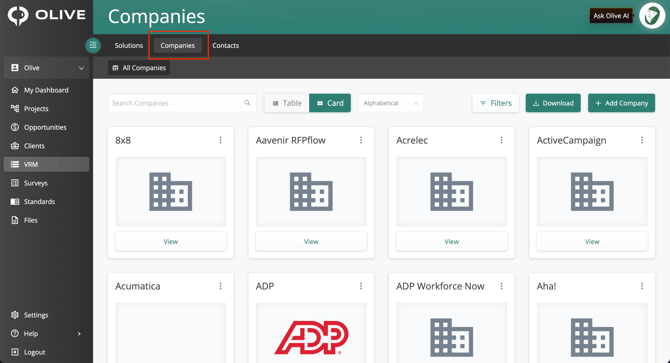
Figure 14: The Companies tab — same structure as the Solutions tab
Contacts Tab
The Contacts tab is where you maintain a directory of the vendor contacts your organisation works with.
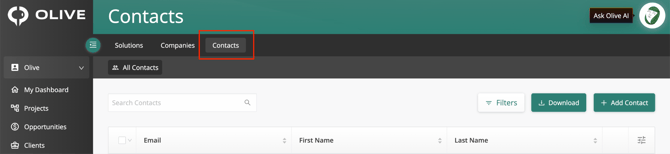
Figure 15: The Contacts tab — view and manage your VRM contacts
Adding a Contact
Click + Add Contact. Enter the contact's Email address, First name, and Last name, then click Add Contact.
Bulk Upload
Hover over the + Add Contact button to reveal the Upload button. Click it to import a spreadsheet of contacts, following the same process as the Solutions bulk upload.
Download
Click the Download button to generate and automatically download a spreadsheet of all contact data.
Filtering
The Filter button works identically to the Solutions filter — select any contact property to narrow the list.
Viewing Contact Details
Click the View icon on the relevant row in the Contacts table. The contact detail view works in the same way as the Solution detail view.
What's Next?
Once your VRM is set up, here is the recommended approach to get the most from it:
- Define your properties before uploading data in bulk
- Upload your existing vendor list using the bulk Upload feature
- Use structured property types to enable powerful filtering across your vendor portfolio
- Use Merge Solutions to consolidate any duplicate records
- Add companies and contacts to build a complete picture of each vendor relationship
- Use Add to Project to bring VRM solutions directly into your evaluation projects
- Use Ask Olive to receive AI-powered vendor recommendations informed by your VRM data
For additional support, contact your Olive administrator or reach out to the Olive support team through your organisation's support channel.