Overview
Olive Surveys allow you to collect structured input, requirement ratings, vendor scoring, and general feedback from stakeholders — whether they are inside or outside of Olive. Respondents do not need an Olive account to complete a survey.
Surveys in Olive exist at two levels:
|
Survey type |
Where to find it / When to use it |
|
Project-Level Surveys |
Found inside a specific project under the top navigation bar. Use for requirement ratings, vendor scoring, stakeholder priorities, and project-specific feedback. |
|
Account-Level Surveys |
Found in the left-hand navigation. Use for organisation-wide surveys, repeatable templates, and external insight gathering not tied to a single project. |
Both types use the same survey builder and Olive AI capabilities.
1. Survey Types
1.1 Project-Level Surveys
To access Project-Level Surveys, open your project and click Surveys in the top navigation bar. Use this type when your survey relates to project requirements, vendor scoring, stakeholder priorities, or project-specific discovery.
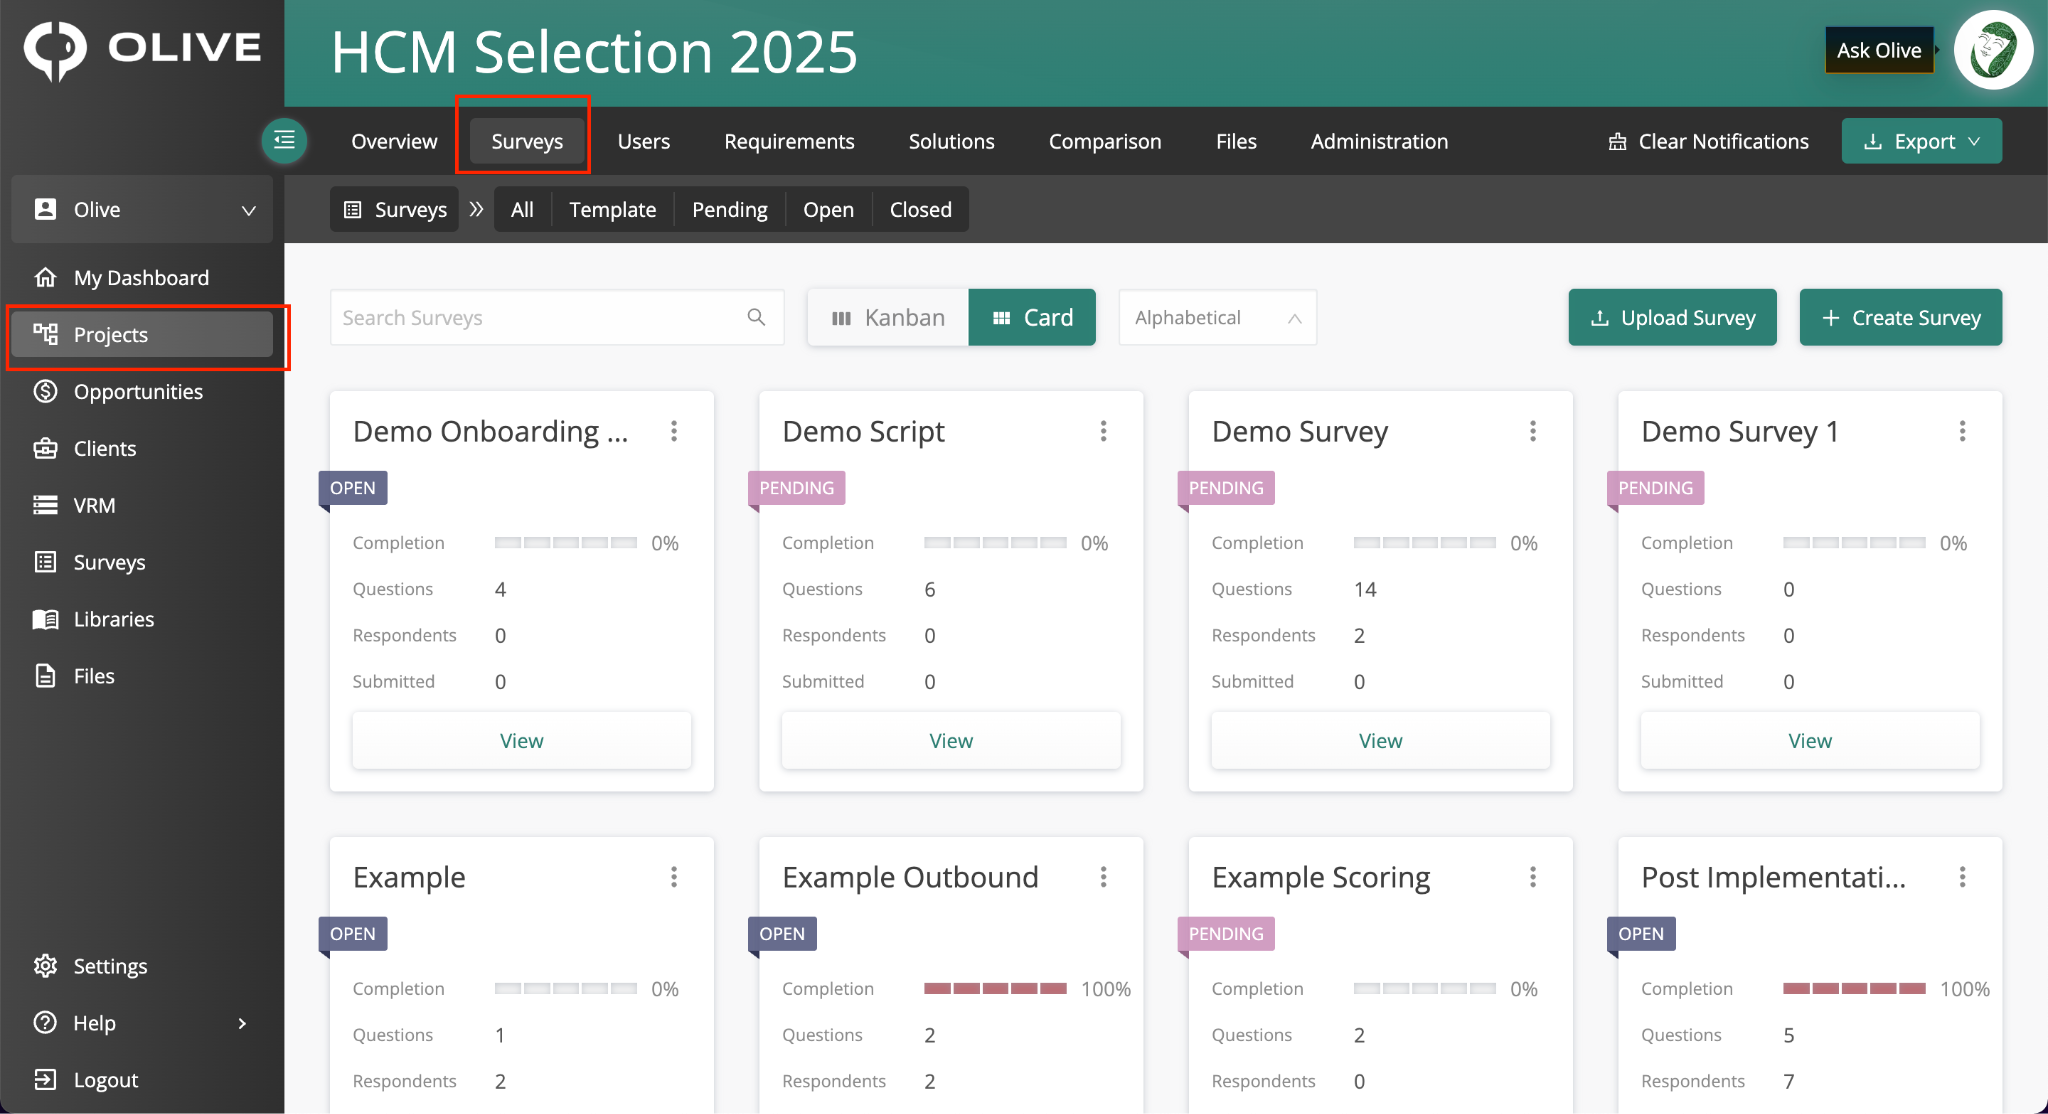
The Surveys tab within a project, showing the project-level survey list
1.2 Account-Level Surveys
To access Account-Level Surveys, click the Surveys link in the left-hand navigation, located below VRM and above Libraries. Use this type for organisation-wide surveys, repeatable templates, and external insight gathering.
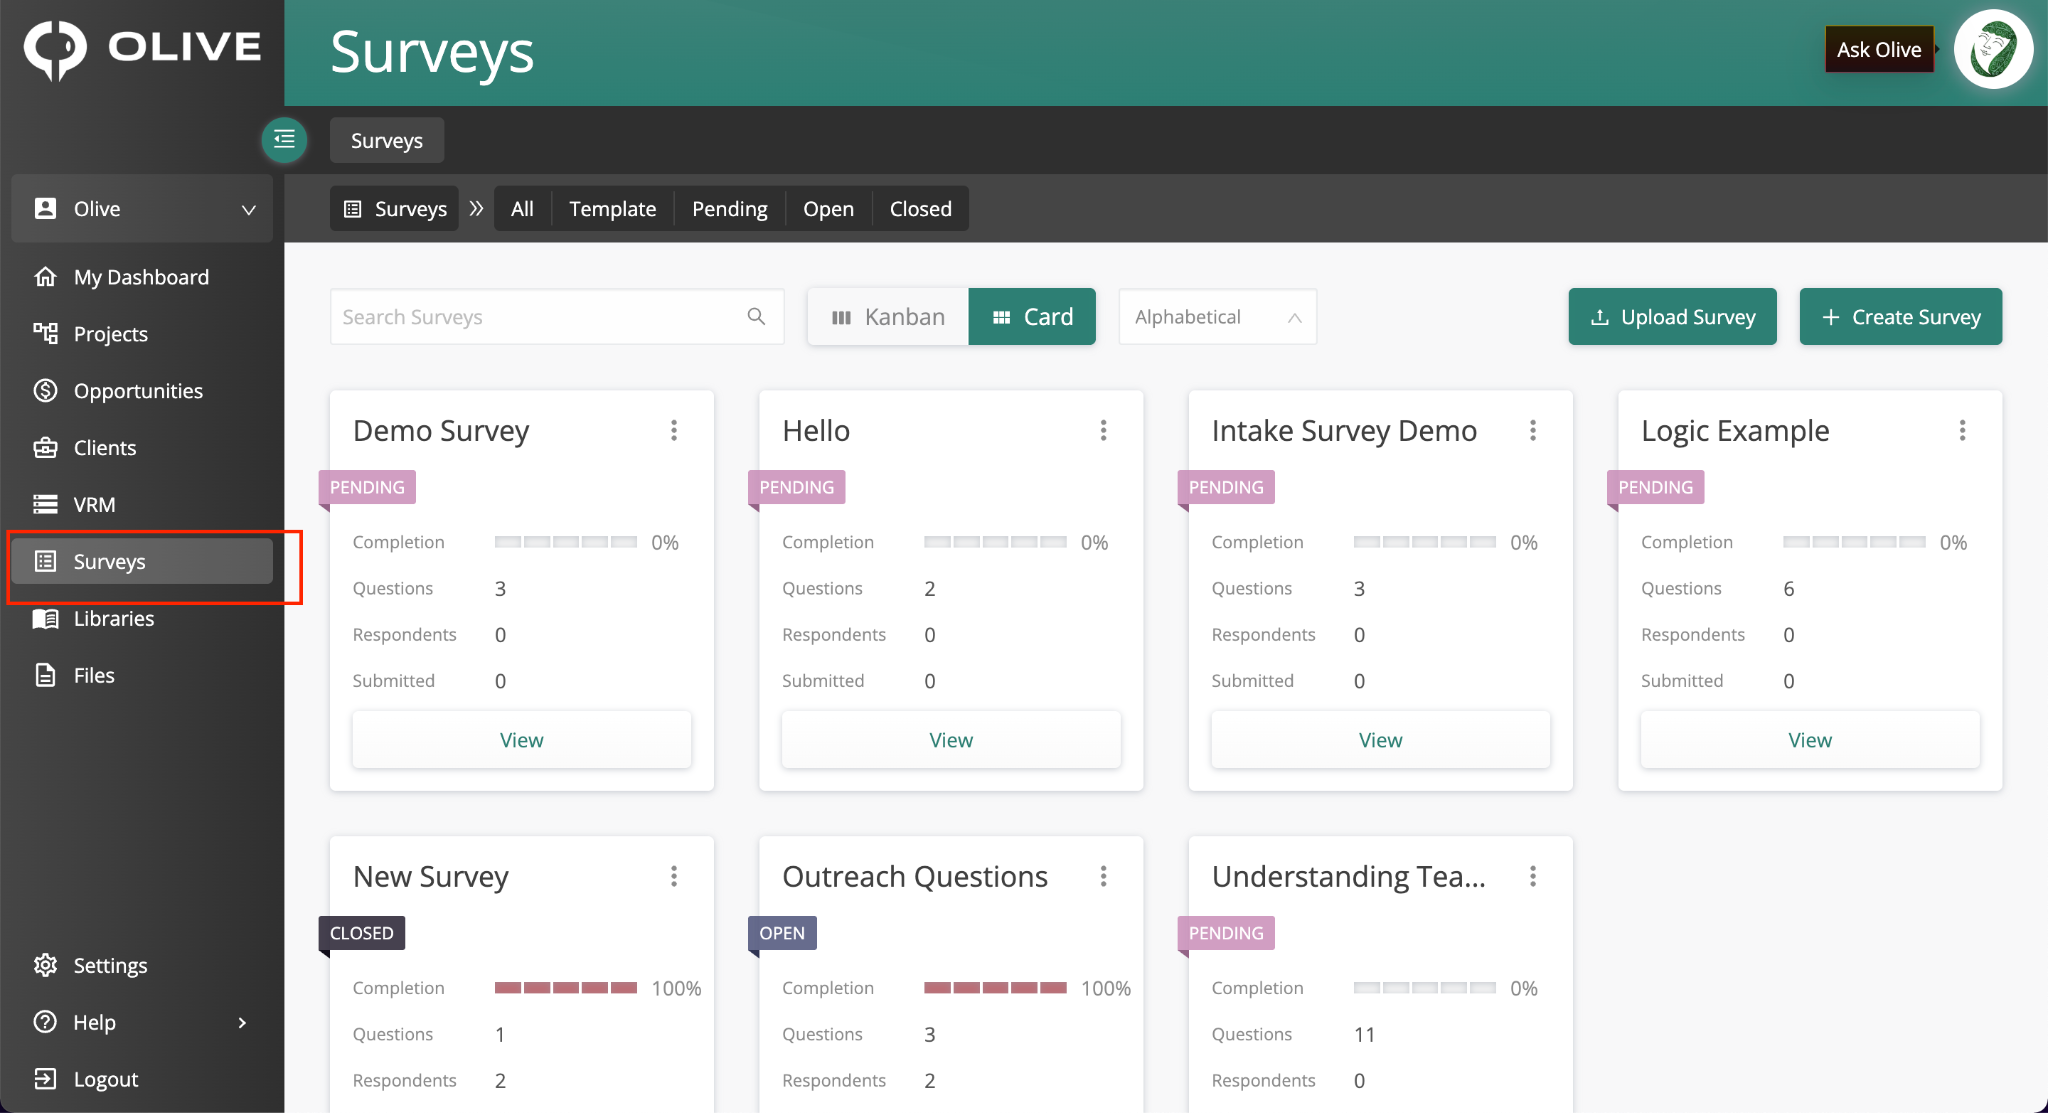
The Account-Level Surveys view in the left-hand navigation
2. Accessing Surveys
When you open the Surveys tab (at either level), you will see a list of existing surveys or a blank state if none have been created yet. From this view you can:
- Switch between Kanban View (visual progression by stage) and Card View (tile/grid layout)
- Sort surveys alphabetically
- Search for a specific survey by name
3. Creating Surveys
Click Create Survey to begin. Olive offers three ways to create a survey, depending on how much content you already have prepared.
3.1 Create a Blank Survey
Use this method when you want to build your survey from scratch inside Olive.
- Click 'Create Survey'
- Enter a label for your survey
- Click 'Build' to open the survey designer and start adding questions
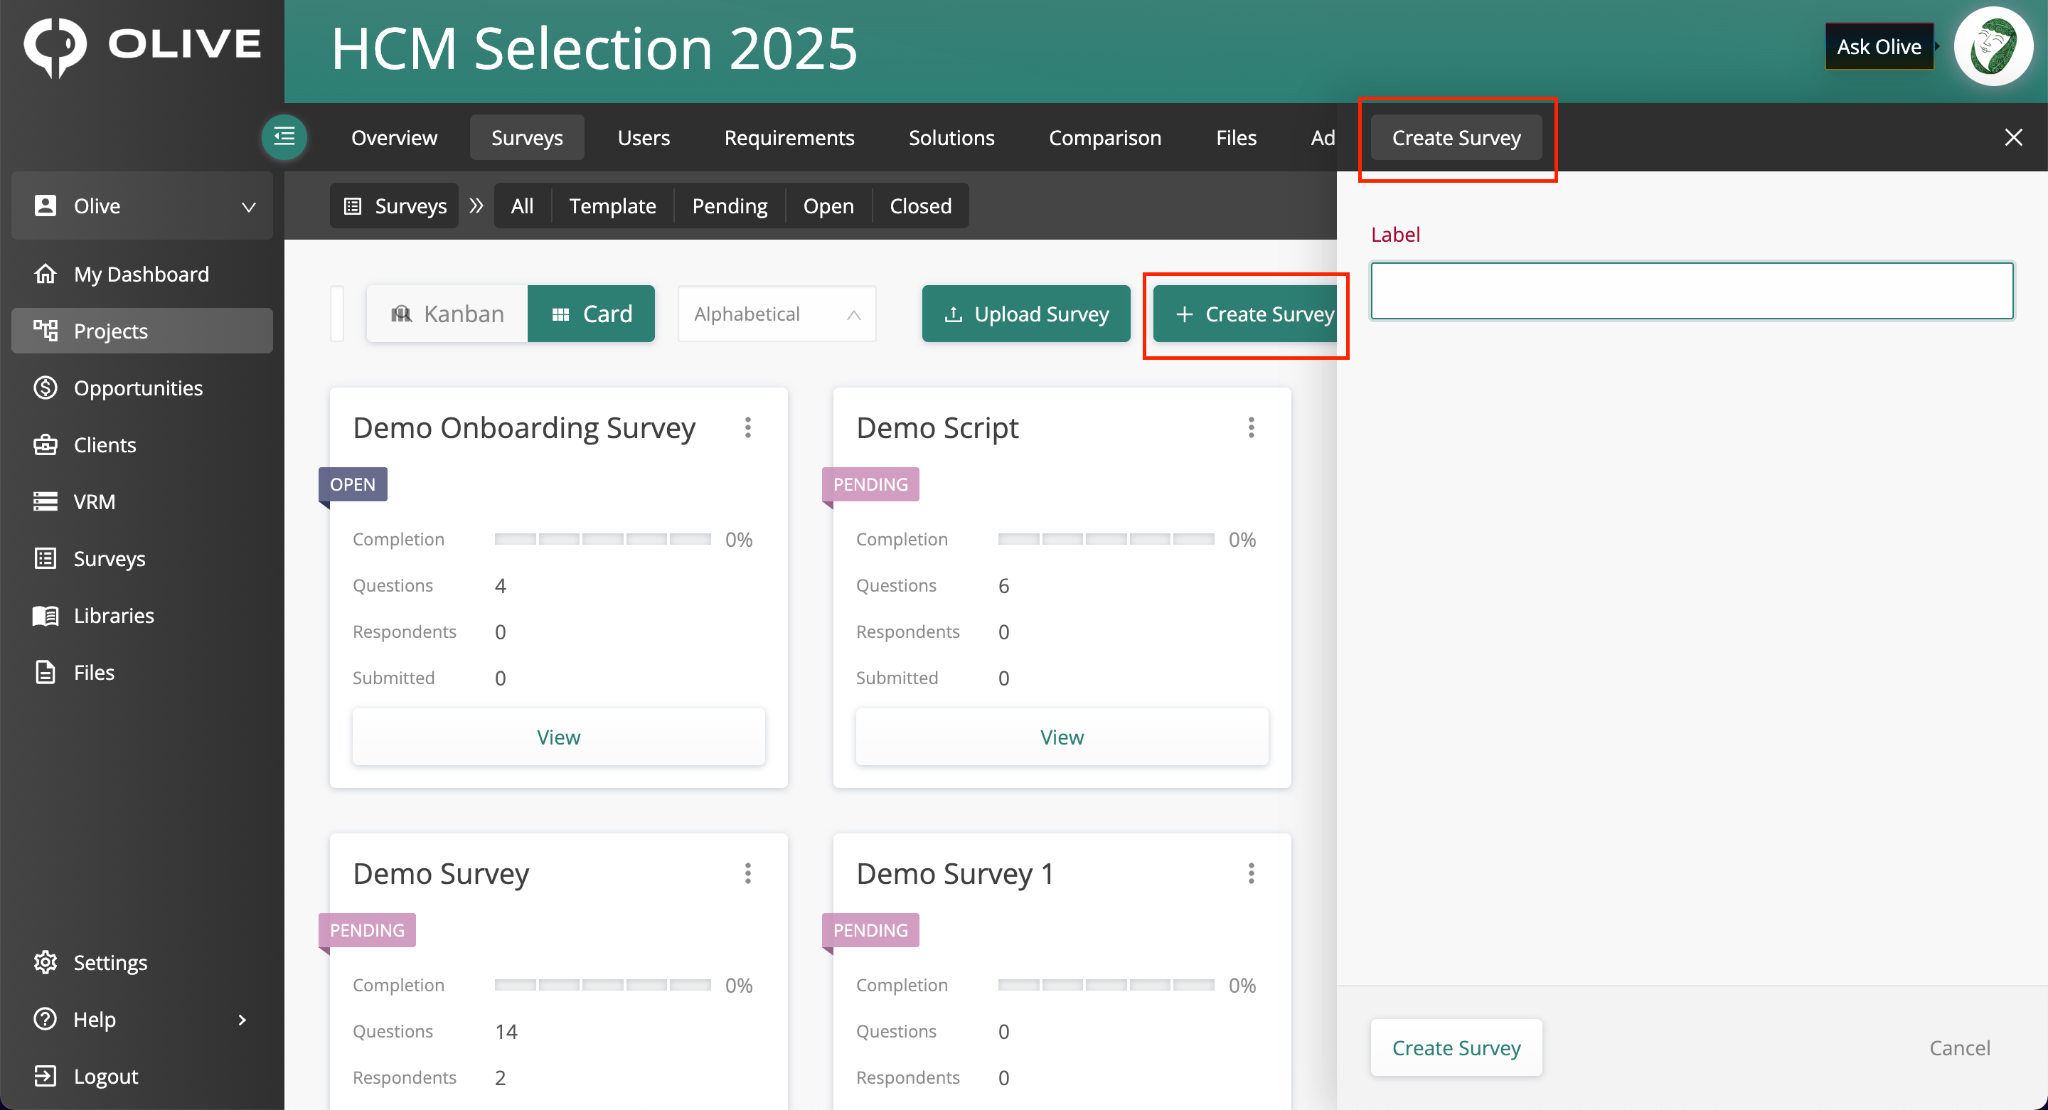
A newly created blank survey ready to be built in the designer
3.2 Upload a Survey
Use this method if you have already prepared survey content in a spreadsheet. This saves time when migrating existing surveys into Olive.
- Click 'Upload'
- Download the CSV or Excel template provided and populate it with your questions
- Upload your completed file — Olive will parse it and create the survey automatically
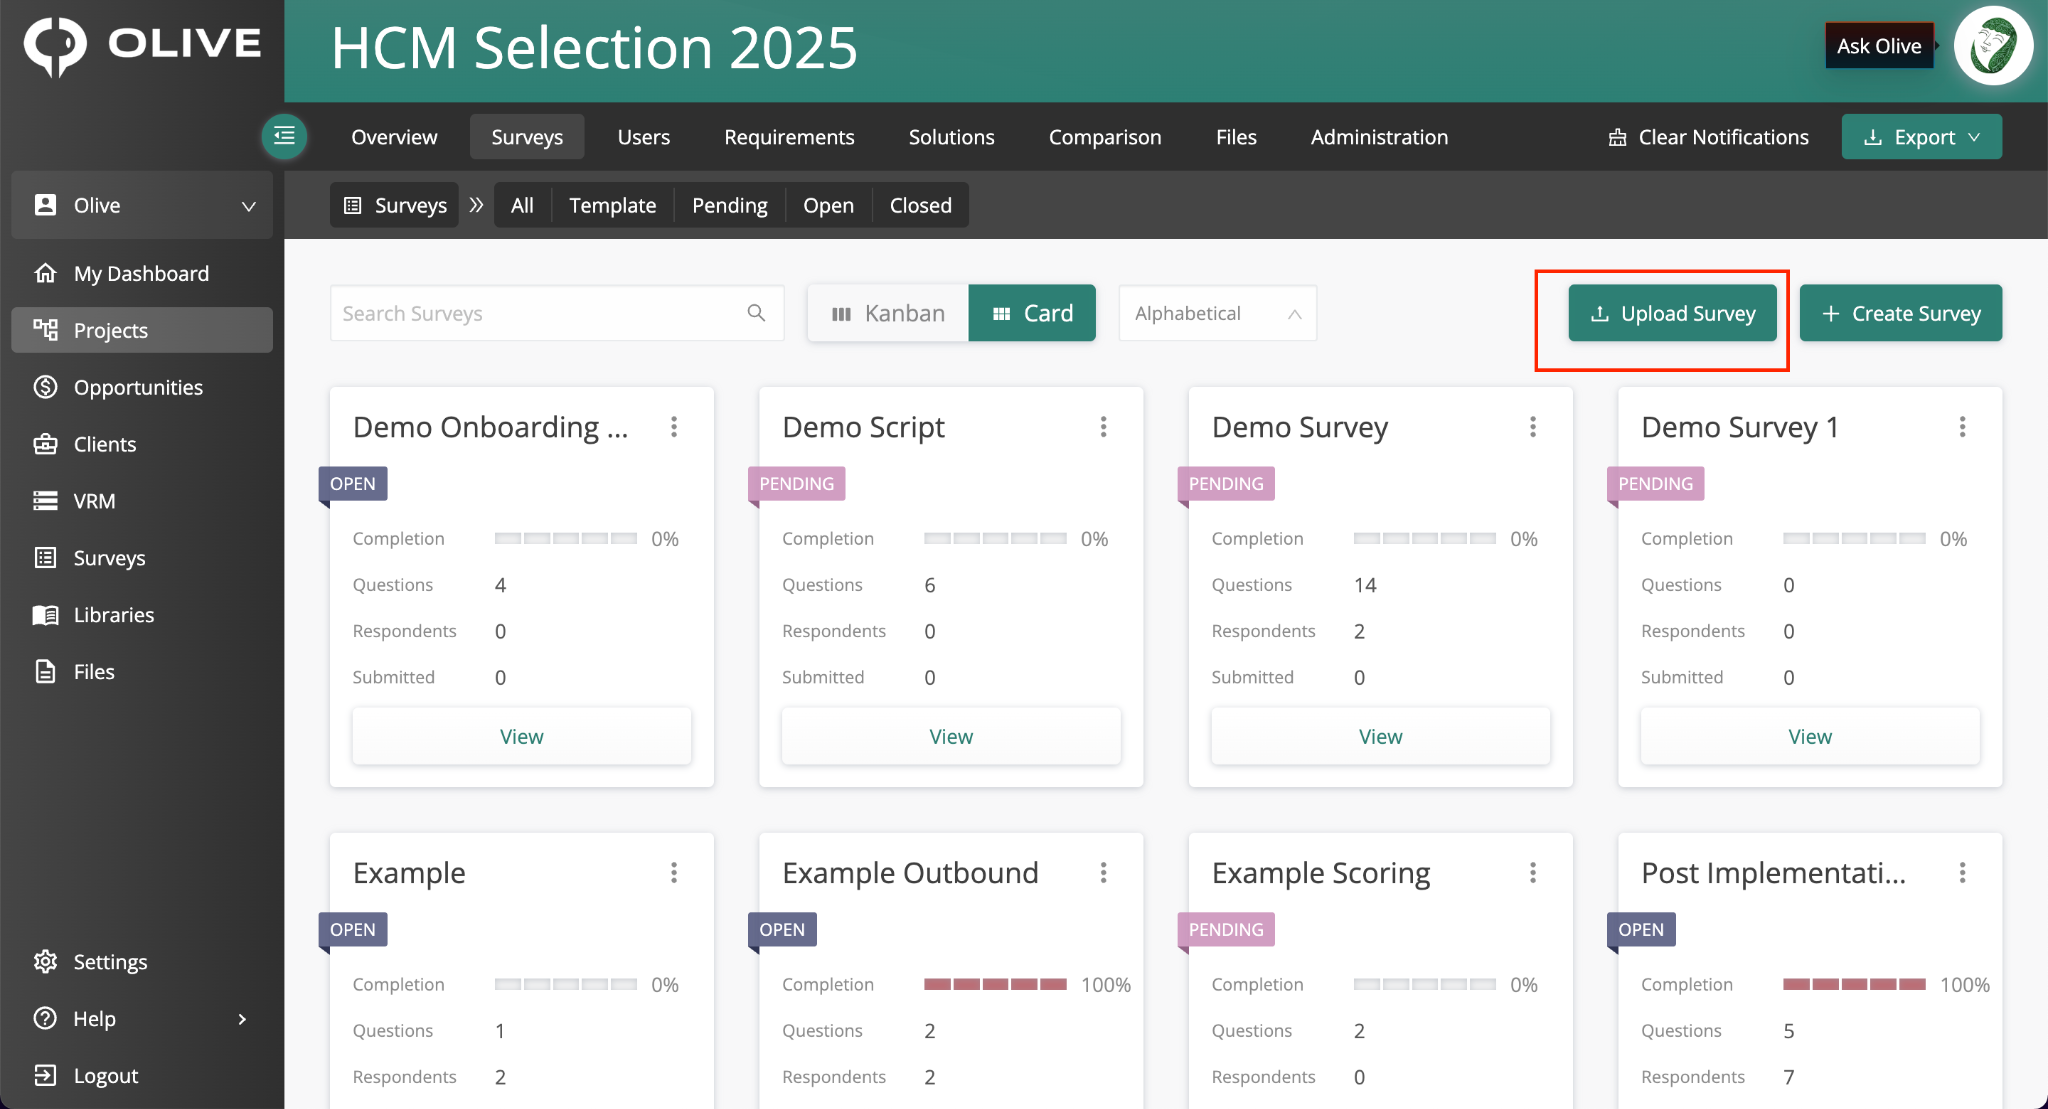
The survey upload flow, showing the template download and file upload options
|
💡 Tip: Download the Olive template before populating your spreadsheet to ensure the column format matches what the importer expects. |
3.3 Create a Survey Using Olive AI
Use the Olive AI assistant to generate a full survey based on prompts you provide.
- Click the AI face icon in the top-right corner of the survey view to open the AI chat window
- Type a prompt describing the survey you need. For example: "Write a survey to help gather stakeholder priorities and needs for an HCM platform. Use the project requirements as context."
- The AI will propose draft questions — ask for edits, additions, or removals as needed
- When satisfied, tell the AI 'Add this to the project' — Olive inserts the questions into a new survey and opens it immediately in Preview Mode
|
💡 Tip: Include your project requirements in the AI prompt context for best results. The AI can tailor questions directly to your requirement list. |
4. Survey Layout & Views
From the Surveys tab, use the view toggle to switch between two display modes:
- Kanban View — displays surveys as cards organised into columns by stage, giving you a visual pipeline overview
- Card View — displays surveys as a tile/grid layout
Sort or search within either view.
5. Building Surveys
Open a survey and click Build to enter the survey designer. The designer has two main tabs: Designer and Logic.
5.1 Designer Tab
The Designer tab is where you construct your survey. The left sidebar lists all available question types — drag or click them to add questions to your survey canvas.
Every question you add supports the following configuration options (see Section 6 — Question Settings for details):
- Title and description
- Optional image attachment
- Required / optional toggle
- Visibility toggle
- Logic settings
- Layout customisation
You can also add multiple pages to your survey to break up long question sets and improve the respondent experience.
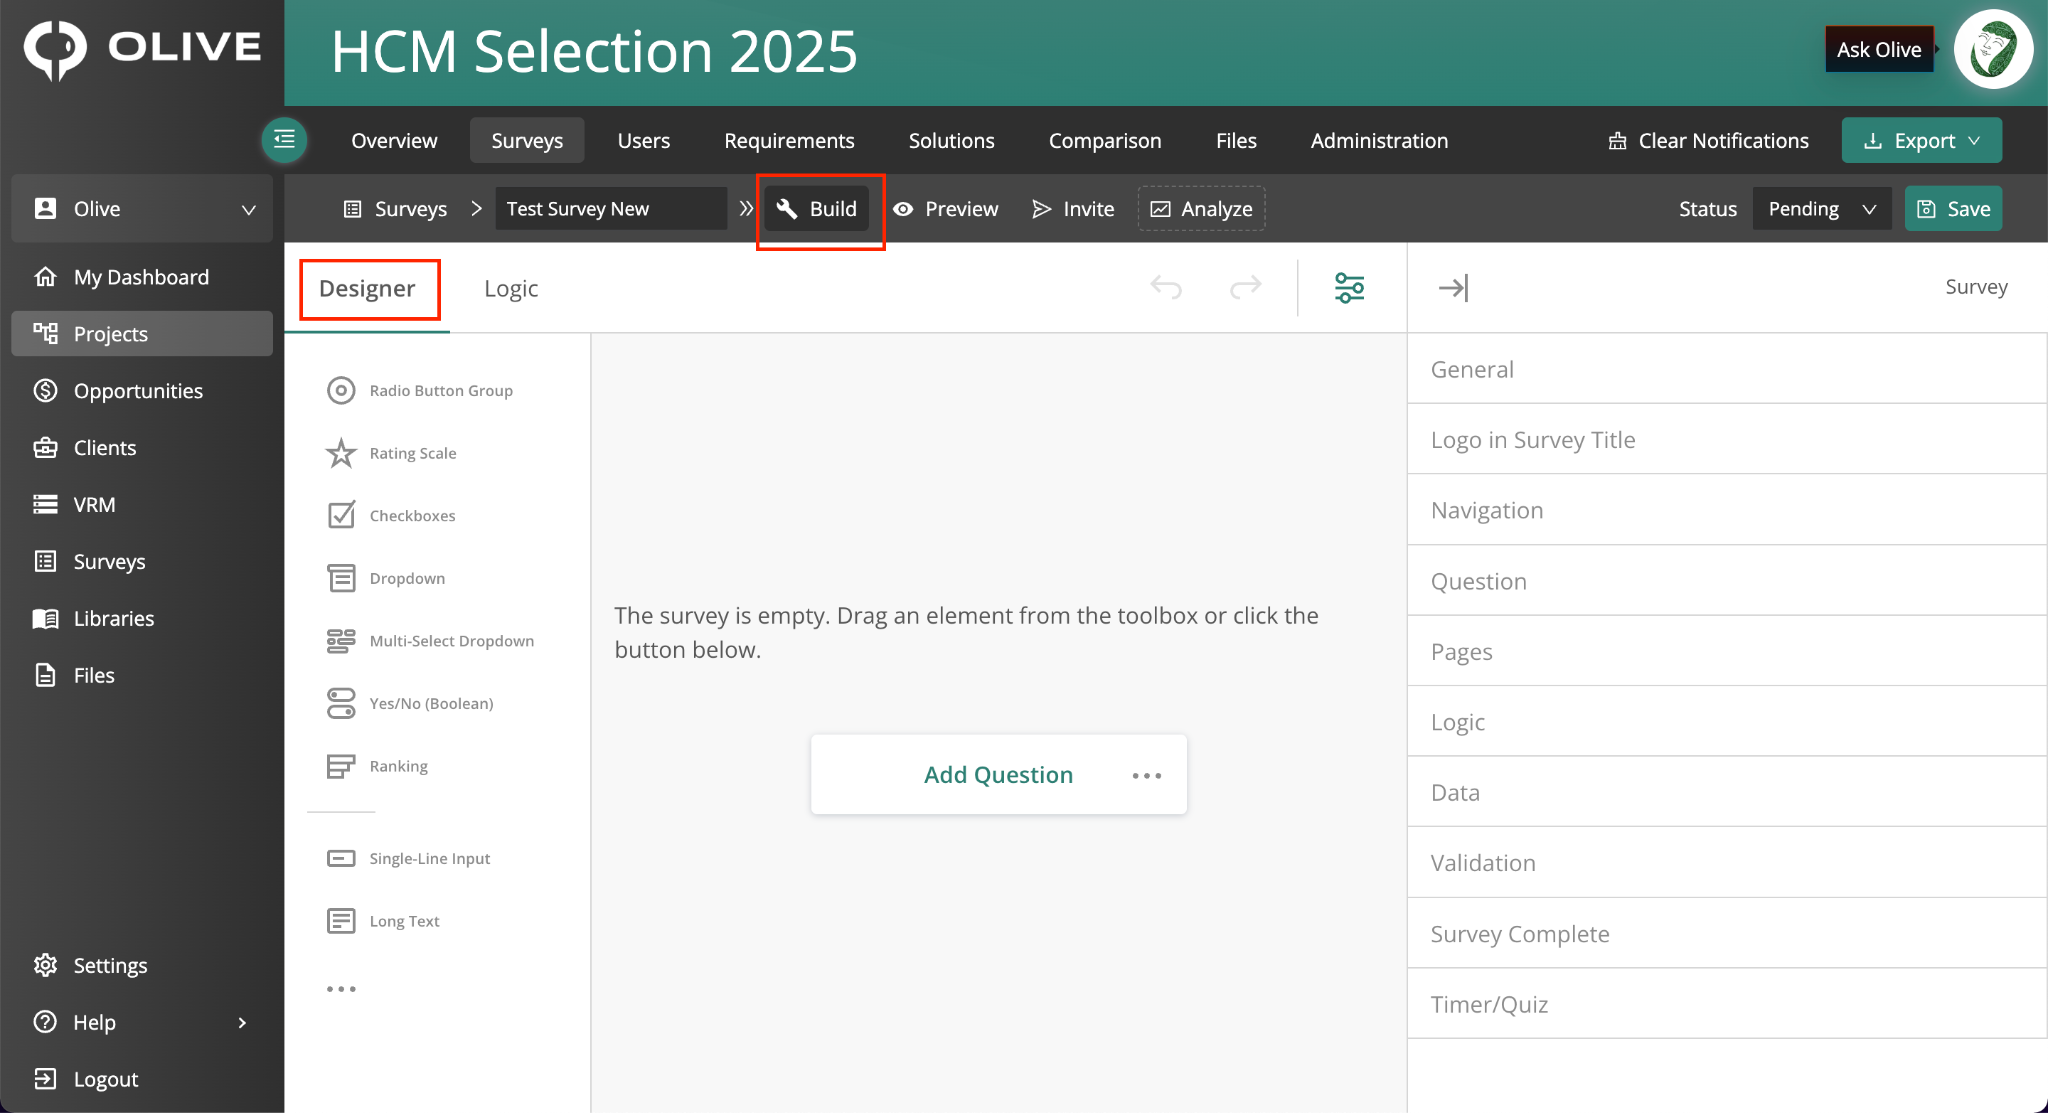
The Designer tab, showing the question sidebar and a survey being built
5.2 Logic Tab
Click the Logic tab to set up conditional display rules across your entire survey. Logic allows you to show or hide specific questions or entire panels based on how respondents answer earlier questions.
From the Logic tab you can:
- Show or hide individual questions
- Show or hide entire panels
- Create complex multi-condition logic rules
- Apply logic to question groups at once
Example: Show the CRM Satisfaction question only if the respondent selects Marketing as their department.
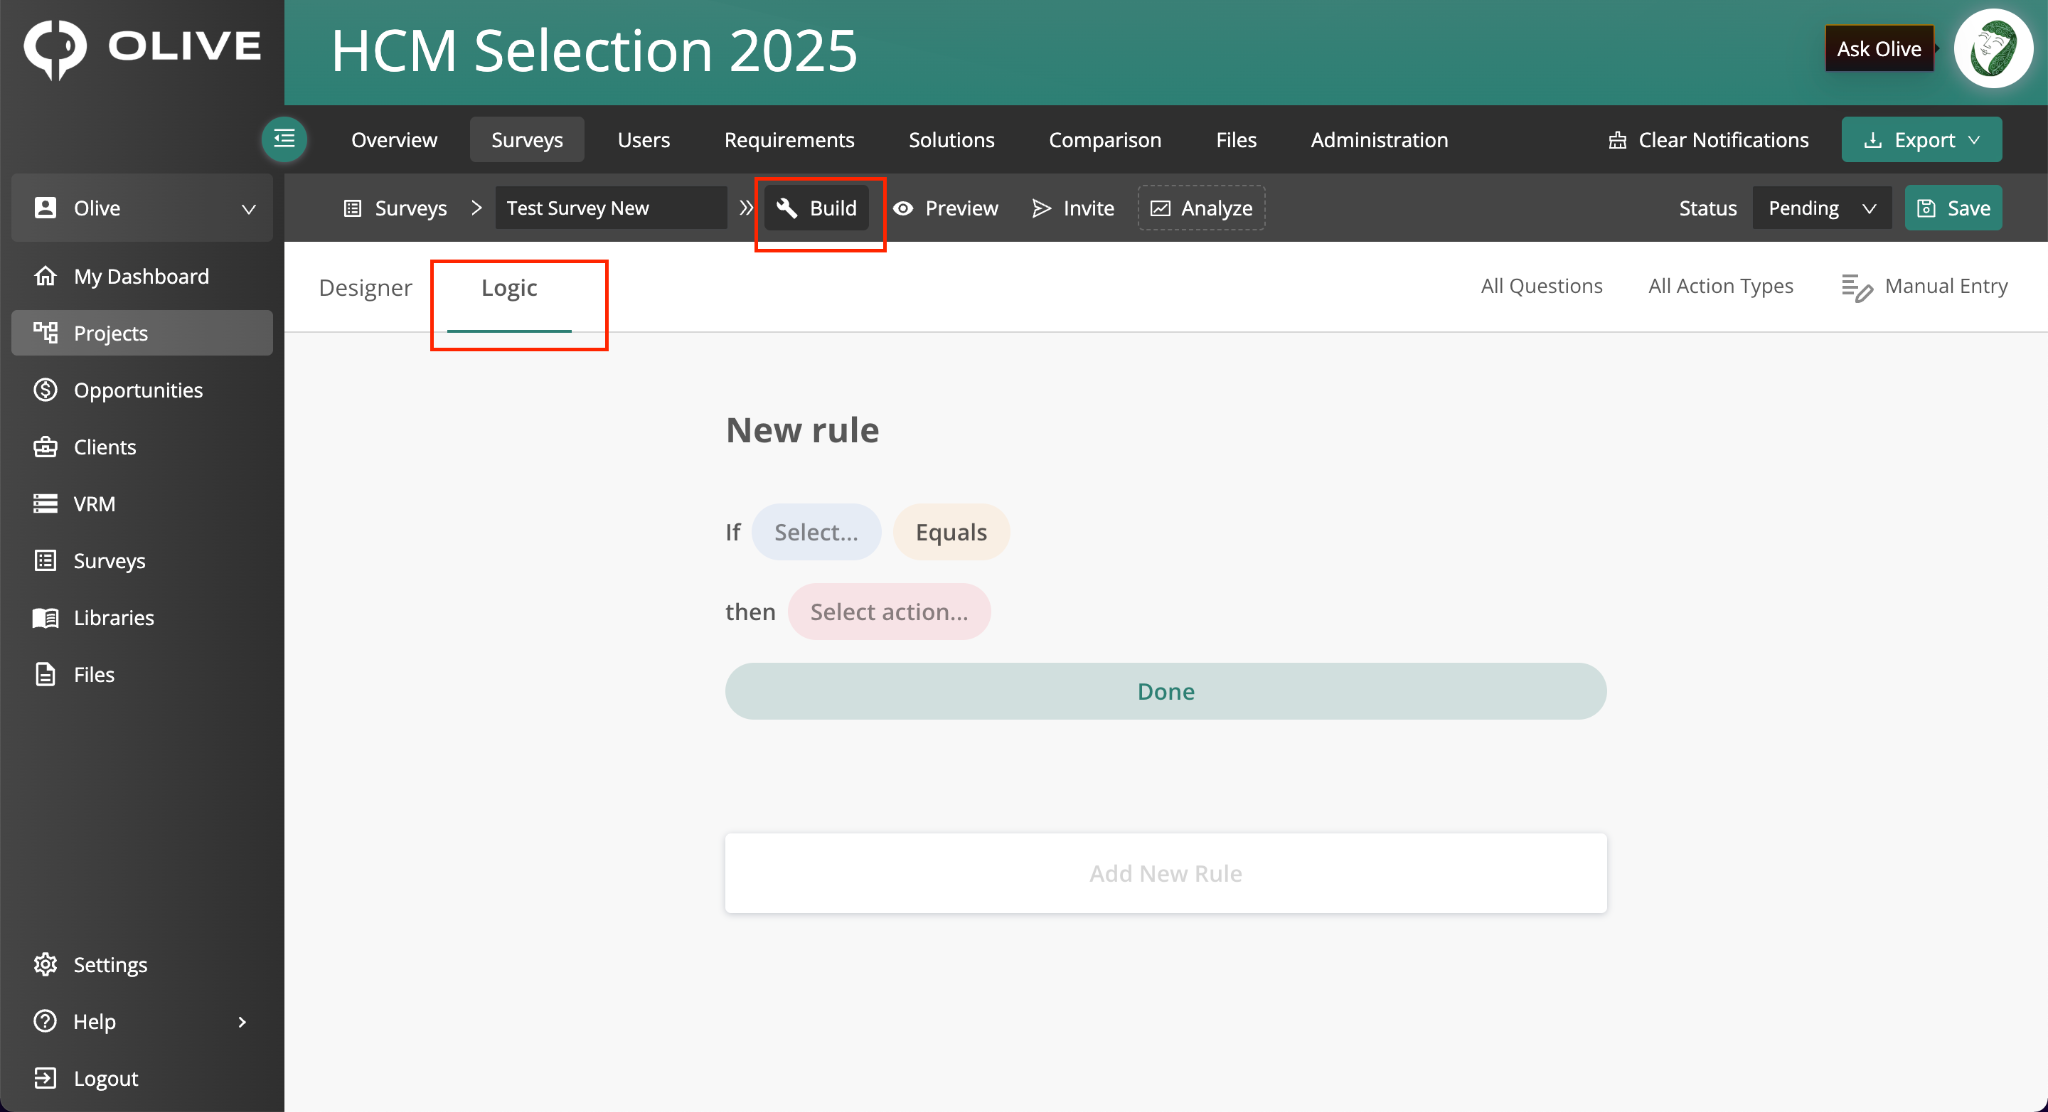
The Logic tab, showing conditional display rules applied to survey questions
|
💡 Tip: Use Panels to group related questions, then apply a single logic rule to the Panel to show or hide all questions inside it at once — much more efficient than applying logic to each question individually. |
5.3 Question Types
Select from the left sidebar in the Designer tab to add any of the following question types. Use the table below as a quick reference:
|
Question type |
Best for |
|
Radio Button (Single Select) |
One answer from a visible list — e.g. "Which department are you in?" |
|
Rating Scale |
Likert-style scoring on a scale. Customise as numbers, stars, or smiley faces. |
|
Checkboxes (Multi-Select) |
Multiple answers from a visible list — e.g. "Which systems do you currently use?" |
|
Dropdown (Single Select) |
Same as Radio Button but displayed as a compact dropdown — useful for long option lists |
|
Multi-Select Dropdown |
Same as Checkboxes but displayed as a compact dropdown |
|
Yes/No |
Simple binary choice for quick confirmation or filtering questions |
|
Ranking |
Respondents drag items into their preferred priority order |
|
Single-Line Input |
Brief free-text — name, phone number, job title |
|
Long Text |
Open-ended paragraph responses — qualitative feedback |
|
Panel |
Container to group related questions; apply one logic rule to the whole group |
|
Text Box |
Display-only text element — not a question. Use for instructions, introductions, or disclaimers. |
|
Requirements Rating |
Stakeholders rate project requirements without needing an Olive login |
|
Vendor Scoring |
Stakeholders score vendors against requirements, tags, or sections |
|
Respondent Details |
Collect name and email so responses are attributed, not anonymous |
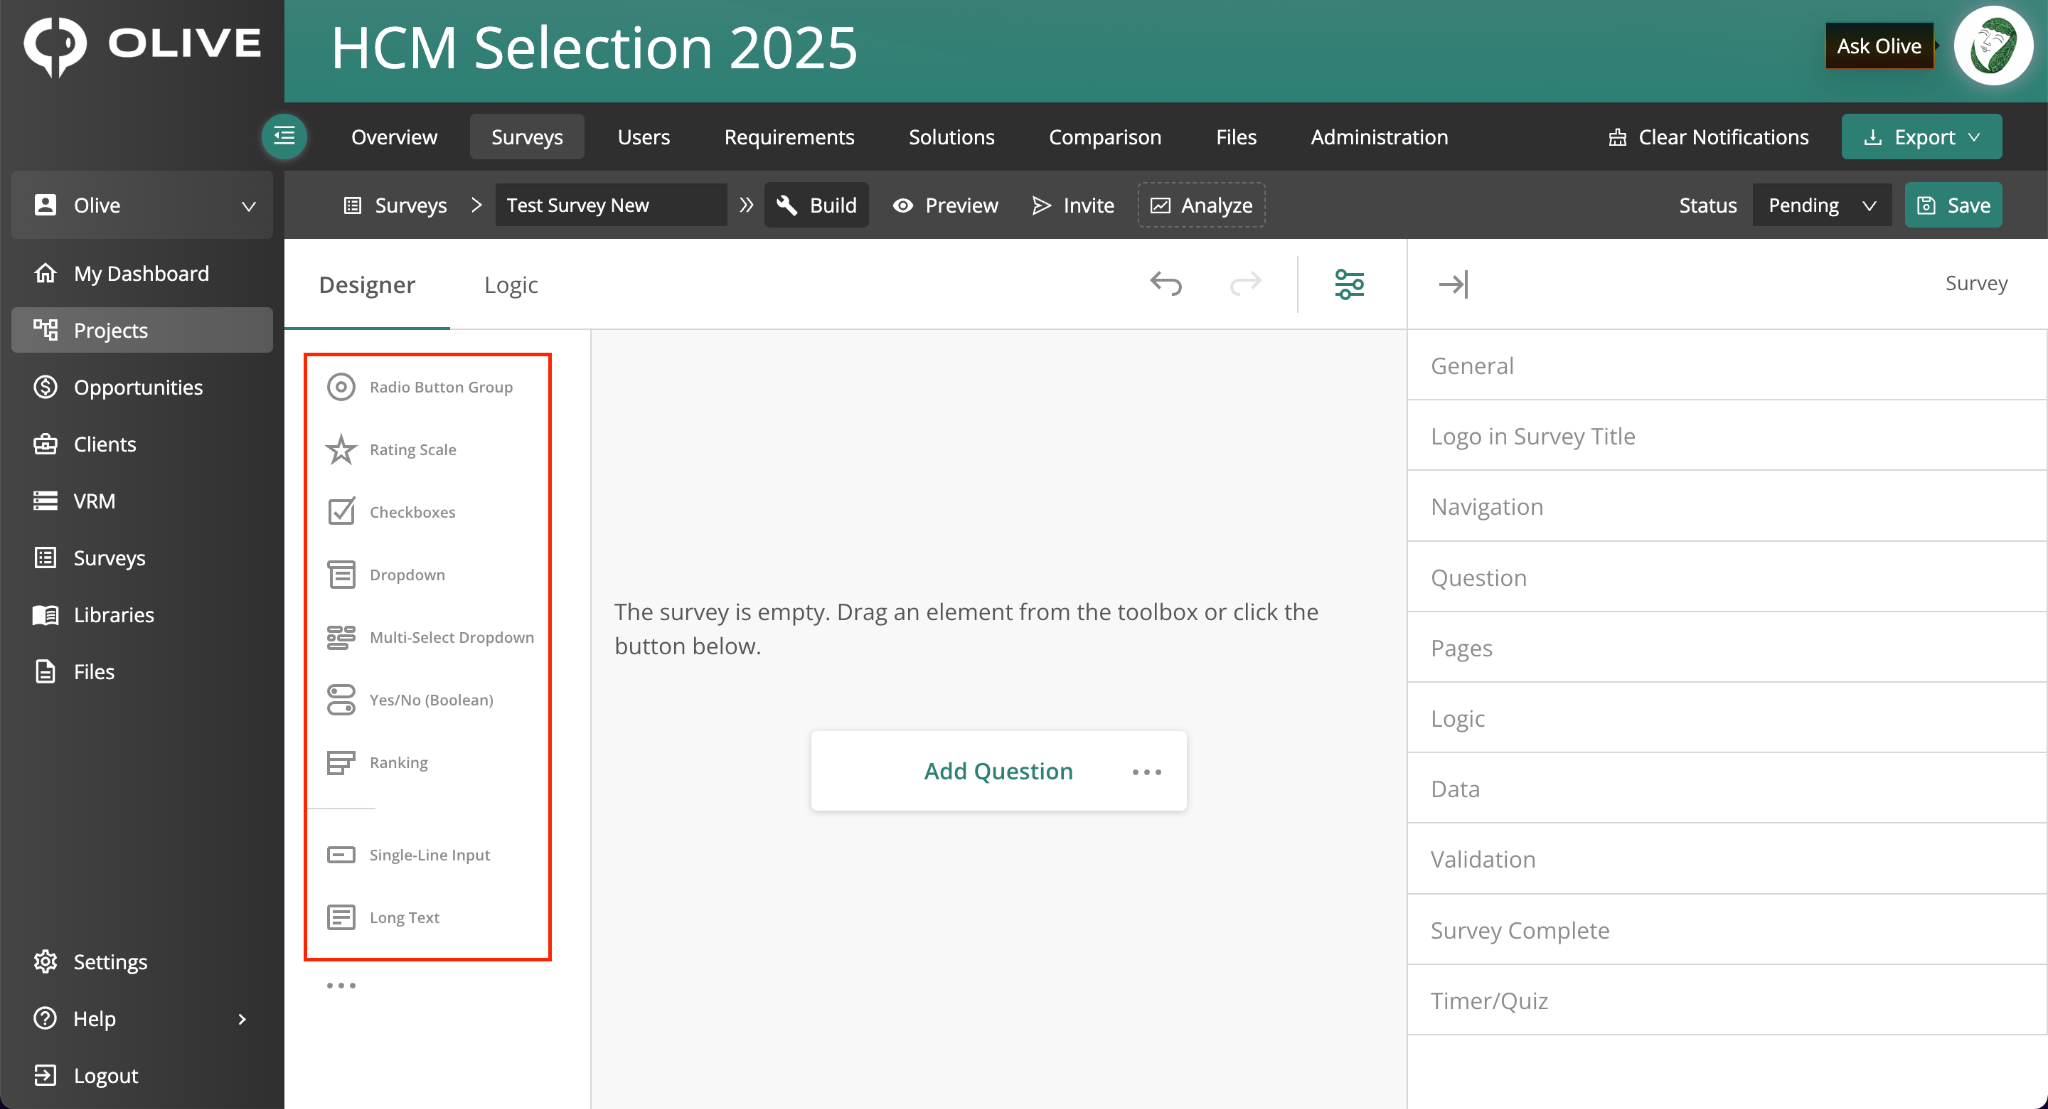
The question types panel in the survey designer, showing available options
|
📌 Note: Panels and Text Boxes are not questions — they are structural and display elements. Panels group questions and support shared logic rules. Text Boxes display information to respondents without collecting a response. |
5.4 Requirements Rating Questions
Requirements Rating Questions are an Olive-exclusive feature that allow stakeholders to rate project requirements directly from a survey — without needing to log into Olive. Ratings automatically populate back into the project.
There are three variants, found in the left sidebar under Requirements Rating:
|
Variant |
How it works / When to use it |
|
Rate Requirements |
Respondents rate each individual requirement. Most granular. Best when you need precise data on specific requirements. Select requirements from the left panel and click the green arrow to include them in the survey. |
|
Rate Tags |
Respondents rate a tag (e.g. Security, Marketing). All requirements under that tag inherit the same score. Good for high-level feedback with large requirement sets. |
|
Rate Sections |
Respondents rate an entire requirement section. Every requirement in the section gets the same score. Fastest completion — best for busy stakeholders. |
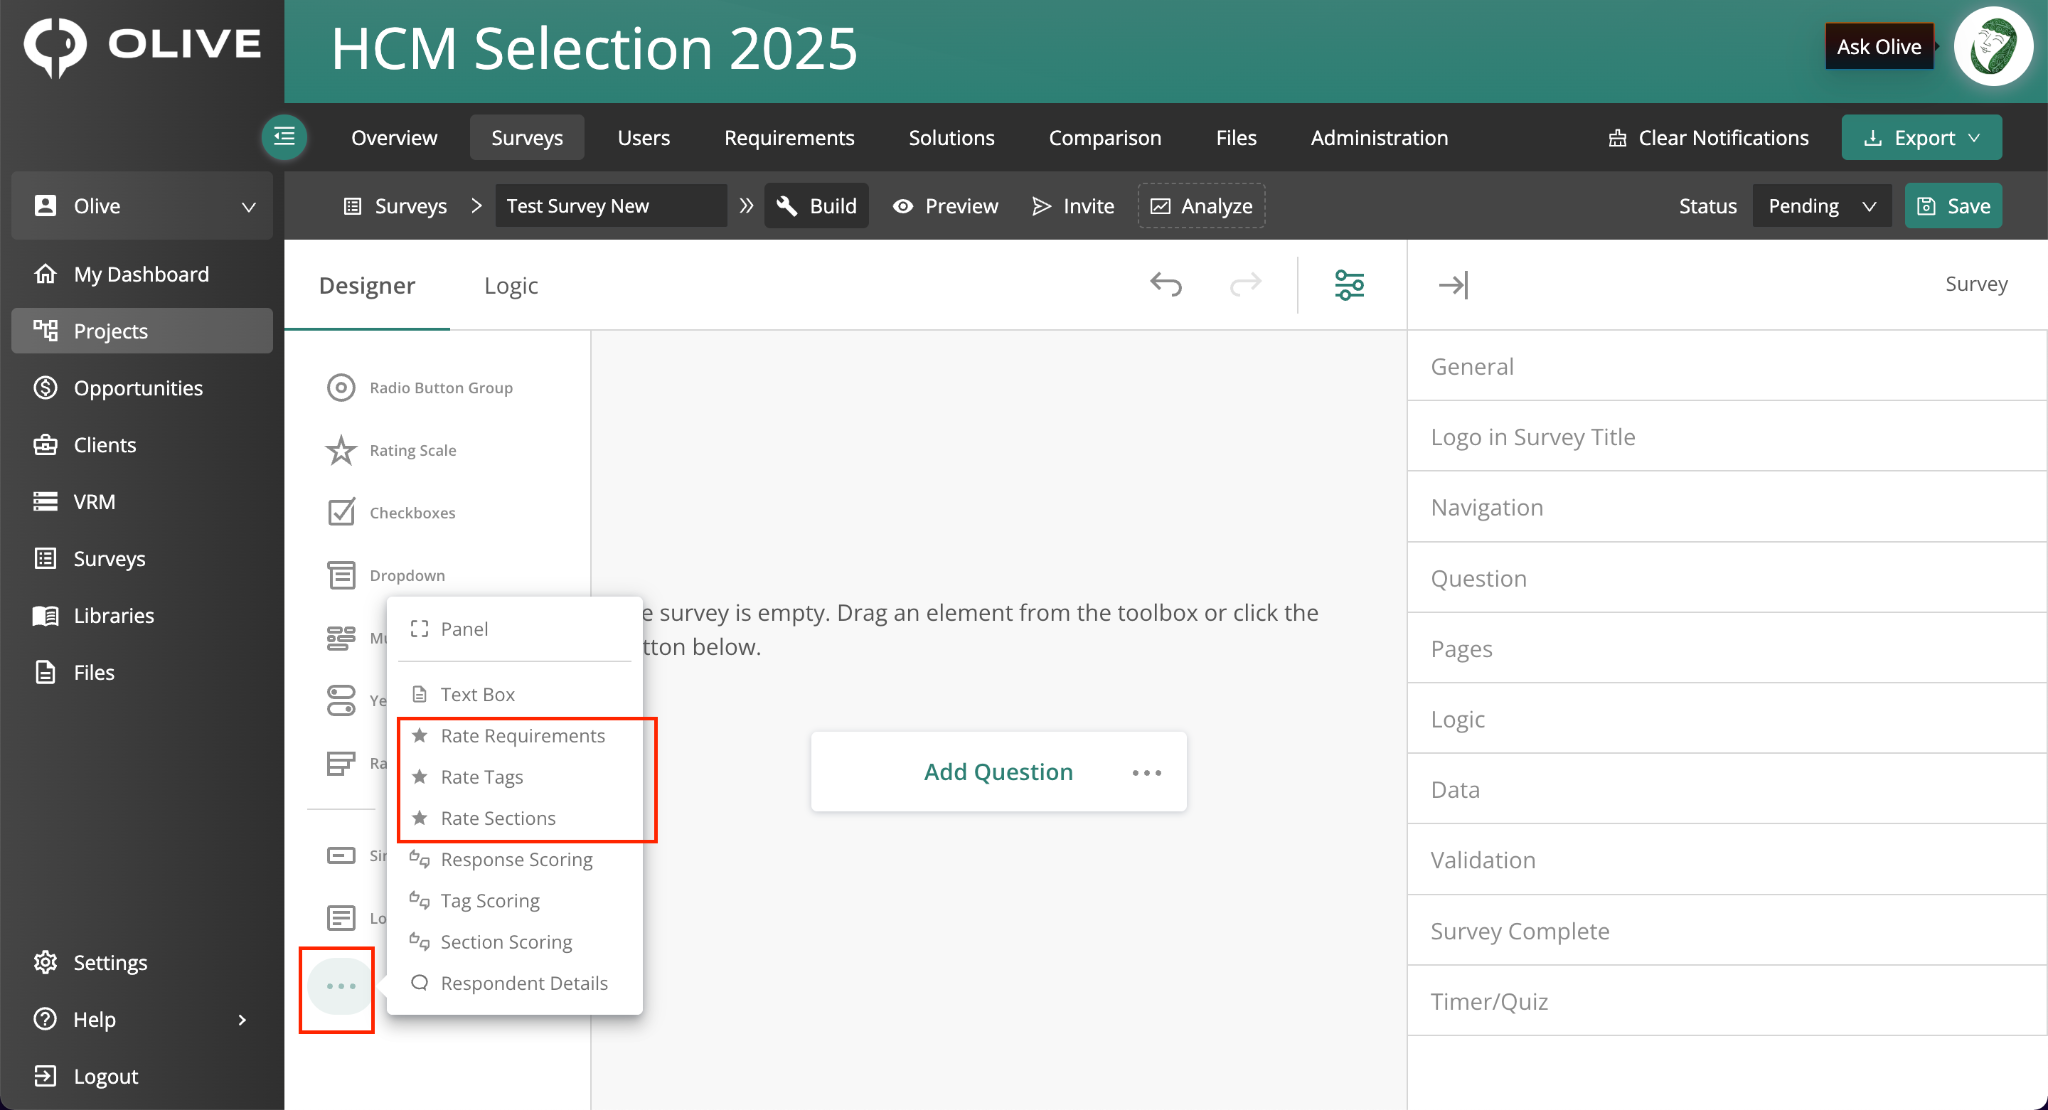
The Requirements Rating question configuration, showing requirement selection
|
💡 Tip: For large requirement sets, Rate Tags or Rate Sections significantly reduce survey length and improve completion rates. |
5.5 Vendor Scoring Questions
Vendor Scoring Questions are used to score vendors during or after product demos. Scores collected through surveys automatically feed into vendor comparison views in the project. Find these in the left sidebar under Vendor Scoring.
|
Variant |
How it works / When to use it |
|
Requirement-Based Vendor Scoring |
Respondents score a specific vendor against individual requirements. Most granular — select the vendor and then the requirements to score against. |
|
Tag-Based Vendor Scoring |
Respondents score the vendor at the tag level. All requirements under that tag receive the same vendor score. |
|
Section-Based Vendor Scoring |
Respondents score the vendor by requirement section (e.g. Payroll, Benefits). Recommended for demo scoring — faster to complete while still feeding structured scores into comparison views. |
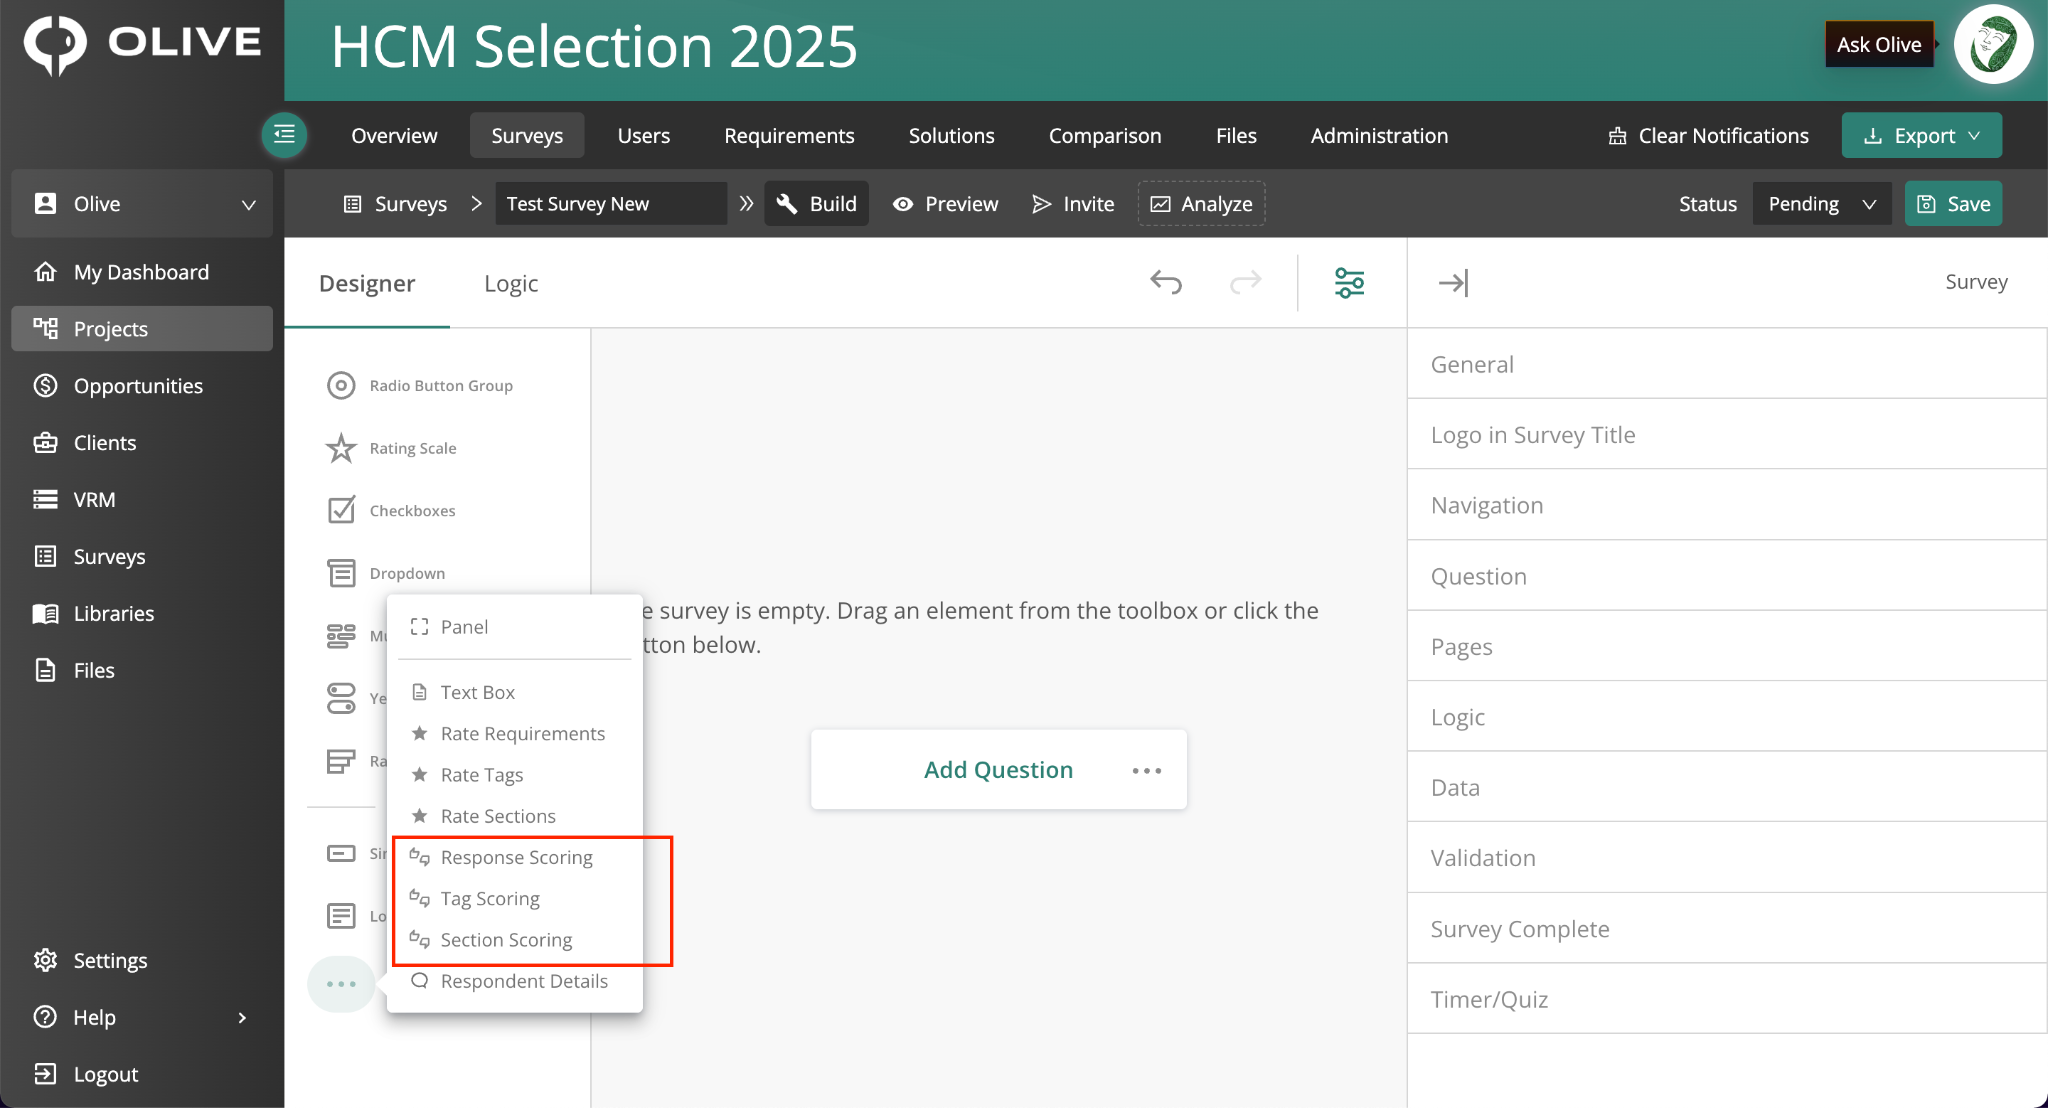
The Vendor Scoring question configuration, showing vendor and section selection
|
💡 Tip: Section-Based Vendor Scoring is the recommended approach for post-demo surveys. It keeps the survey manageable while still feeding structured scores into your comparison views. |
5.6 Respondent Details
Add a Respondent Details question from the sidebar to collect identifying information such as First Name, Last Name, and Email. This is used to track who responded and to link responses to a VRM contact.
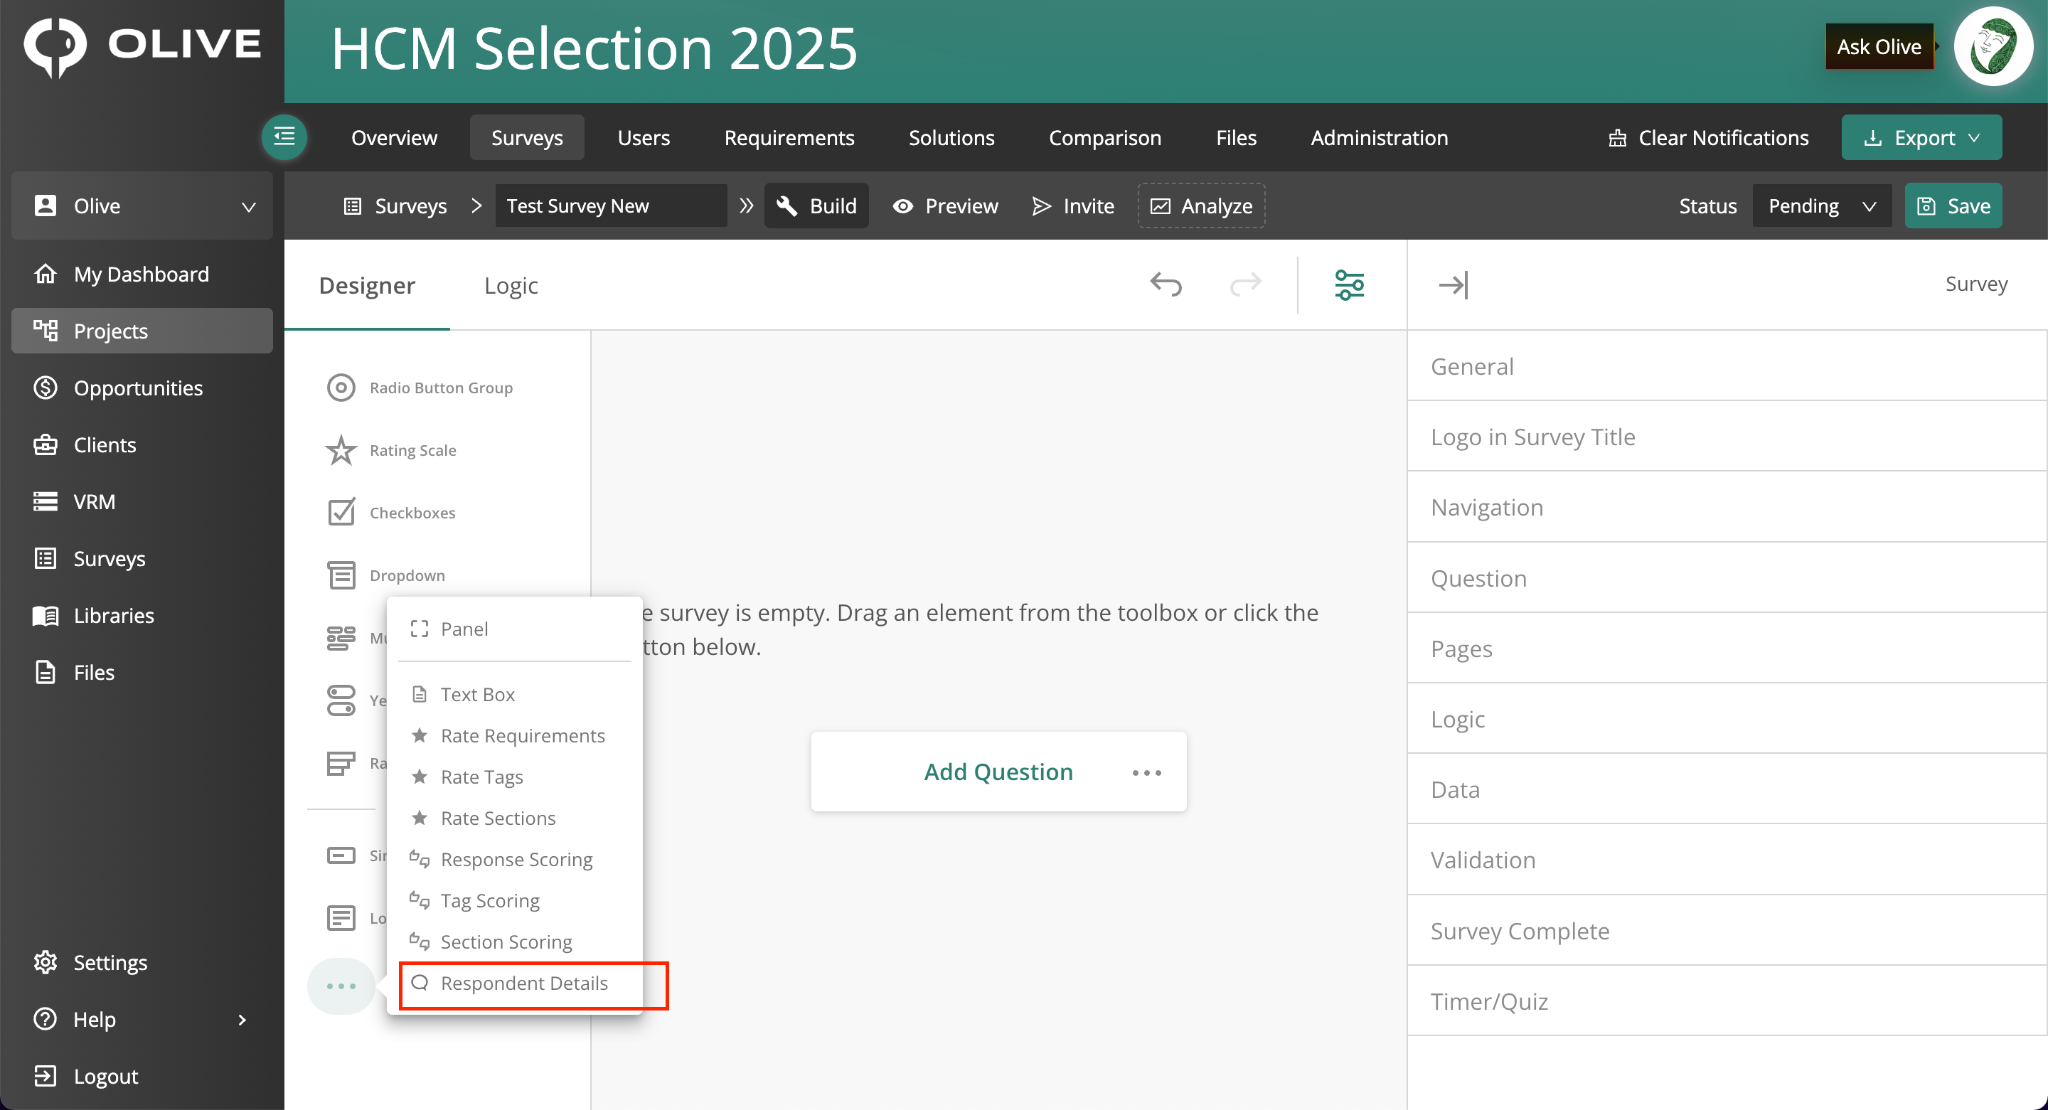
The Respondent Details question, showing the name and email fields
|
📌 Note: If you omit the Respondent Details question, all responses from that survey will be listed as "Anonymous Respondent" in the Analyze tab. |
|
💡 Tip: Place the Respondent Details question at the start of your survey rather than the end. Respondents who drop off mid-survey will still have their identity captured for partial responses. |
6. Question Settings
Click on any question in the Designer tab to open the right-side Question Properties panel. Use this panel to configure individual question behaviour:
|
Setting |
What it does |
|
Visible / Hidden |
Toggle whether the question appears to respondents by default |
|
Read-Only |
Display the question for information purposes without allowing input |
|
Required |
Force respondents to answer before they can proceed |
|
Add Comment Box |
Append an open text field beneath the question for optional comments |
|
Logic |
Set display conditions directly on the question without switching to the Logic tab |
|
Layout Options |
Adjust how the question renders on screen |
Click anywhere outside a question to deselect it — the right panel will switch to Survey-Level settings (see Section 7).
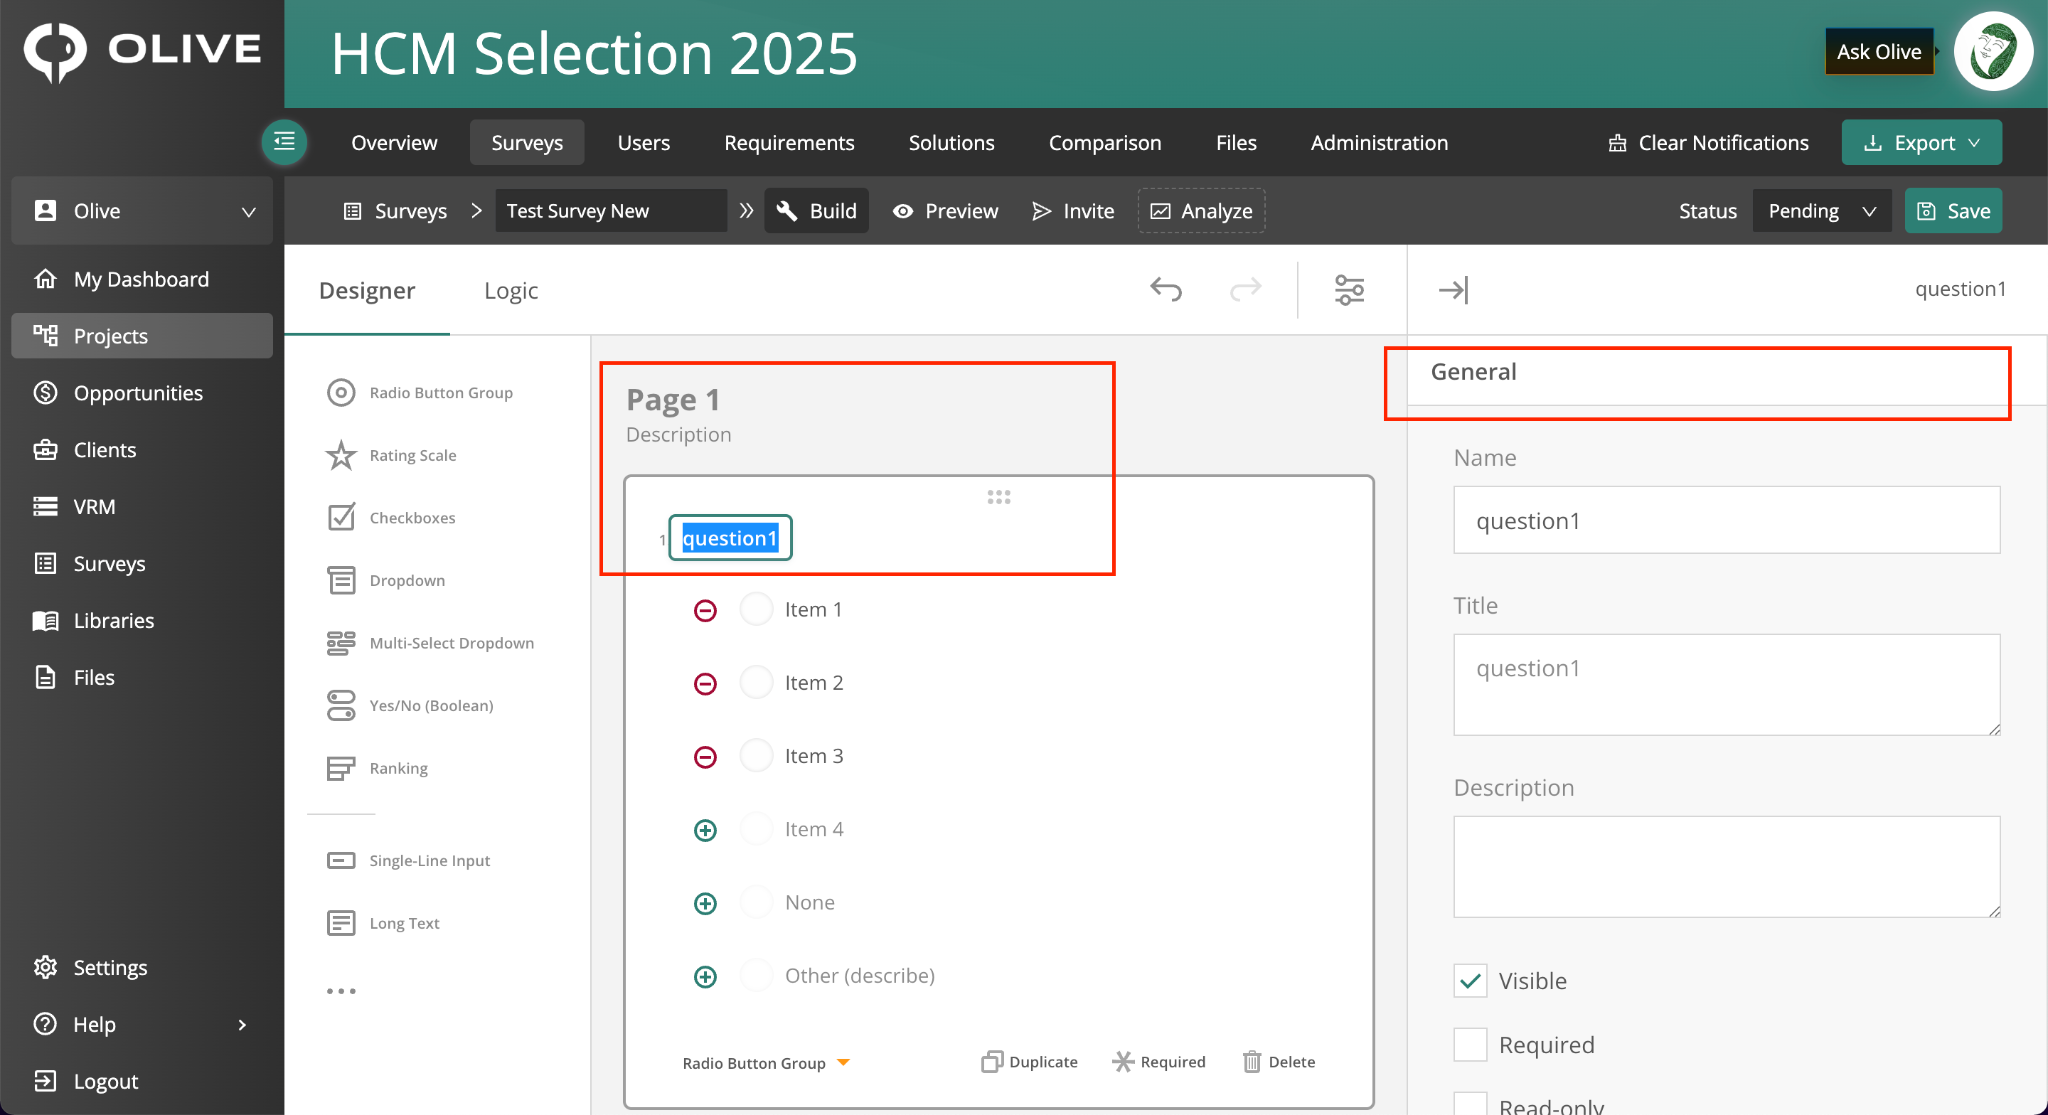
The Question Properties panel, showing per-question configuration options
7. Survey-Level Configuration
Click anywhere outside a question in the Designer tab to open the Survey-Level settings panel on the right. These controls apply globally to the entire survey:
|
Setting |
What it controls |
|
Read-only mode |
Makes the entire survey view-only |
|
Full width / standard width |
Controls the survey canvas layout |
|
Survey logo and logo size |
Add your brand logo to the survey |
|
Navigation button placement |
Position of Back/Next buttons — top, bottom, or both |
|
Page structure |
Single page or paged (multi-page) layout |
|
Progress bar visibility |
Show or hide the progress indicator |
|
Question numbering and page titles |
Display format for question numbers |
|
Completion message |
Customise the final screen, or redirect respondents to a URL after submission |
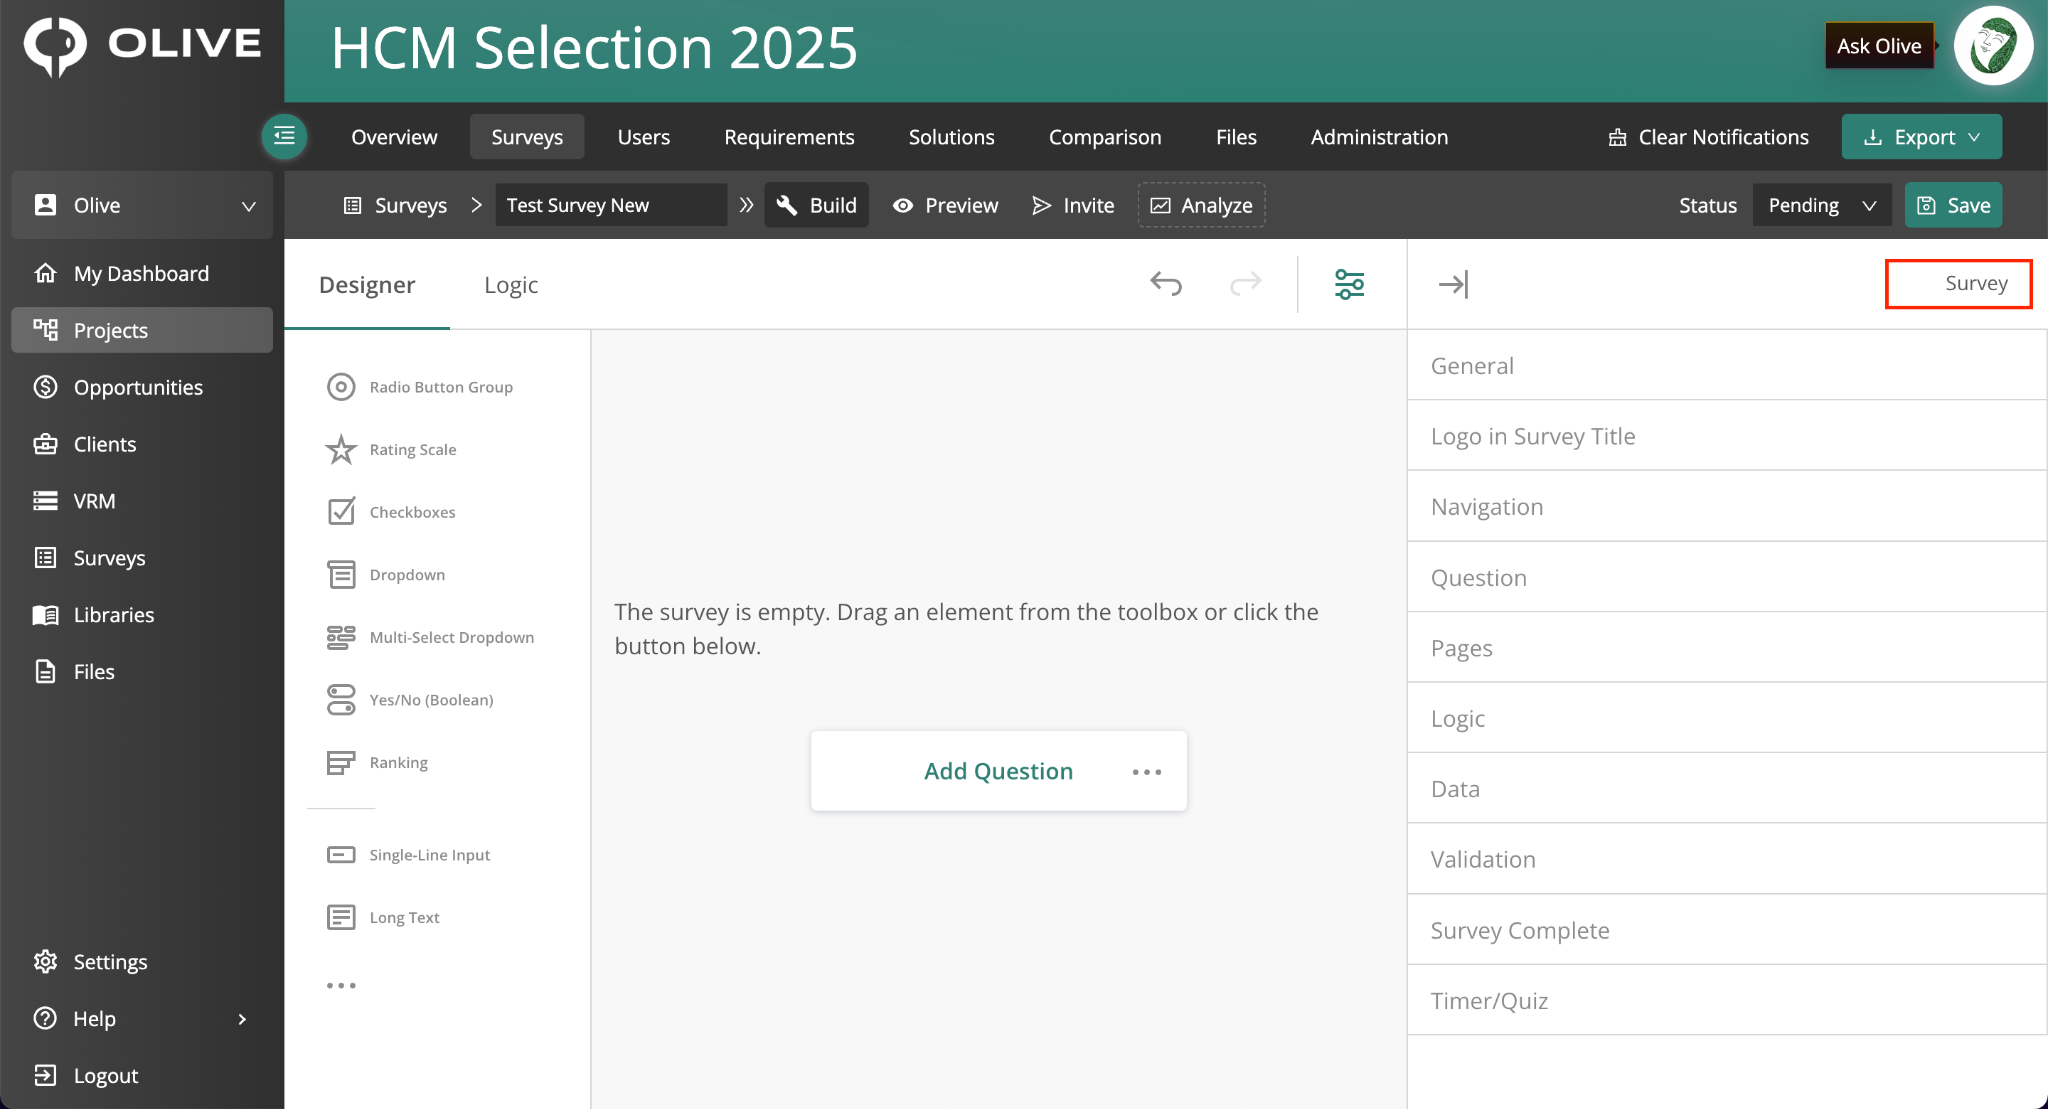
The Survey-Level Configuration panel, showing global survey settings
|
💡 Tip: Set a custom completion message or URL redirect to give respondents a branded or contextually relevant end experience. |
8. Previewing Surveys
Click Preview at the top of the survey designer to view the survey exactly as a respondent will see it. All logic, navigation, and page structure will behave identically to the live survey — making this an essential step before sending invitations.
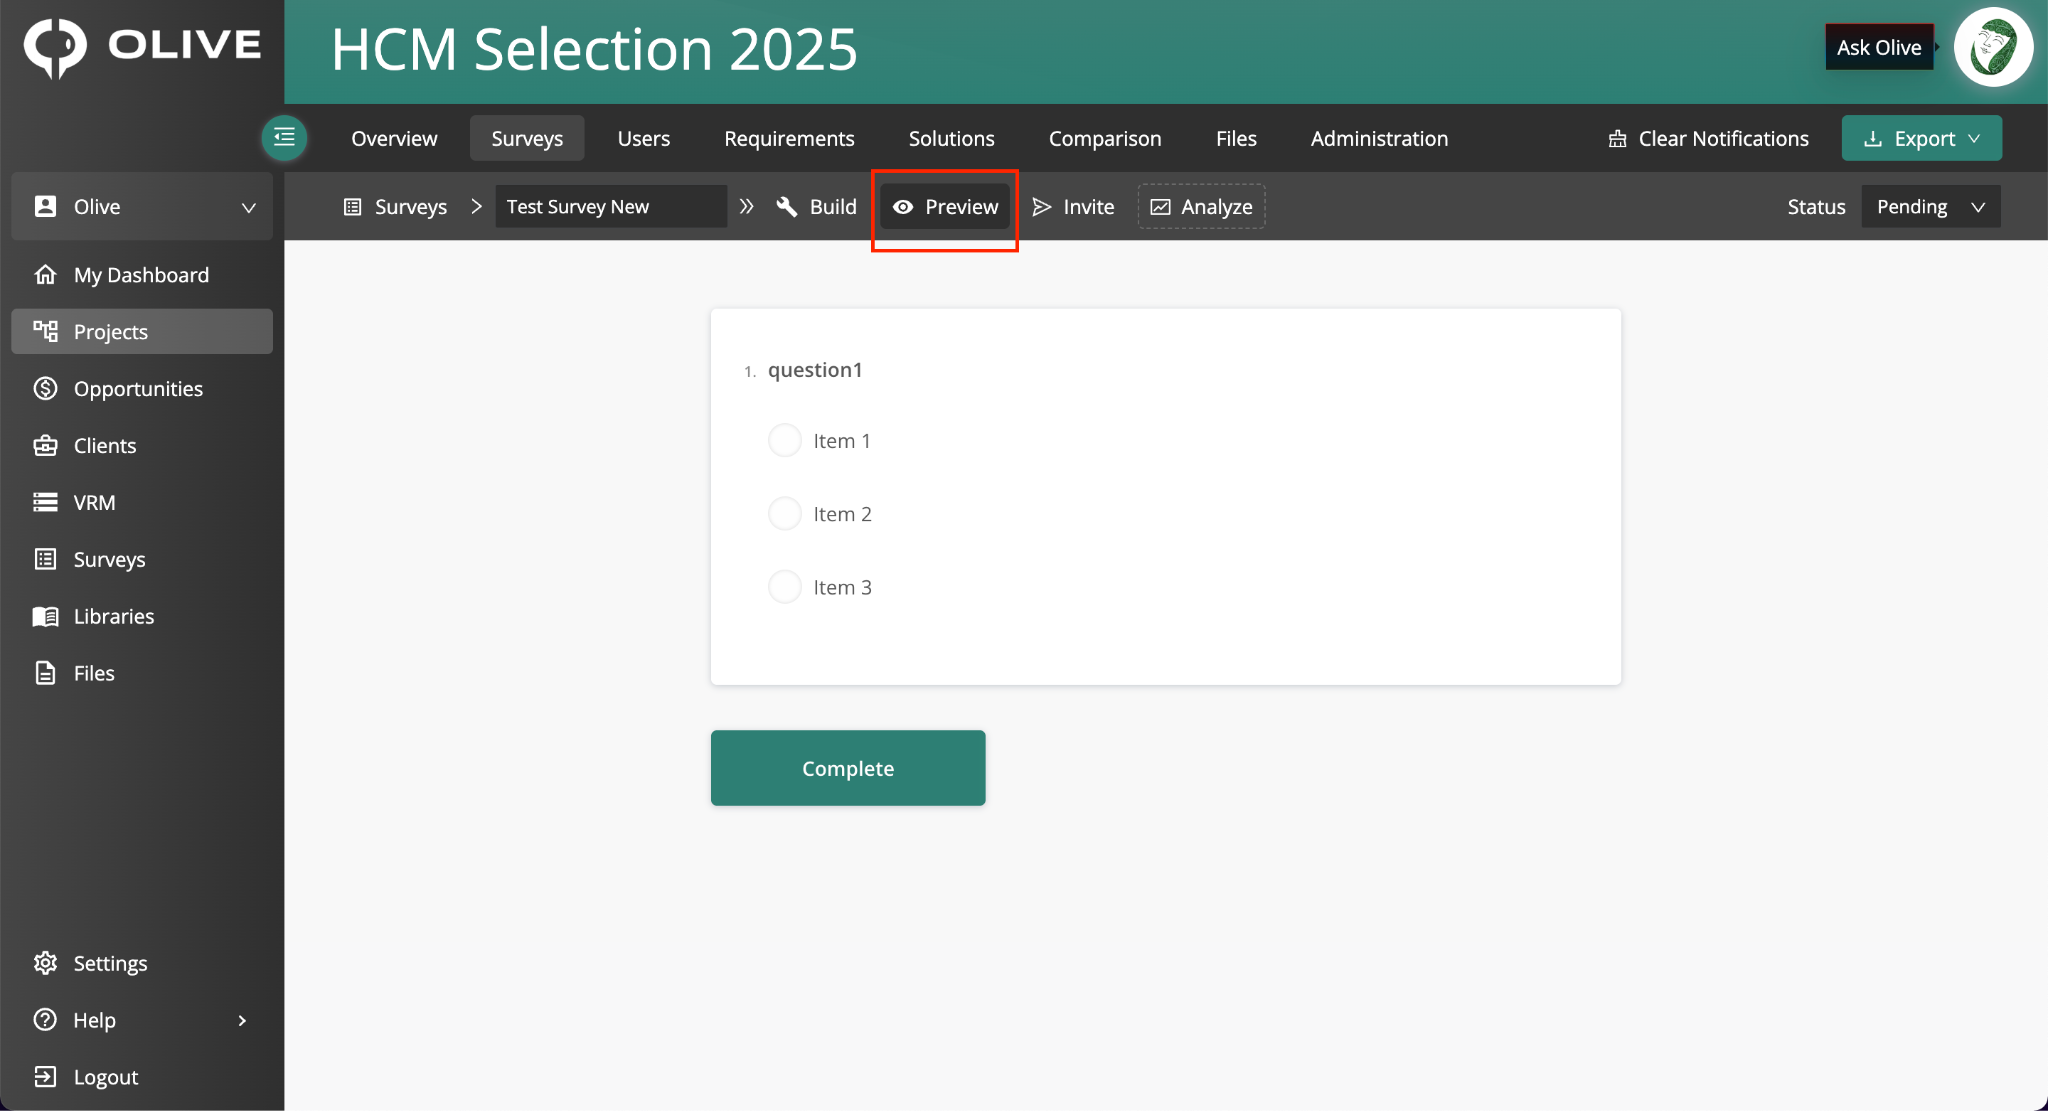
The survey in Preview Mode, showing the respondent-facing experience
|
💡 Tip: Always preview your survey before sending invitations. Pay particular attention to logic rules — they can be easy to misconfigure and Preview Mode is the safest way to test them. |
9. Inviting Respondents
Click Invite at the top of the survey to open the respondent management panel. From here you can add respondents, manage their status, and send invitation emails.
9.1 Adding Respondents
Add respondents to your survey using one of two methods:
- Search for existing VRM contacts by name or email address
- Enter email addresses manually for people not in your VRM
Added respondents are placed in a staging area before any invitation is sent.
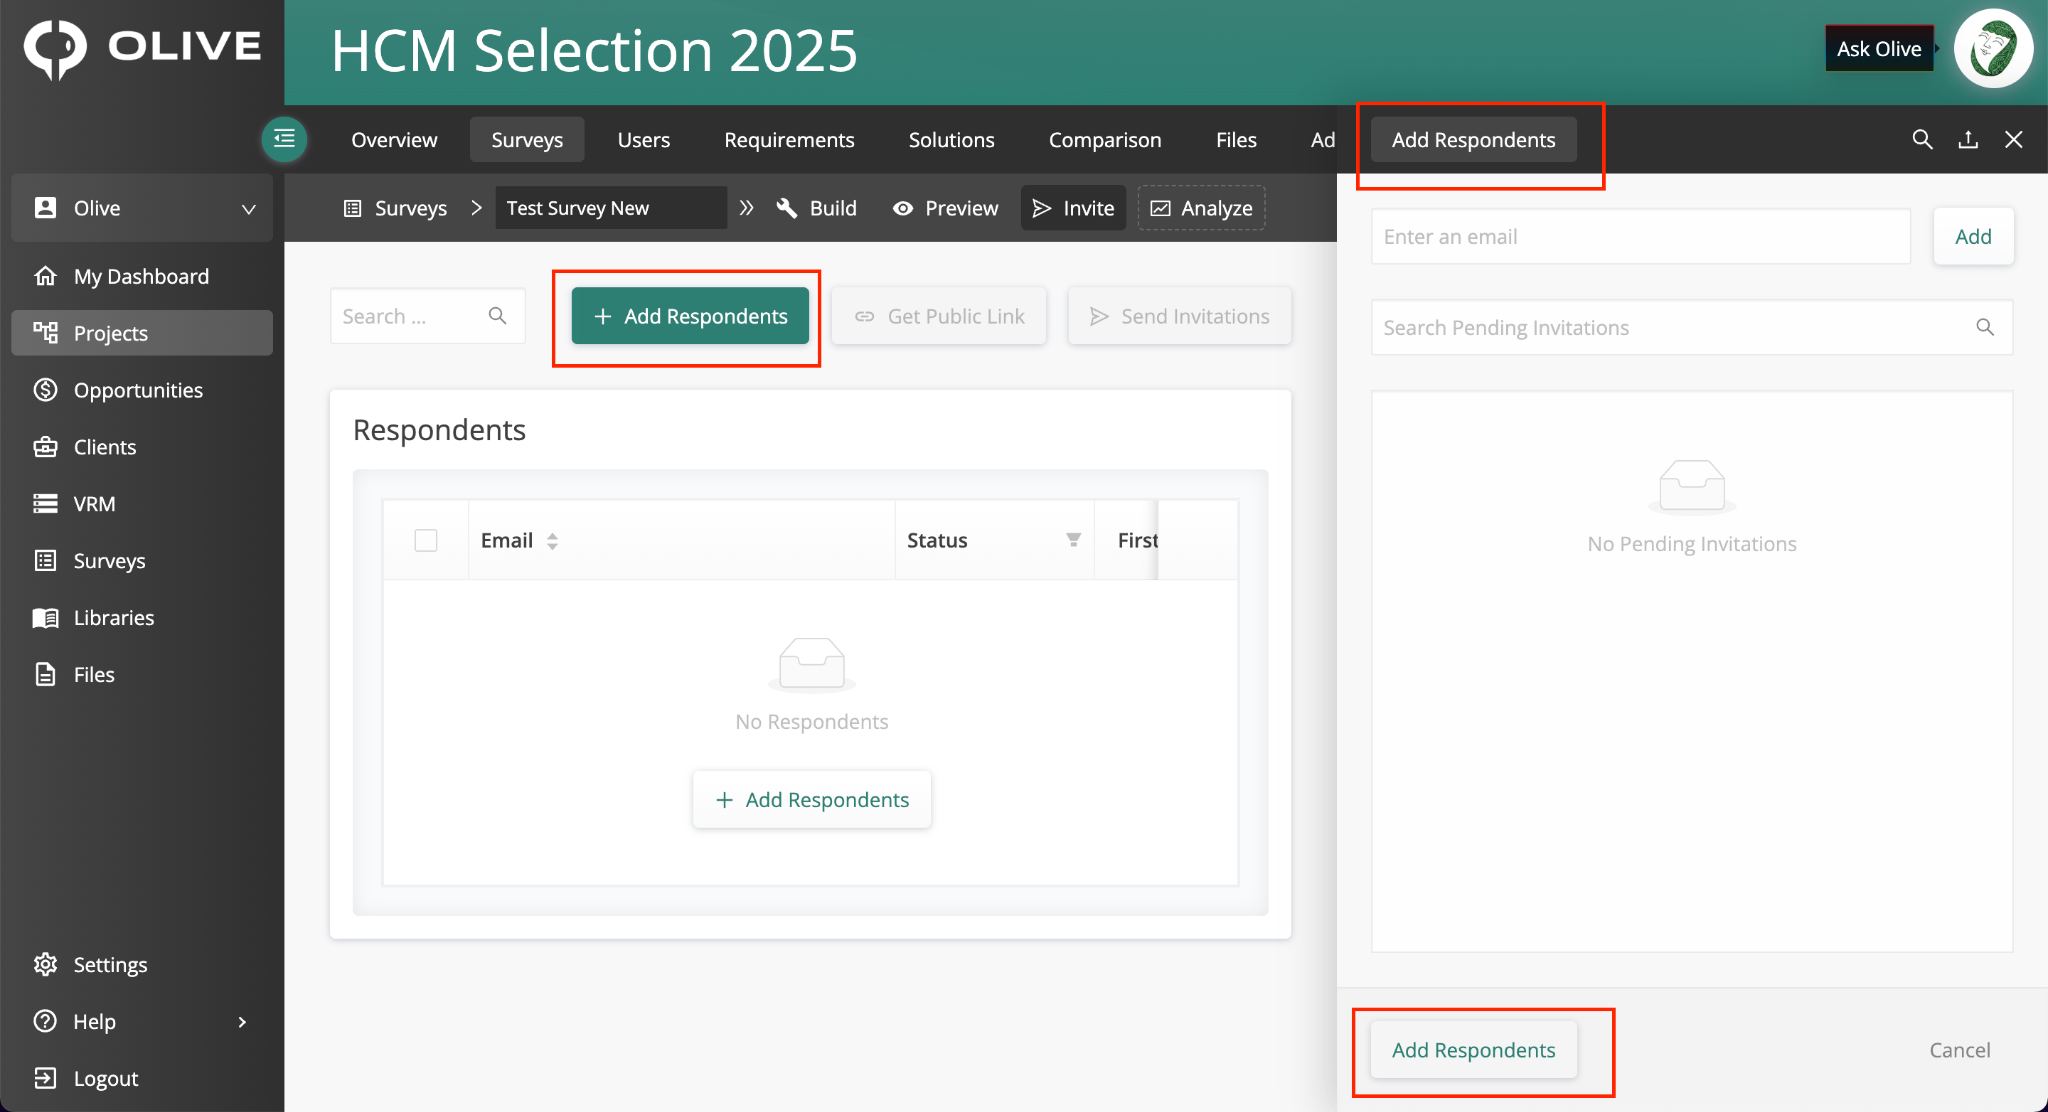
The Add Respondents panel, showing VRM search and manual email entry
9.2 Respondent Staging Area
The Respondent Staging Area displays everyone who has been added to the survey. For each respondent you can see:
- Email, First Name, Last Name
- Status — tracks progress from Pending → Invited → Responding → Completed
- Associated Solution (optional — used only for vendor scoring surveys)
- Progress, invitation date, and completion date
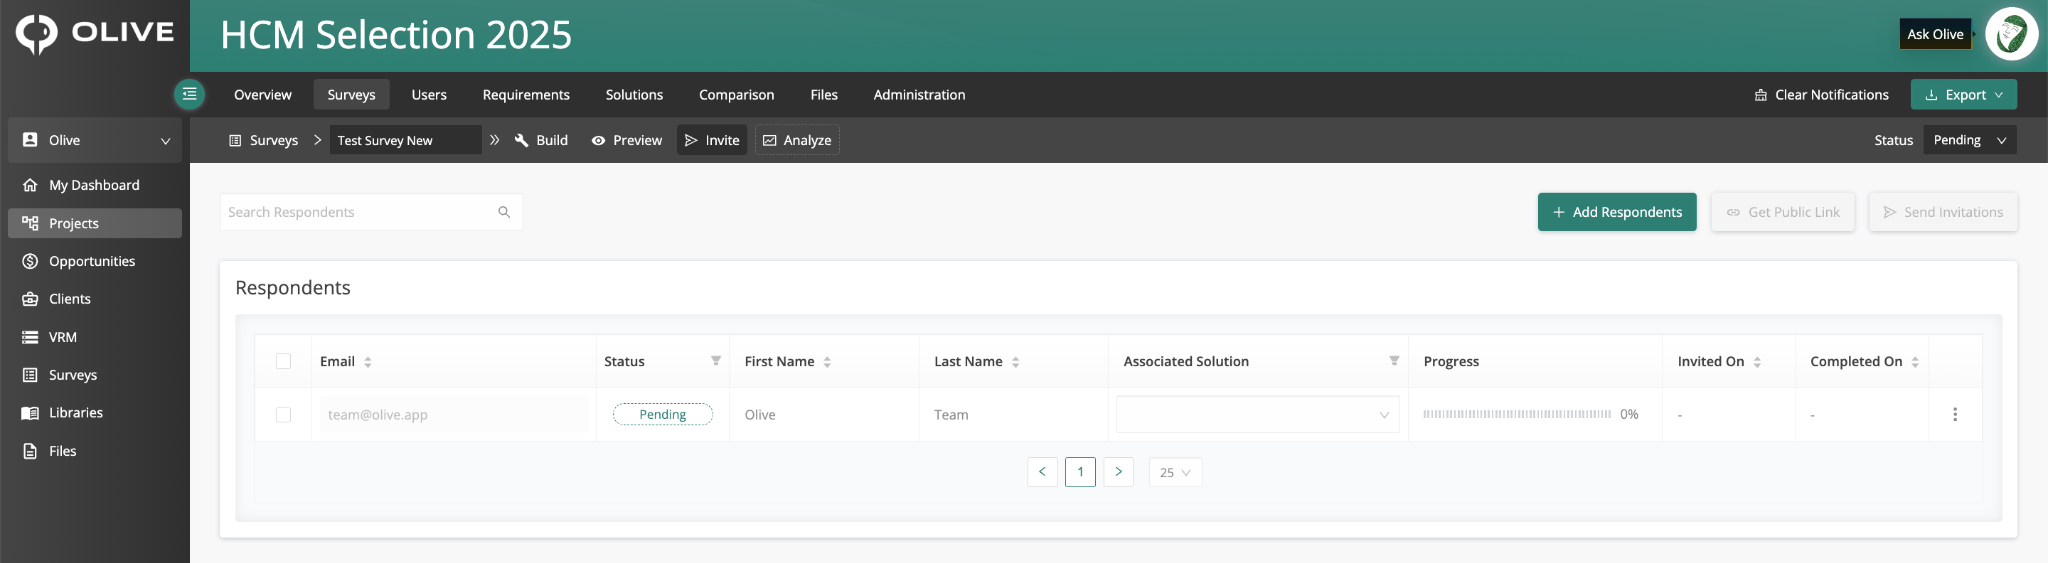
The Respondent Staging Area, showing respondent status and progress tracking
|
Status |
What it means |
|
Pending |
Added but not yet invited |
|
Invited |
Invitation sent — waiting for them to open the survey |
|
Responding |
Has opened the survey and started answering |
|
Completed |
Has submitted all answers |
9.3 Sending Invitations
From the staging area, select the respondents you want to invite, then click Invite. Olive sends each respondent a unique link — no account required to complete the survey.
Additional actions available for selected respondents:
- Associate with a solution — for vendor scoring surveys
- Remove from the survey
- Disable access
Respondent status updates automatically as they progress through the survey.
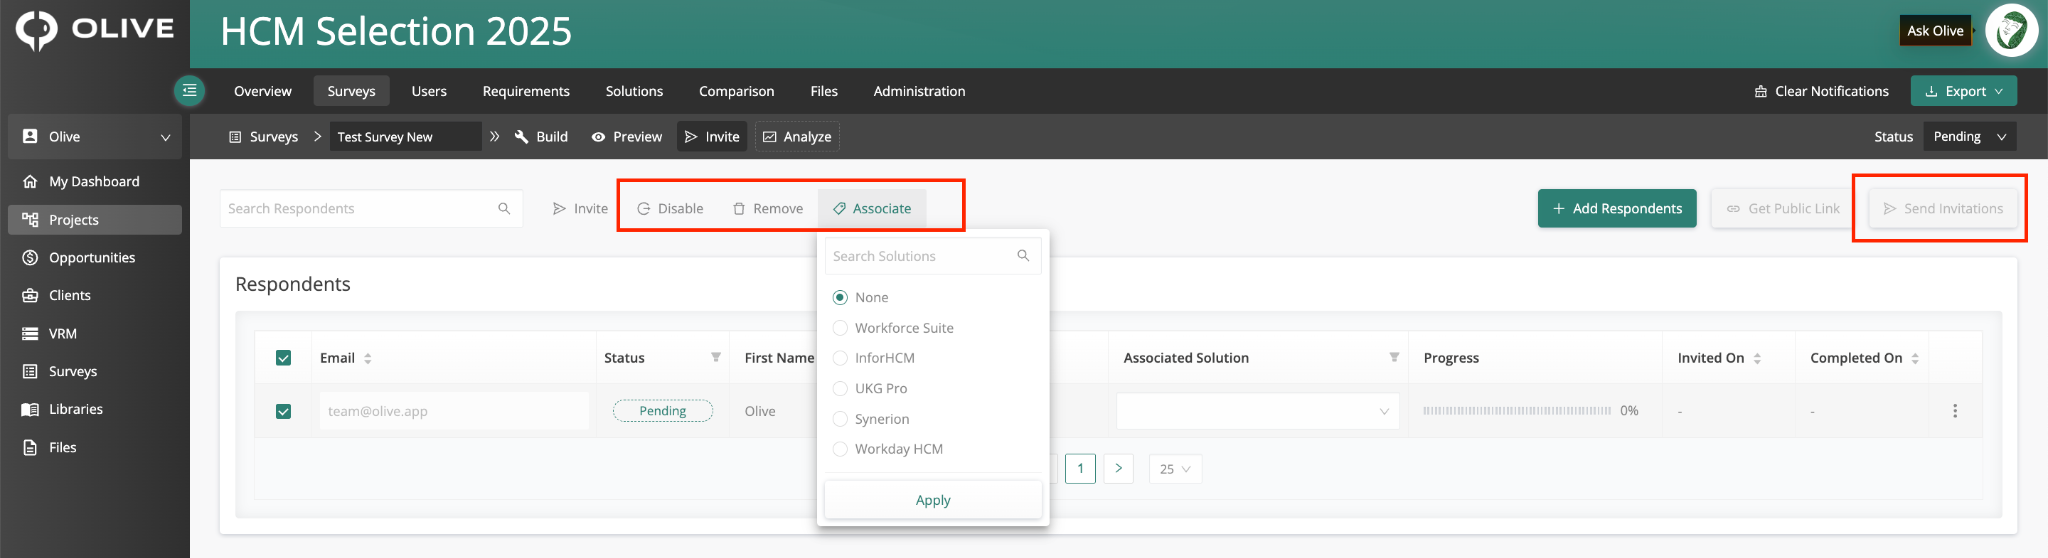
The sending invitations panel, showing the Invite button and respondent actions
9.4 Public (Anonymous) Survey Links
Use a public link when you want to share a survey broadly without tracking individual respondents — such as embedding it on a website or distributing it via email blast.
- Change the survey status from Pending to Open
- Click 'Get Public Link', then generate and copy the URL
- Share the URL anywhere — no login required
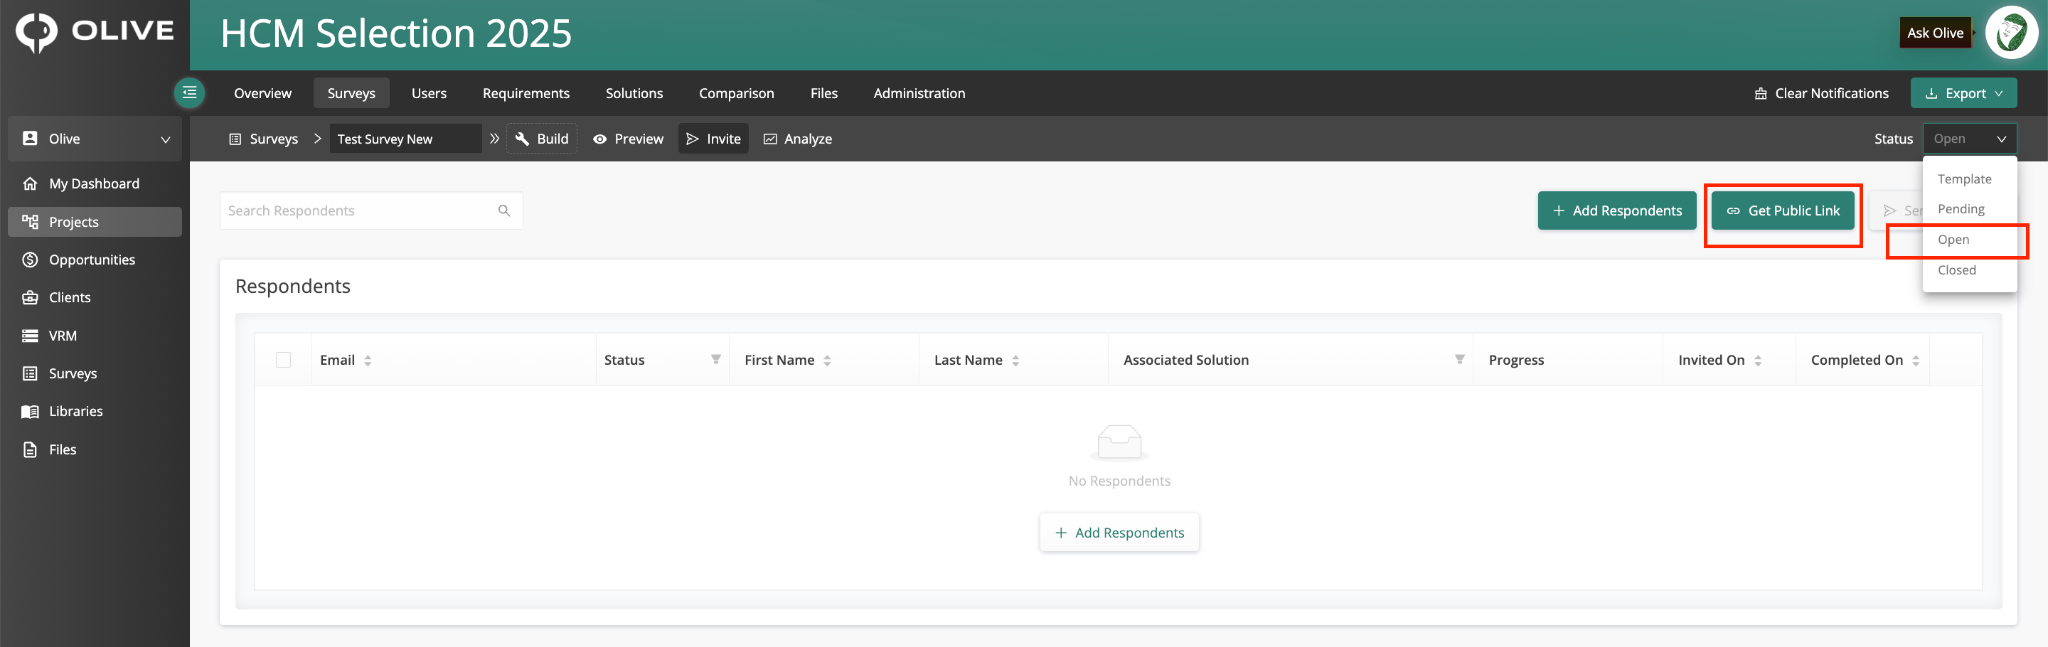
The Public Link panel, showing the Get Public Link option and generated URL
|
📌 Note: Anonymous responses collected via a public link do not update requirement ratings or vendor scores in the project. Use named respondents (invited individually) if you need scores to feed into project data. |
10. Analyzing Survey Responses
Once responses begin arriving, click the Analyze tab within the survey to review results. From the Analyze tab you can:
- View responses by respondent — see all answers from one person
- View responses by question — see all responses to a specific question across all respondents
- Filter to a specific respondent
- Examine requirement ratings and vendor scores
- View all client responses across the project in one place
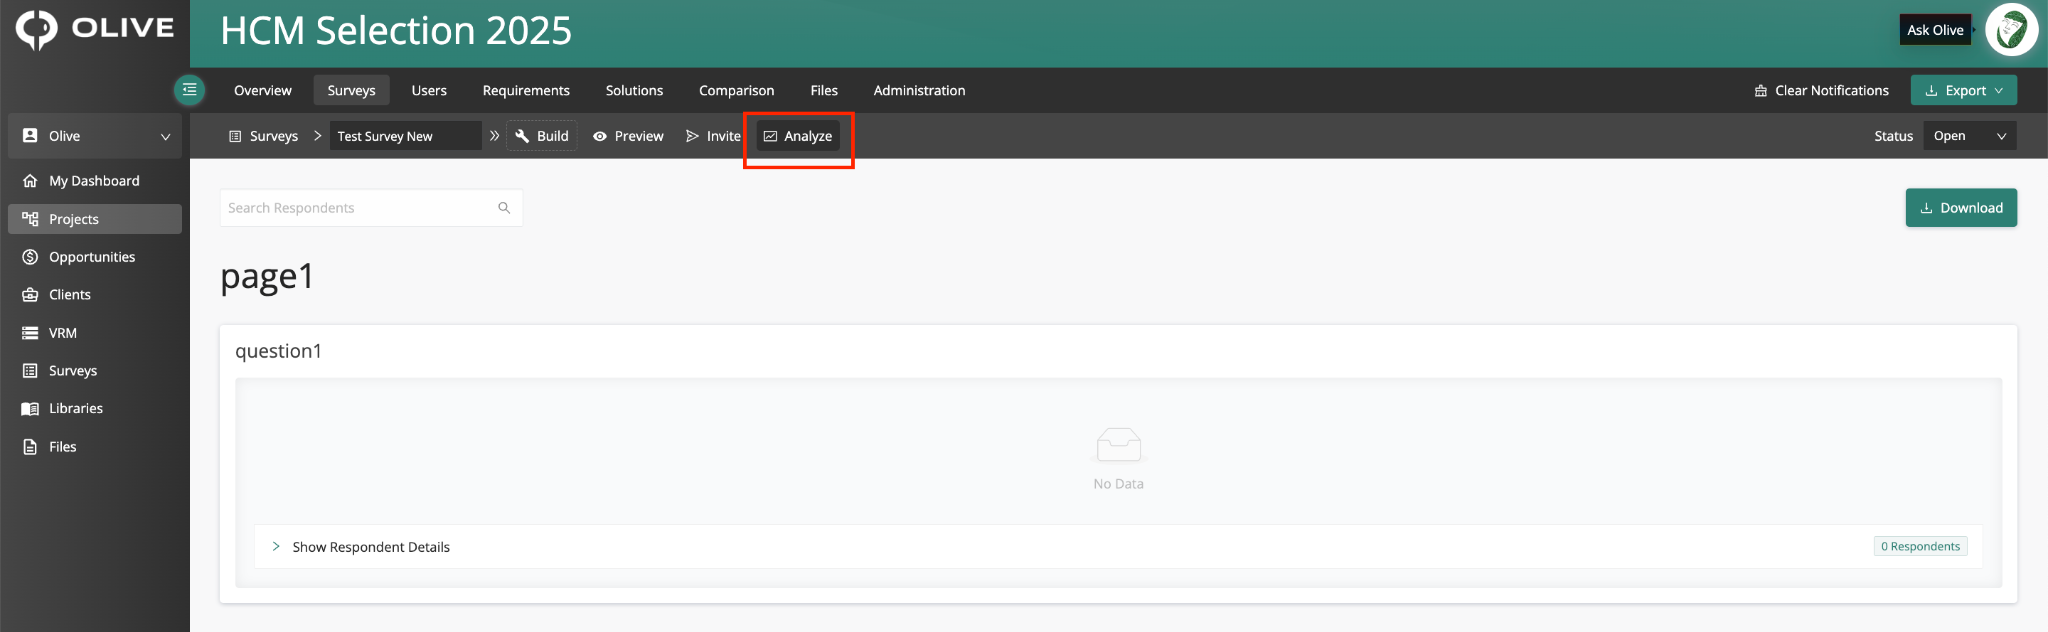
The Analyze tab, showing responses broken down by respondent and question
|
💡 Tip: Use the "by question" view to quickly identify where there is strong consensus or divergence across your respondents — particularly useful for requirement ratings. |
11. Downloading Survey Data
Click Download within the survey to export the full dataset. You can download:
- Raw response data
- Requirement ratings
- Vendor scoring data
Downloaded files are compatible with BI tools, Excel, and external reporting dashboards.
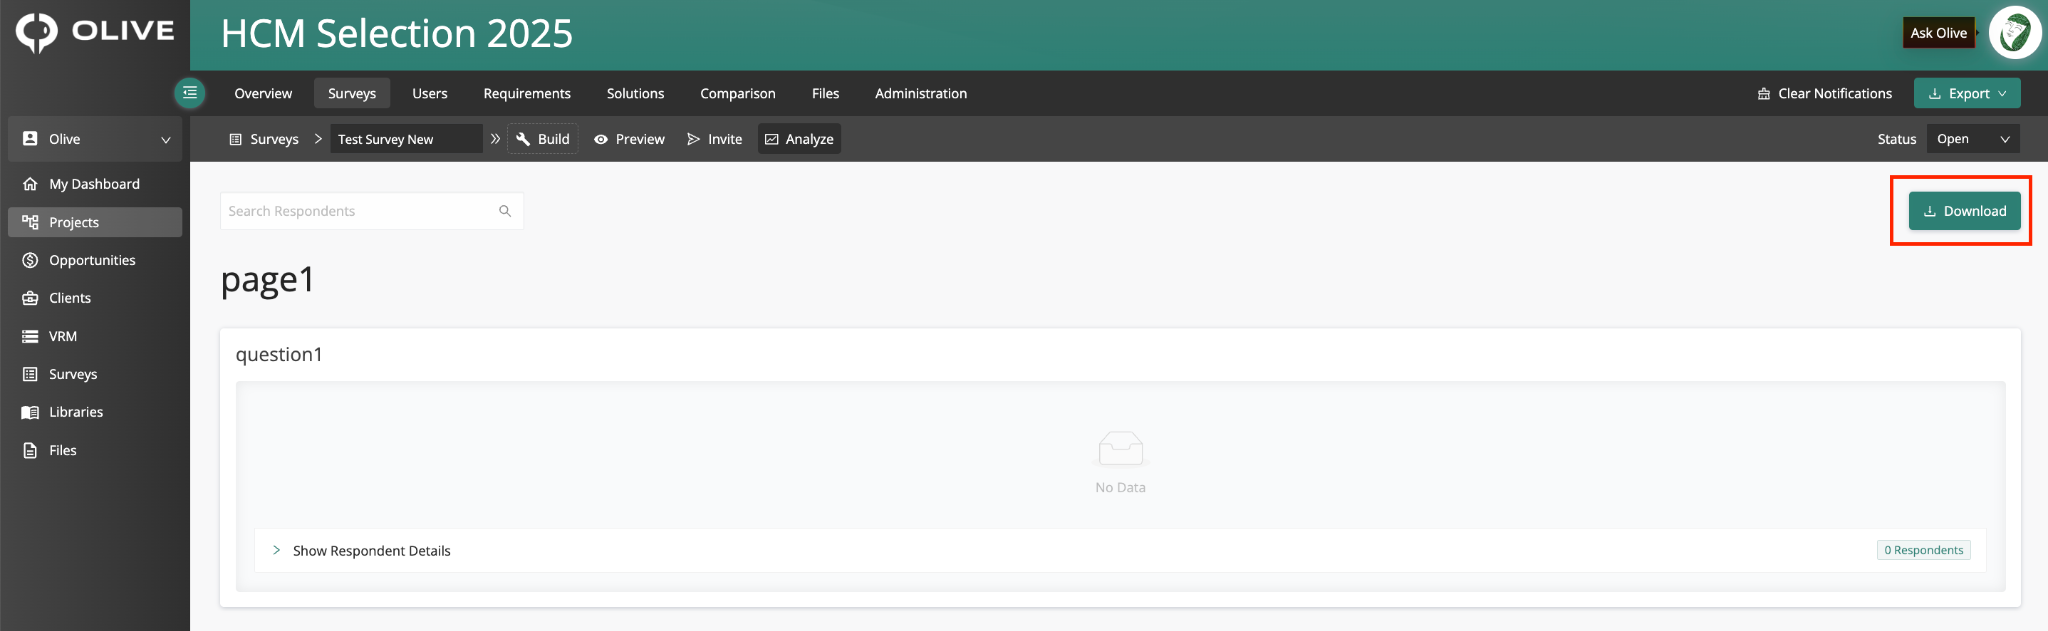
The Download option, showing available export types for survey data
|
📌 Note: Export vendor scoring data before finalising your evaluation. Having scores in a spreadsheet allows you to perform additional analysis outside of Olive if needed. |
What's Next?
Once your survey is built and responses are coming in, here's the recommended order for next steps:
- Preview the survey before sending any invitations — especially if you've added logic rules
- Add Respondent Details if you want named attribution rather than anonymous responses
- Send invitations or publish a public link depending on your audience
- Monitor completion in the Respondent Staging Area and follow up with non-responders
- Review results in the Analyze tab — use "by question" view to identify consensus and divergence
- Export data for any additional analysis in external tools
- Check your project requirements — stakeholder ratings will have automatically updated in the Requirements tab
Need help? Contact your Olive project administrator or reach out to Olive support.