Overview
The Overview tab is the first place you build out your project in Olive. It's where you write your RFP's project description, set up the project timeline, and manage the public discussion with vendors. Think of it as the front page of your RFP — vendors read it to understand your organisation, your needs, and the process they'll be participating in.
The Overview tab has three sub-tabs:
|
Sub-tab |
What you'll find there |
|
Description |
Project write-up, budget fields, live vendor dashboards, and must-have requirements list |
|
Timeline |
Key milestones and dates — automatically visible to all invited vendors |
|
Project Discussion |
Shared Q&A forum where vendors post questions and your team replies publicly to all |
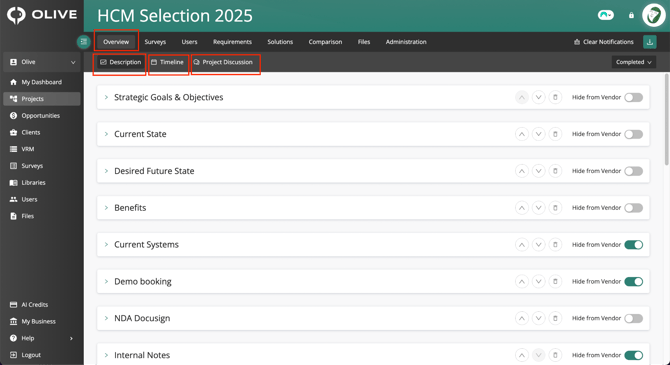
The Overview tab — showing the three sub-tabs: Description, Timeline, and Project Discussion
Description Sub-tab
Click the Description sub-tab to build the written content of your project overview. You can create multiple sections — for example: Strategic Goals & Objectives, Current State, Desired Future State, Benefits, and more. Each section can contain formatted text and images.
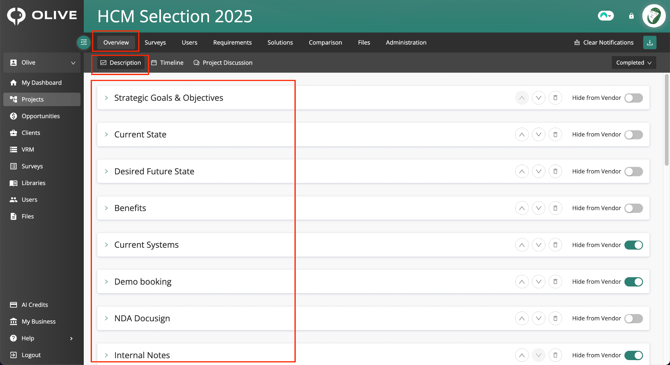
The Description sub-tab — showing custom sections with section controls and Hide from Vendor toggles
Adding a New Section
- Click the 'Add New Section' button at the bottom of the existing sections
- A new blank section appears — double-click the heading field and type the section name
- Click the drop arrow (chevron) on the left to expand the section and reveal the description text area
- Type your content in the text area — you can also insert images inline
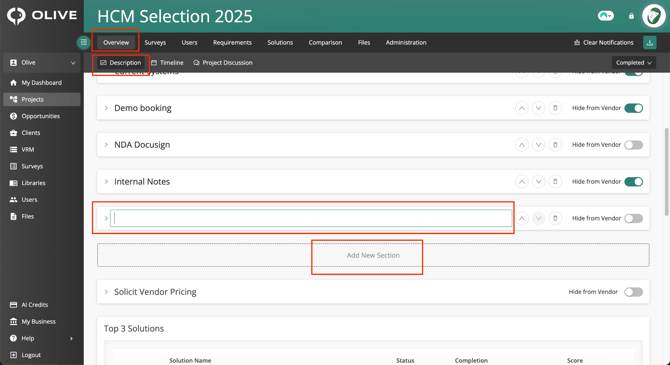
'Add New Section' button at the bottom of the page — a new blank section appears above it with a heading field
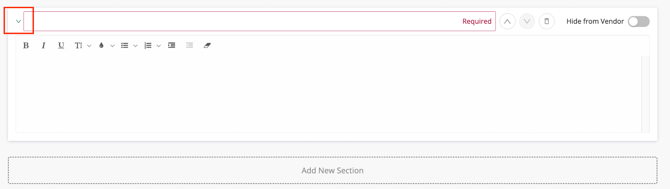
Expanded section — the description text area appears with a full formatting toolbar
|
💡 Tip: Use sections to share everything vendors need to understand your project — company background, strategic goals, current systems, desired outcomes, and any process instructions. |
Section Controls
Each section has a set of controls on the right side of its heading bar. Use the table below as a quick reference:
|
Control |
What it does |
|
↑ Up arrow |
Moves the section up the page |
|
↓ Down arrow |
Moves the section down the page |
|
Delete icon |
Permanently deletes the section and all its content |
|
Hide from Vendor toggle |
Hides the section from all invited vendors when turned on. Use for internal-only content or to reveal sections progressively as you shortlist. |
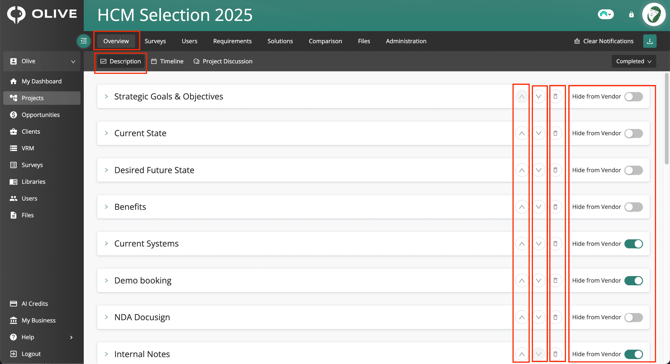
Section heading bar — showing the Up/Down arrows, Delete icon, and Hide from Vendor toggle for each section
|
📌 Note: The 'Hide from Vendor' toggle hides the section from all vendors simultaneously — it cannot be applied to individual vendors. Use the Permissions sub-tab in the Solutions tab for per-vendor section visibility. |
Solicit Vendor Pricing
The Solicit Vendor Pricing section is always present at the bottom of the Description sub-tab. Use it to share budget expectations with vendors. Fill in the following fields:
- First Year Budget — your expected budget for the first year
- Total Cost of Ownership Budget — your expected total budget over the project period
- Over (Years) — the number of years the TCO budget covers
You can also add a description in the text area below the budget fields to provide additional context to vendors about your pricing expectations.
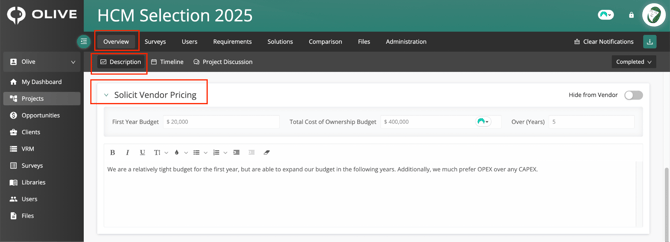
The Solicit Vendor Pricing section — with fields for First Year Budget, Total Cost of Ownership Budget, and Over Years
|
💡 Tip: Sharing a budget range helps vendors tailor their pricing proposals to your expectations — reducing back-and-forth in the evaluation process. |
Live Project Dashboards
Scrolling down the Description sub-tab reveals four live dashboard elements that update automatically as your evaluation progresses. Use these to monitor the health of your evaluation at a glance without leaving the Overview tab.
Top 3 Solutions
The Top 3 Solutions table automatically updates as your team scores vendor responses, showing the three highest-scoring vendors with their evaluation status, completion percentage, and overall score.
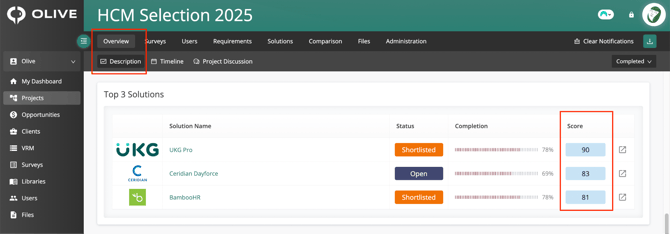
The Top 3 Solutions table — showing the current top-ranked vendors by score, with their status and completion
Vendor Engagement Status
The Vendor Engagement Status bar chart shows a live count of vendors at each stage of the process. Use it to spot which vendors have gone quiet or haven't yet engaged with their opportunity.
|
Stage |
What it means |
|
Included |
Vendor has been added to the project |
|
Contacted |
Vendor has been sent the opportunity invite |
|
Engaged |
Vendor has logged into their opportunity |
|
In Progress |
Vendor has started responding to requirements |
|
Disqualified |
Vendor has been removed from the evaluation |
|
Submitted |
Vendor has submitted their full response |
|
Completed |
Vendor has been marked as completed (typically used for disqualified vendors) |
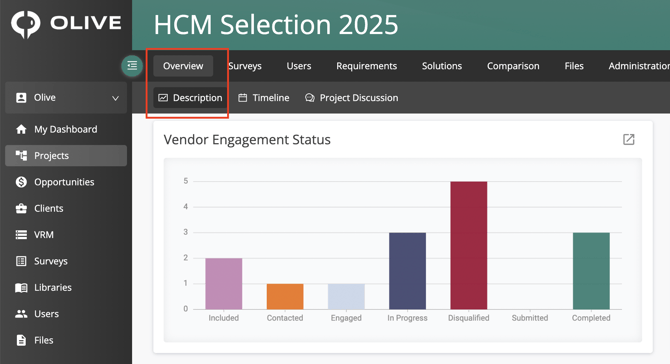
The Vendor Engagement Status bar chart — showing how many vendors are at each stage of progress
Evaluation Status
The Evaluation Status donut chart gives you an at-a-glance view of how vendors are distributed across evaluation stages. The total number in the centre shows how many vendors are in the project. The segments show the split between Active, Shortlisted, and Disqualified vendors.
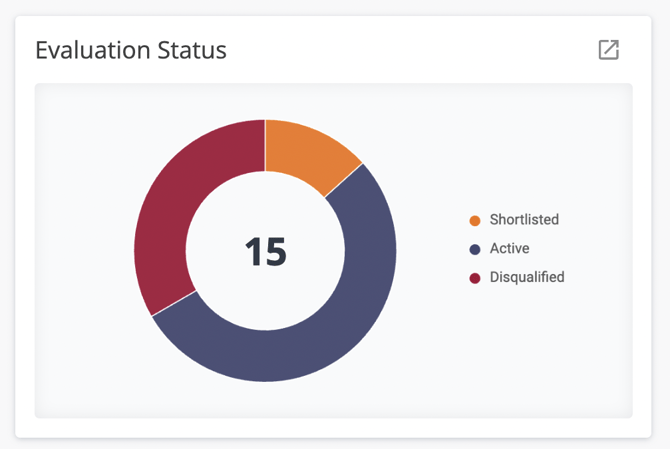
The Evaluation Status donut chart — showing the split of vendors by Active, Shortlisted, and Disqualified
Must Have Requirements
The Must Have Requirements section lists every requirement that has been flagged as must-have in the Requirements tab, along with its star rating. Use this as a quick reference for your most critical evaluation criteria throughout the project.
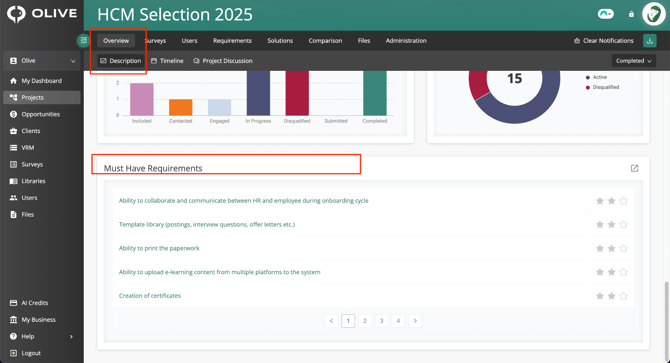
The Must Have Requirements list — showing all requirements marked as must-have, with star ratings
Timeline Sub-tab
Click the Timeline sub-tab to manage key project milestones and dates. The timeline is automatically shared with all invited vendors, so they can see the project schedule and plan their responses accordingly.

The Timeline sub-tab — showing the Timeline tab highlighted and the '+ Add Event' button
Adding a Timeline Event
- Click '+ Add Event' at the top right of the Timeline sub-tab — the Add Event panel opens on the right
- Enter the Name of the milestone or event (e.g. RFP Submission Deadline, Shortlist Announcement)
- Select the date and time for the event
- Click the Save icon to add the event to the timeline
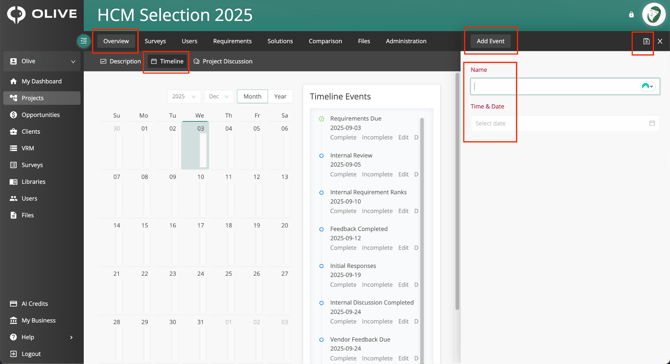
The Add Event panel — enter a Name and select a Time & Date, then click Save
|
💡 Tip: Add key milestones early — RFP release date, submission deadline, demo week, shortlist announcement, and final decision. This sets clear expectations for vendors from day one. |
|
📌 Note: You do not need to notify vendors when you add events — timeline visibility is automatic for all invited vendors the moment you save an event. |
Managing Timeline Events
All timeline events are listed in the Timeline Events panel on the right side of the page. For each event:
|
Option |
What it does |
|
Complete |
Marks the event as done — a green checkmark appears next to it |
|
Incomplete |
Reverts a completed event back to open |
|
Edit |
Opens the event to update its name, date, or time |
|
Delete |
Permanently removes the event from the timeline |
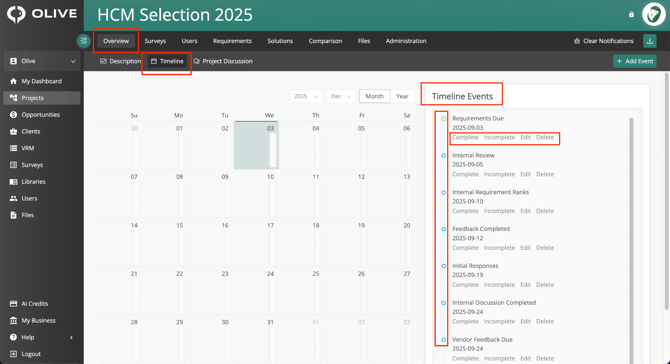
The Timeline Events list — showing each event with Complete, Incomplete, Edit, and Delete options
Timeline Calendar
The calendar on the left side of the Timeline sub-tab shows your events plotted visually. Use the controls above the calendar to navigate:
- Year dropdown — change the year
- Month dropdown — change the month
- Month / Year toggle — switch between a monthly calendar view and an annual overview
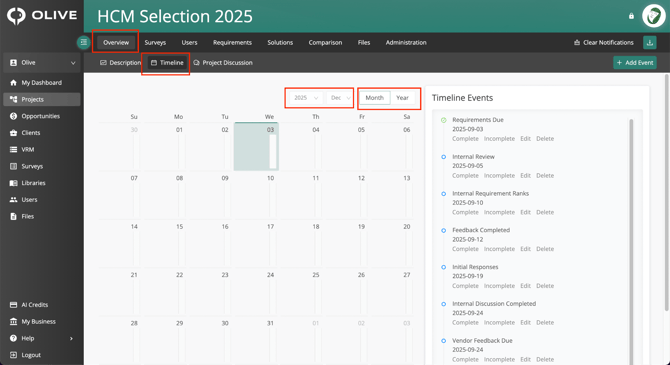
The Timeline Calendar — showing the monthly view with Year/Month dropdowns and Month/Year toggle
Project Discussion Sub-tab
Click the Project Discussion sub-tab to manage the shared Q&A forum between your team and the invited vendors. This is where vendors ask questions about the RFP, and your team responds publicly so that all vendors can see the answers.
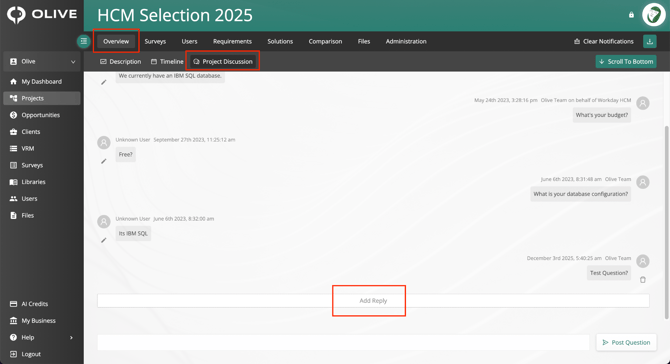
The Project Discussion sub-tab — showing vendor questions and the Add Reply button
How the Discussion Works
Vendors post questions from their opportunity view. Your team sees these questions in the Project Discussion sub-tab along with which vendor asked them. When you reply, your answer is visible to all vendors simultaneously — but vendors cannot see who asked each question. In the vendor's view, questions appear as asked by a 'Vendor User', keeping each vendor's identity confidential from the others.
|
📌 Note: Replies posted in the Project Discussion are visible to all vendors simultaneously. This ensures consistent, fair communication throughout the RFP process — you only need to reply once, even if multiple vendors have asked the same question. |
Replying to Vendor Questions
- Find the question in the Project Discussion sub-tab
- Click 'Add Reply' below the question
- Type your reply in the text area that appears
- Click the Save icon to publish your reply
Your reply is immediately visible to all vendors in the project.
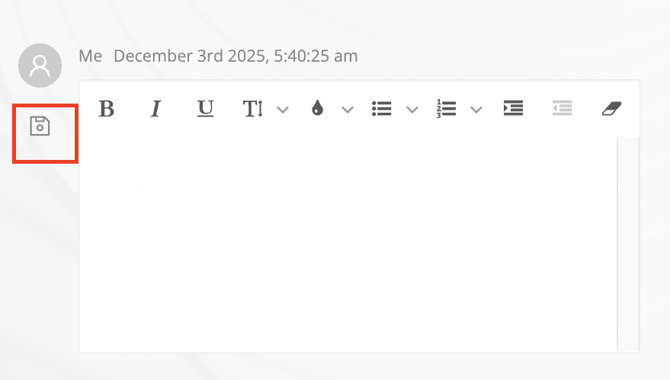
The Add Reply text area — type your reply and click the Save icon to publish it
|
💡 Tip: Encourage vendors to use the Project Discussion for all their questions. This keeps communication centralised, ensures consistency, and creates a full record of all Q&A for your project. |
What's Next?
Once your Overview tab is set up, you're ready to move forward with your evaluation. Here's the recommended order:
- Complete your project description — ensure vendors have all the context they need before the RFP opens
- Fill in your budget expectations in the Solicit Vendor Pricing section
- Add all key milestones to the Timeline so vendors can see the full project schedule from day one
- Monitor the live dashboards on the Description sub-tab as responses come in and the evaluation progresses
- Check the Project Discussion regularly and reply to vendor questions promptly to keep the evaluation on track
Need help? Contact your Olive project administrator or reach out to Olive support.