Overview
The Files tab is your central hub for managing all documents associated with a project in Olive. From here, you can share files with vendors, download documents vendors have submitted, access system-generated exports, and store supplementary materials for AI-assisted analysis.
To access the Files tab, open your project and click Files in the top navigation bar. The tab contains four sub-tabs — each with a distinct purpose:
|
Sub-tab |
Who uploads? |
Who can see it? |
Purpose |
|
Generated Files |
Olive (automatic) |
Your team only |
System exports & reports |
|
Files For Vendors |
Your team |
Your team + all vendors |
Share documents with vendors |
|
Files From Vendors |
Vendors (read-only for you) |
Your team only |
Receive vendor submissions |
|
Other Files |
Your team |
Your team only |
Internal docs + AI analysis |
|
📌 Note: Familiarise yourself with all four sub-tabs before uploading or downloading files to make sure you are always working in the correct location. |
Generated Files
To reach this sub-tab, click Files in the top navigation bar, then select Generated Files.
This is where Olive automatically deposits any system-generated documents — for example, exports you have triggered elsewhere in the platform, such as scoring summaries or full response exports. You cannot upload files here; all content is created by the platform.
How to download a generated file
- Wait until the Status column shows Complete
- Click the Download icon in the corresponding row
- The file saves to your browser's default download location
While a file is being prepared, its status displays as In Progress. Once ready, the status updates to Complete and the Download icon appears.
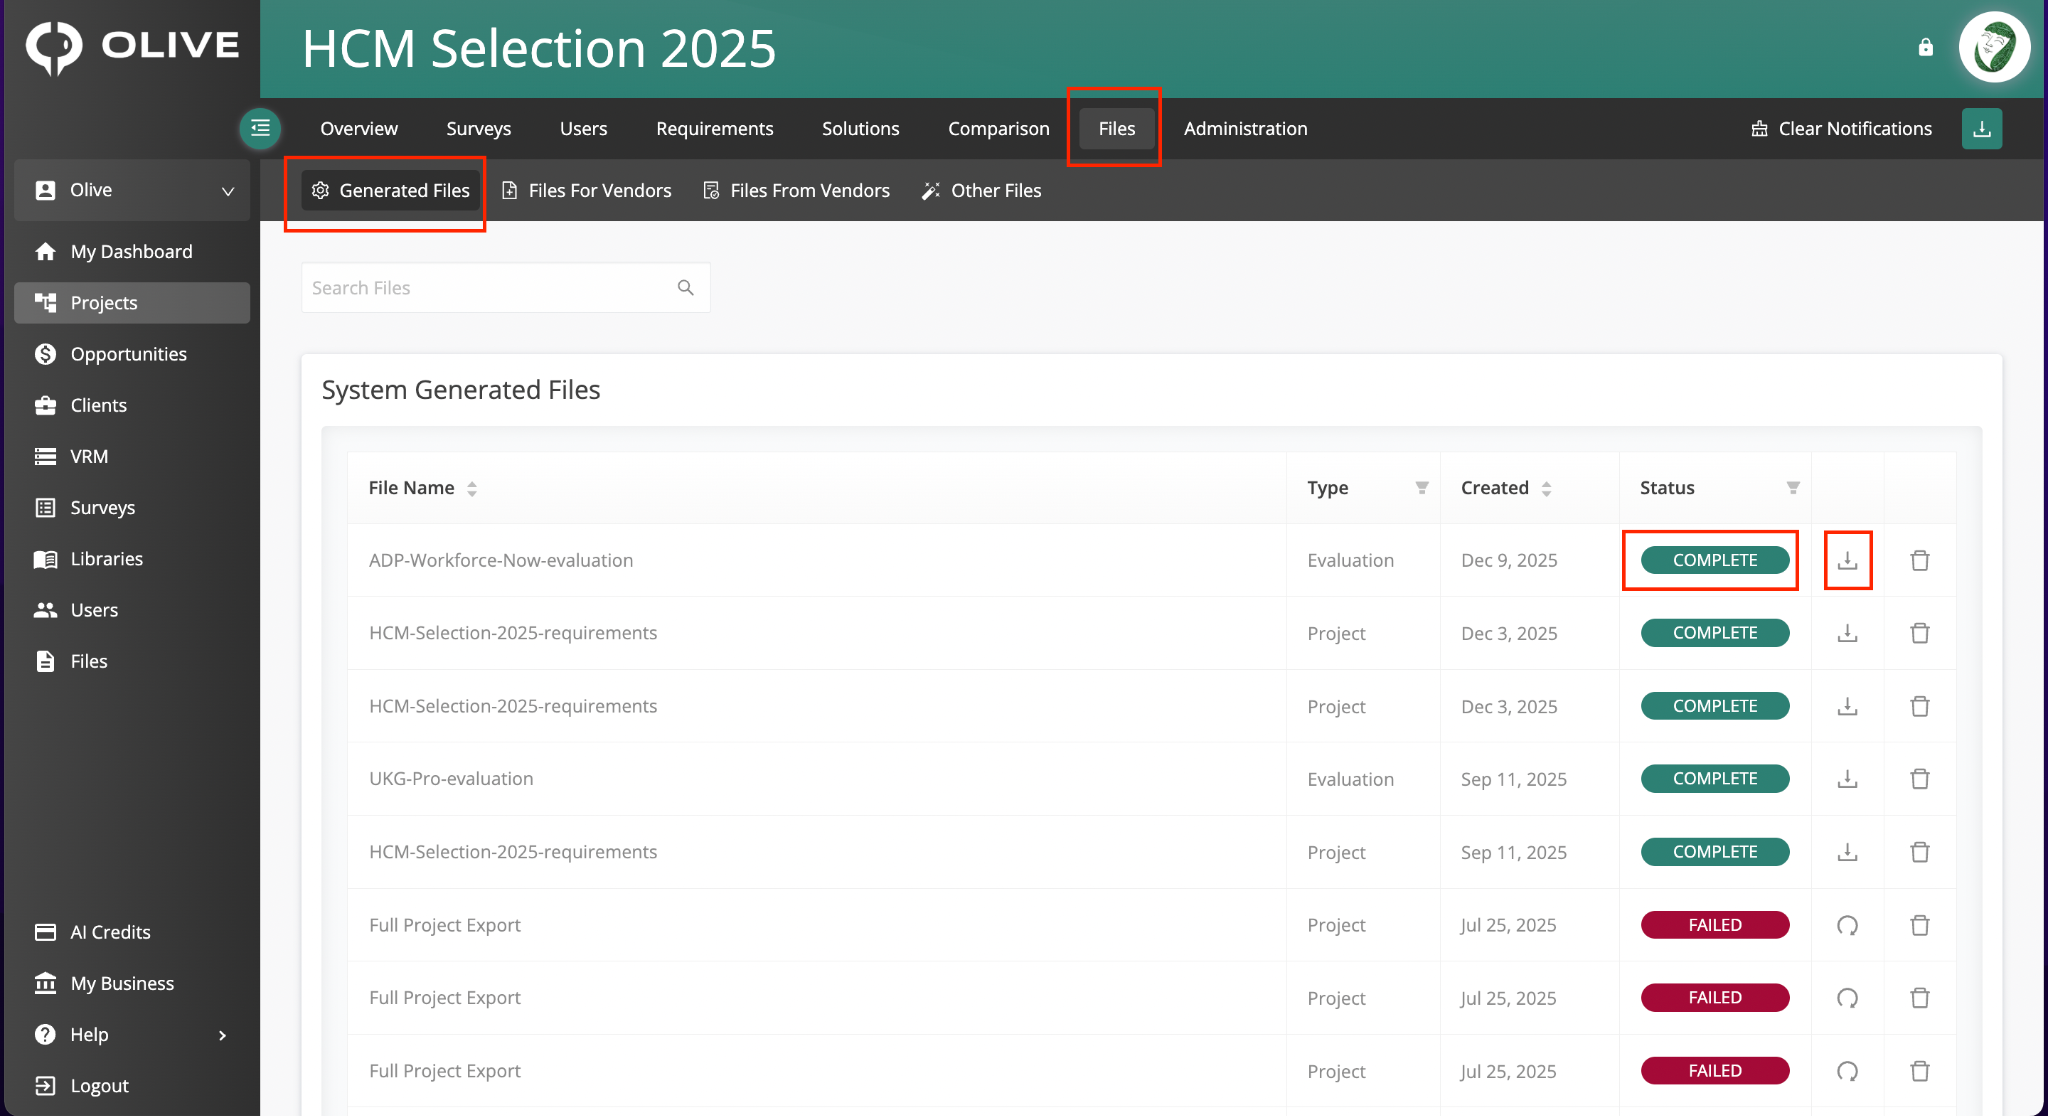
Figure 1: The Generated Files sub-tab — wait for "Complete" status, then click the Download icon
|
💡 Tip: If a file remains In Progress for longer than expected, refresh the page. Large exports may take a few minutes to generate. If the status still does not update, contact your Olive administrator. |
Files For Vendors
To reach this sub-tab, click Files in the top navigation bar, then select Files For Vendors. Within the platform this section is labelled "Files Uploaded By Our Team".
This is where you upload any documents you want the vendors in your project to access. Vendors can view and download everything you place here.
How to upload a file for vendors
- Click the Add Files button at the top of the sub-tab
- Select your file(s) from your computer in the file picker
- Confirm the upload — the file appears in the table and is immediately visible to vendors
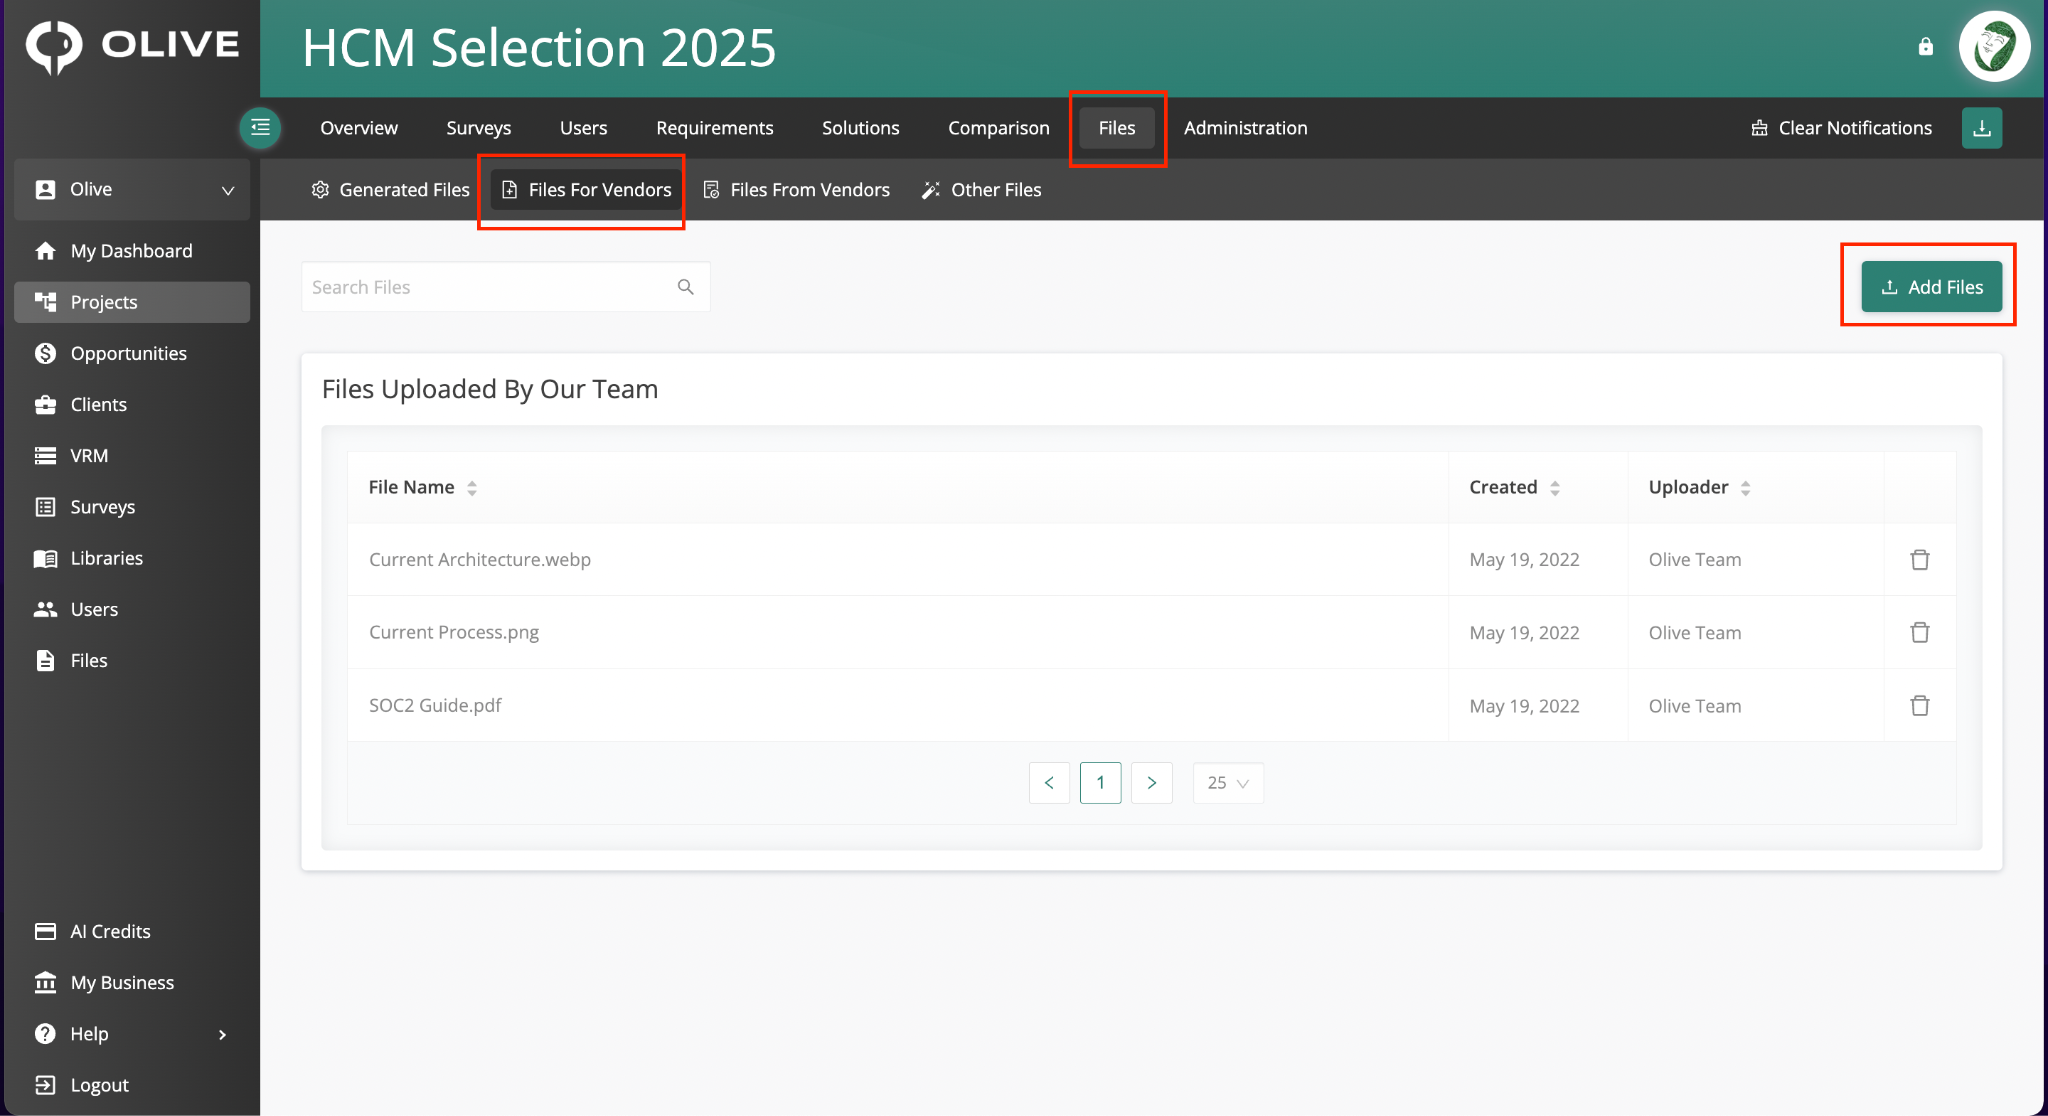
Figure 2: The Files For Vendors sub-tab — use the Add Files button to share documents with vendors
|
💡 Tip: Use clear, descriptive file names so vendors immediately understand what each document contains — for example, "Project_Requirements_v2.pdf" rather than "document_final.pdf". |
|
⚠️ Important: Files uploaded here are visible to all vendors invited to the project. Do not upload documents intended for internal review only — use the Other Files sub-tab for those instead. |
Files From Vendors
To reach this sub-tab, click Files in the top navigation bar, then select Files From Vendors. Within the platform this section is labelled "Files Uploaded By Vendors".
This sub-tab collects all documents submitted by vendors as part of their project participation. This sub-tab is read-only — you cannot upload files here.
How to download a vendor-submitted file
- Locate the file in the table — columns identify the submitting vendor
- Click the Download icon in the corresponding row
- The file saves to your browser's default download location
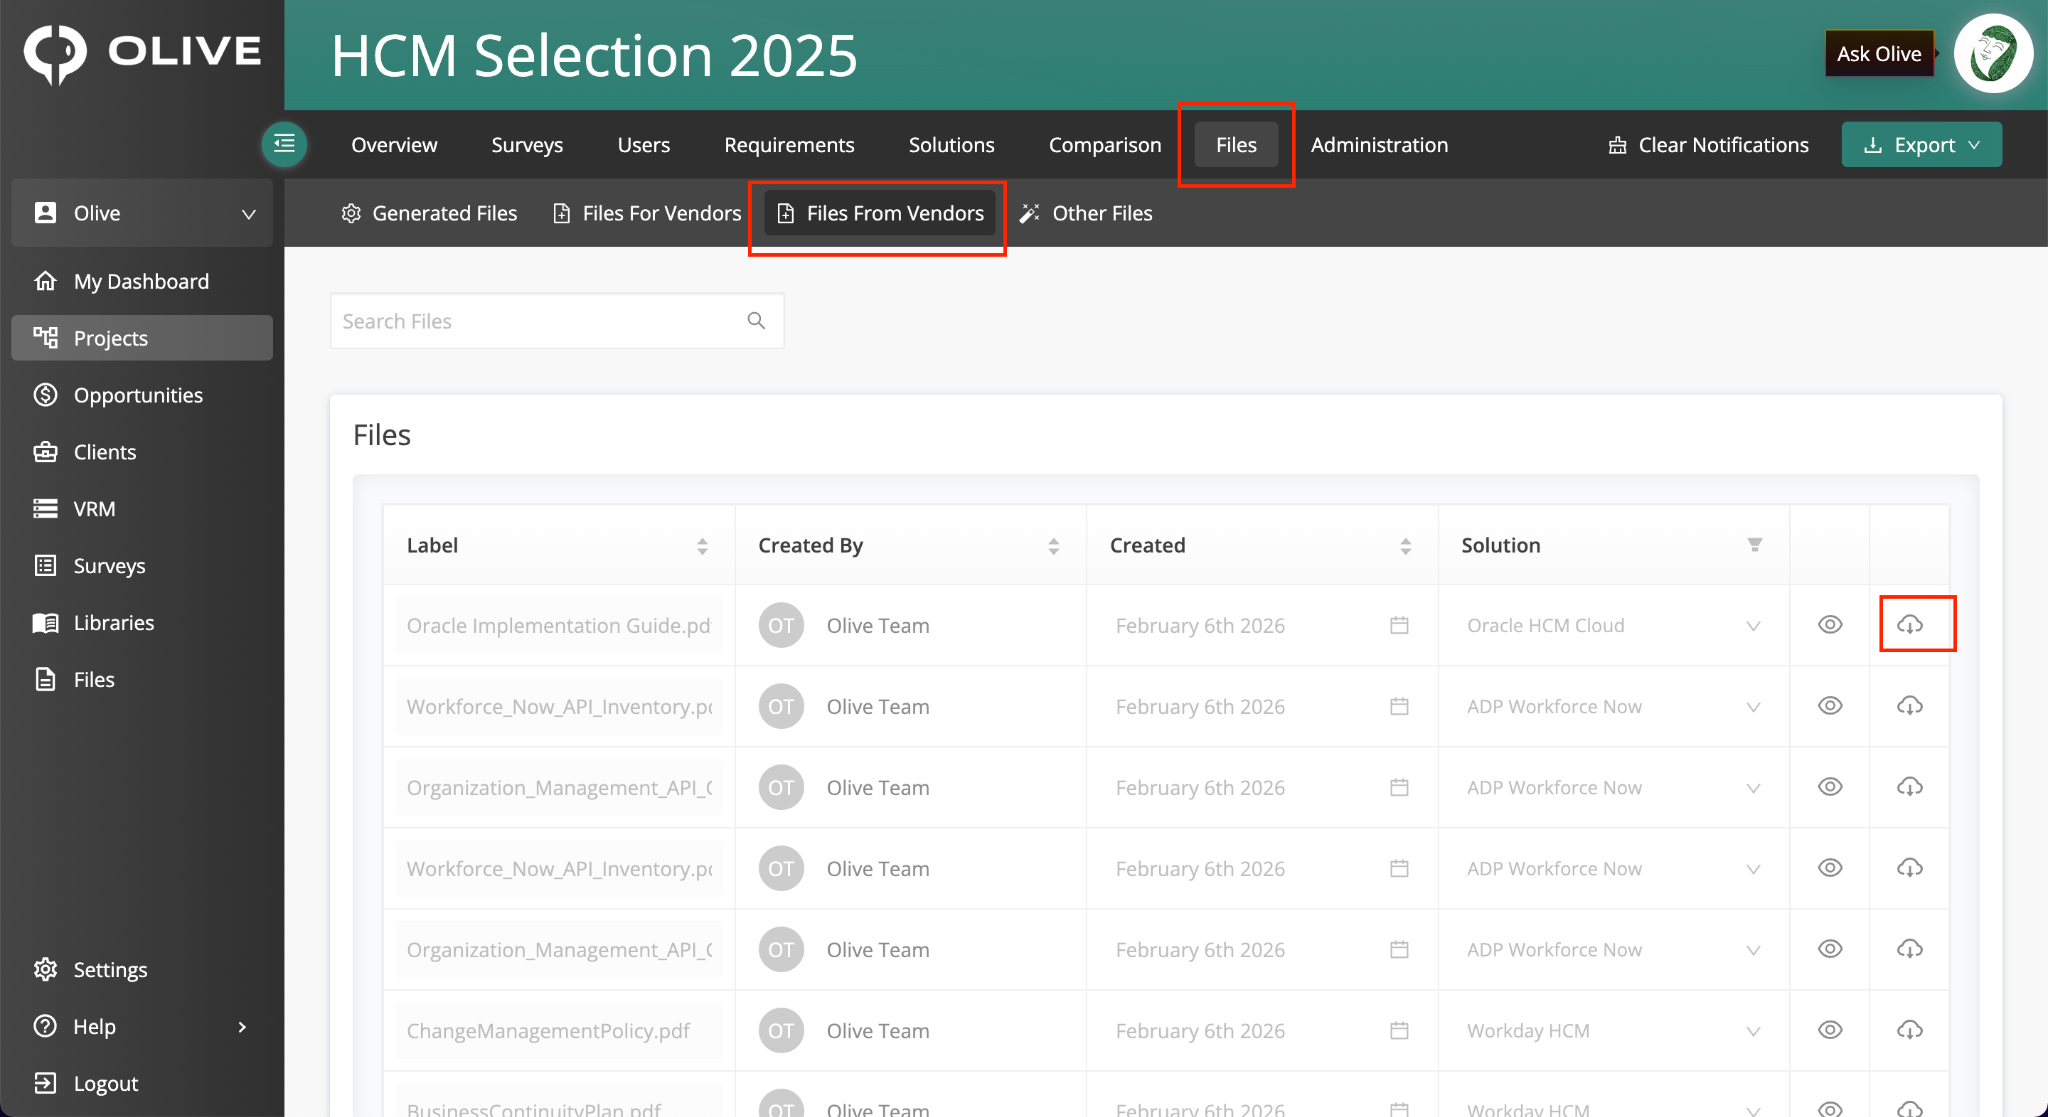
Figure 3: The Files From Vendors sub-tab — locate a file by vendor name, then click the Download icon
|
💡 Tip: Check this sub-tab regularly during active evaluation periods. Vendors may upload supporting documents, certifications, or supplementary materials that provide important context for scoring their responses. |
Other Files
To reach this sub-tab, click Files in the top navigation bar, then select Other Files.
This is a flexible internal storage area for project-related documents that do not need to be shared with vendors. Any files you upload here are scoped to the project and remain visible only to your team.
How to upload a file to Other Files
- Click the Other Files sub-tab
- Use the upload control to select and upload your file
- The file is stored against your project and is immediately available for AI analysis
How to query an uploaded file using Ask Olive AI
What makes Other Files especially powerful is its integration with the Ask Olive AI chatbot. Once you upload a document — such as a meeting transcript, a notes file, or a supplementary specification — you can ask Olive's AI to analyse and extract information from it.
- Upload your file using the steps above
- Open the Ask Olive AI chatbot from within the project interface
- Type your question in plain language — for example:
- "Extract all requirements from this transcript"
- "What vendor questions were raised in this meeting?"
- Olive's AI analyses the document content and returns a response
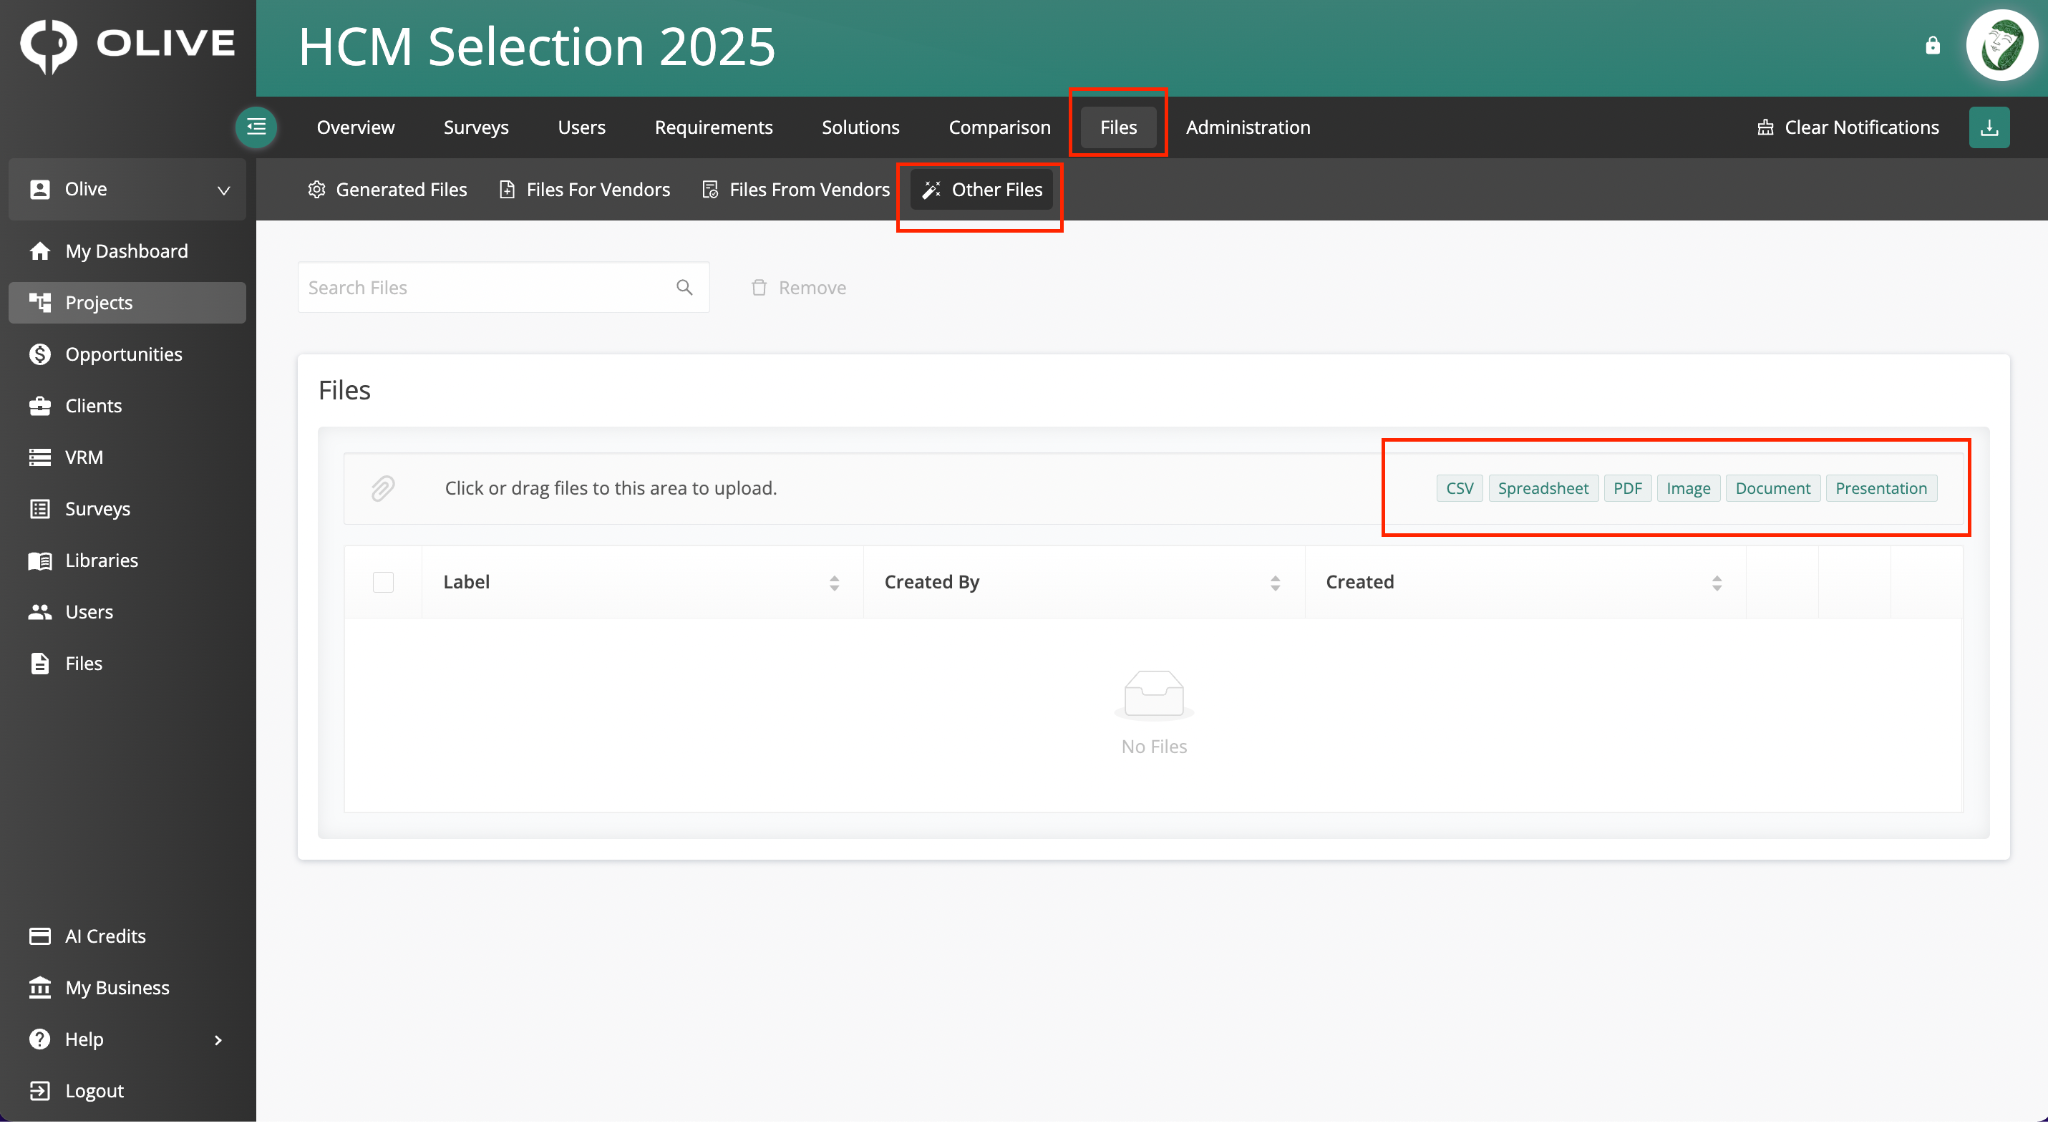
Figure 4: The Other Files sub-tab — upload internal documents and query them using the Ask Olive AI chatbot
|
💡 Tip: Try uploading the transcript from your RFP kickoff or vendor Q&A meeting, then ask Olive's AI to extract a list of requirements or vendor questions. This can save significant time compared to reviewing long documents manually. |
|
📌 Note: Files in Other Files are for internal use only and are not visible to vendors. They are accessible to all team members who have access to the project in Olive. |
What's Next?
Now that you know how each sub-tab works, here are the most common next steps for teams getting started with the Files tab:
- Upload your RFP supporting documents to Files For Vendors so vendors have everything they need
- Check Generated Files after triggering any exports elsewhere in the platform
- Monitor Files From Vendors regularly during the evaluation period for new vendor submissions
- Upload meeting transcripts or notes to Other Files and use Ask Olive AI to extract requirements or action items
For additional support, contact your Olive administrator or reach out to the Olive support team through your organisation's support channel.