Overview
The Administration tab is where you configure the scoring and weighting rules that determine how vendor match percentages and overall scores are calculated in your project. It also gives you visibility into the status of background processing jobs running in the platform.
To access the Administration tab, open your project and click Administration in the top navigation bar. The tab contains two sub-tabs:
|
Sub-tab |
What you configure |
Use it when… |
|
Weighting |
Scoring scale, star ratings, section weights, department weights |
Setting up or adjusting how vendor scores are calculated |
|
Jobs |
Read-only — view background job statuses |
Checking whether an export or process has completed |
|
📌 Note: The weights and scoring scale you configure here directly affect the match percentages and scores shown when evaluating vendors. Set these up before scoring begins to ensure your results are meaningful. |
Weighting
To reach the Weighting sub-tab, click Administration in the top navigation bar, then select Weighting. This is where you define the rules that govern how vendor responses are scored and how those scores are weighted across sections and departments.
The Weighting sub-tab contains four configurable settings:
Scoring Scale
The Scoring Scale sets the maximum score you can award a vendor for any individual response. For example, setting the Scoring Scale to 10 means you will score vendor responses on a scale of 0 to 10.
- Navigate to Administration > Weighting
- Locate the Scoring Scale field
- Enter the maximum score value you want to use — for example, 10 or 5
- Click Save to apply your changes
|
💡 Tip: Choose a scoring scale that gives evaluators enough granularity to differentiate between vendors. A scale of 1–5 works well for straightforward projects; 1–10 is better when nuanced comparison is important. |
Stars
The Stars setting defines the star rating scale used to rank the importance of individual requirements. Stars act as a priority indicator — each star level represents a different tier of importance.
Example with Stars set to 3:
- 1 star = Nice to have
- 2 stars = Should have
- 3 stars = Must have
- Navigate to Administration > Weighting
- Locate the Stars field
- Enter the maximum number of stars you want to use
- Click Save to apply your changes
|
💡 Tip: Define what each star level means for your team before you begin building requirements, and share that definition with all evaluators. Consistent star usage ensures your scoring reflects true business priority. |
Section Weighting
Section Weighting lets you control how much each requirement section contributes to a vendor's overall score. Assign higher weights to the sections most critical to your project decision.
- Navigate to Administration > Weighting
- Locate the Section Weighting area — you will see a list of each requirement section in your project
- Enter a weight value for each section
- Click Save to apply your changes
|
📌 Note: Olive normalises weight values, so they do not need to add up to exactly 100. What matters is the proportion between sections. For example, if Security is your primary concern, a Security weight of 40 and a Reporting weight of 10 correctly reflects that Security is four times more important — regardless of what other sections are set to. |
Department Weighting
Department Weighting lets you control how much each department's evaluation contributes to the overall vendor score. Increase a department's weight when that team has primary decision-making responsibility for the project.
- Navigate to Administration > Weighting
- Locate the Department Weighting area — you will see a list of departments involved in the evaluation
- Enter a weight value for each department
- Click Save to apply your changes
|
💡 Tip: If all departments should carry equal influence, assign them the same weight. If certain departments — such as IT or Legal — are the primary decision-makers, increase their weight accordingly. |
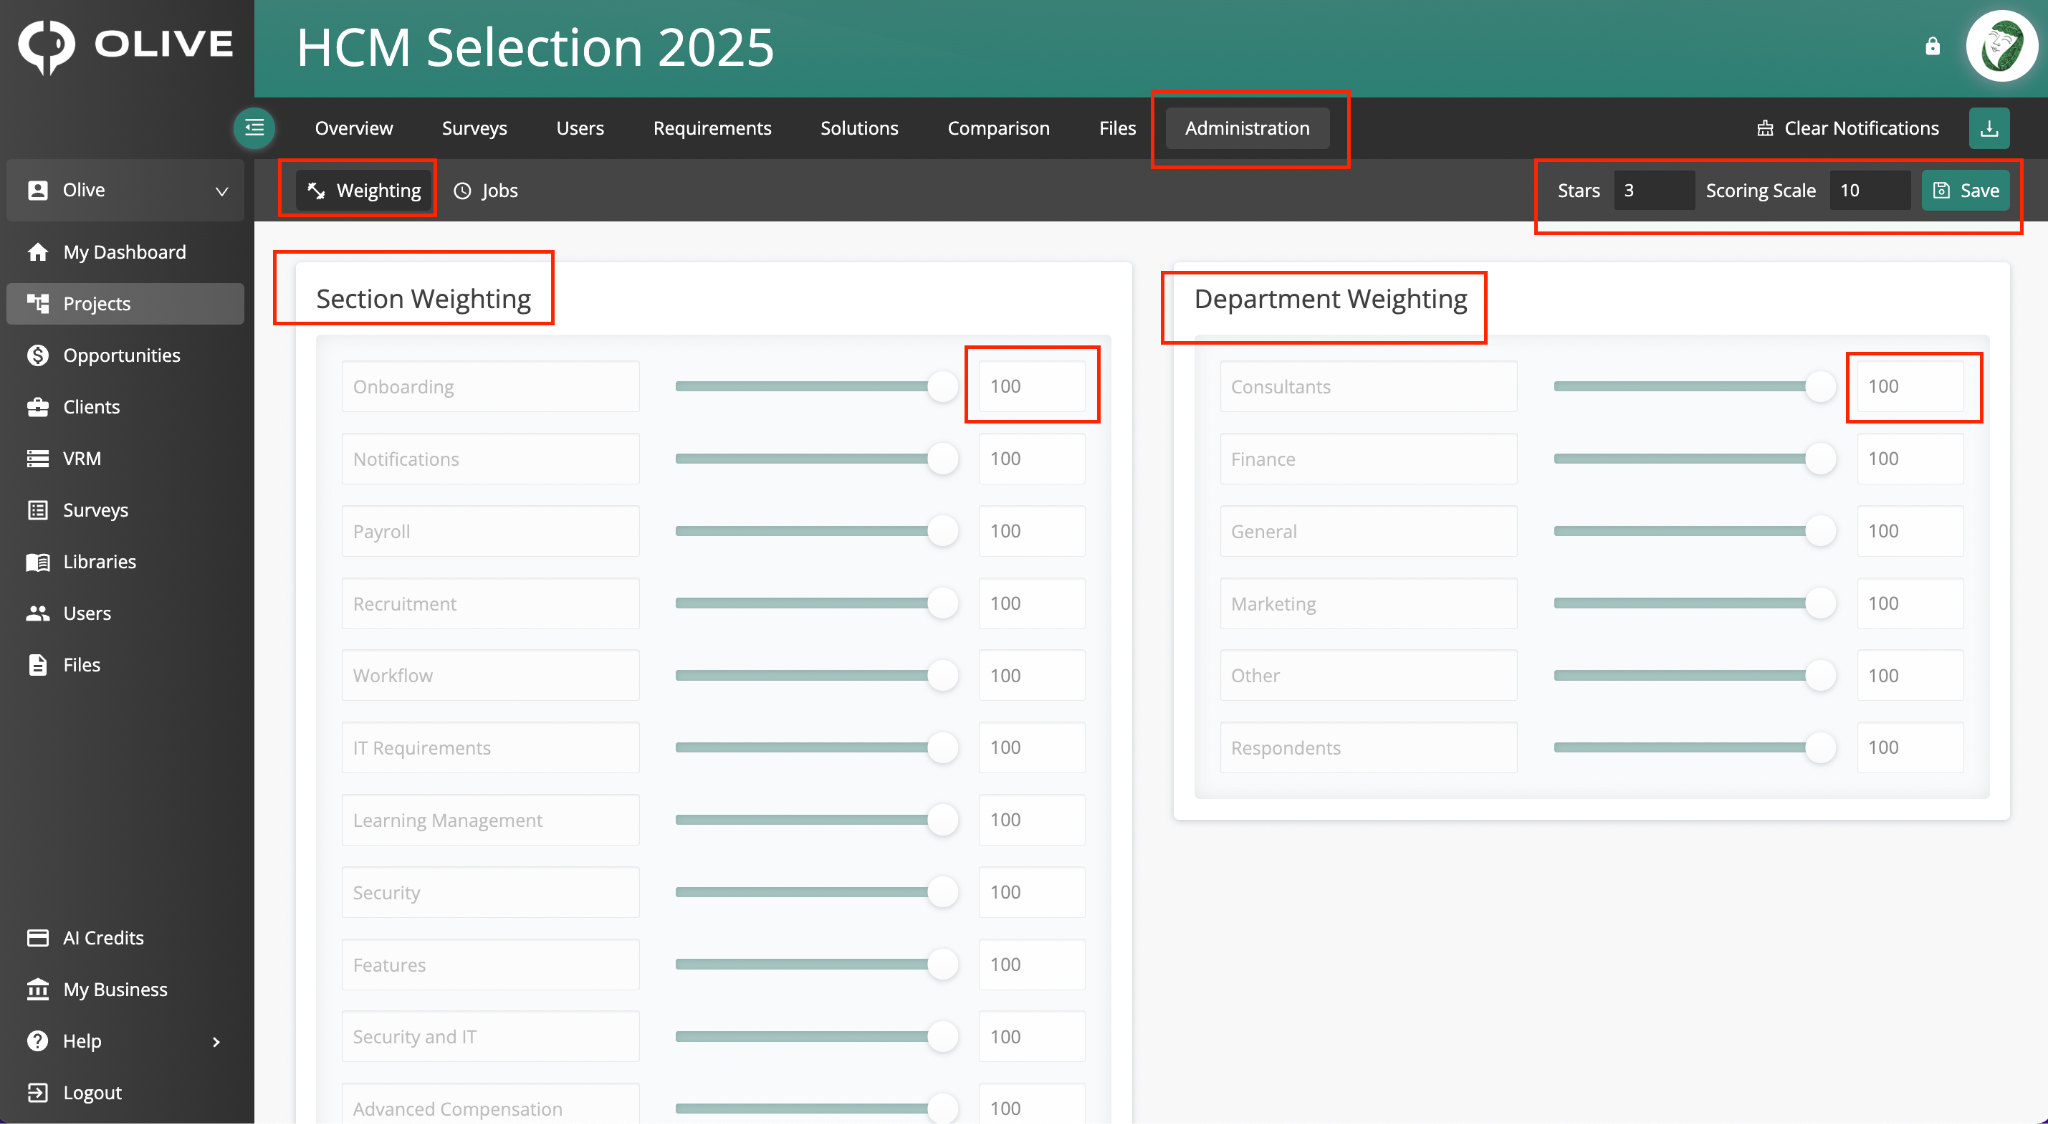
Figure 1: The Weighting sub-tab — configure Scoring Scale, Stars, Section Weighting, and Department Weighting
Jobs
To reach the Jobs sub-tab, click Administration in the top navigation bar, then select Jobs. This sub-tab gives you visibility into the background jobs running in your project — automated platform processes such as exports, score calculations, and data processing tasks.
Background Job Statuses
The Background Jobs table lists every job associated with your project and shows its current status. Use the table below as a quick reference:
|
Status |
What it means |
What to do |
|
Running |
The job is currently being processed |
Wait and refresh the page |
|
Pending |
The job is queued and waiting to start |
Wait — it will start shortly |
|
Complete |
The job finished successfully |
Download or access your output |
|
Failed |
The job encountered an error and did not complete |
Contact your Olive administrator before retrying |
How to filter the jobs list
- Navigate to Administration > Jobs
- Click the filter icon next to the Status column header
- Select one or more statuses — Running, Complete, Failed, and/or Pending
The table updates to show only jobs matching your selected filters.
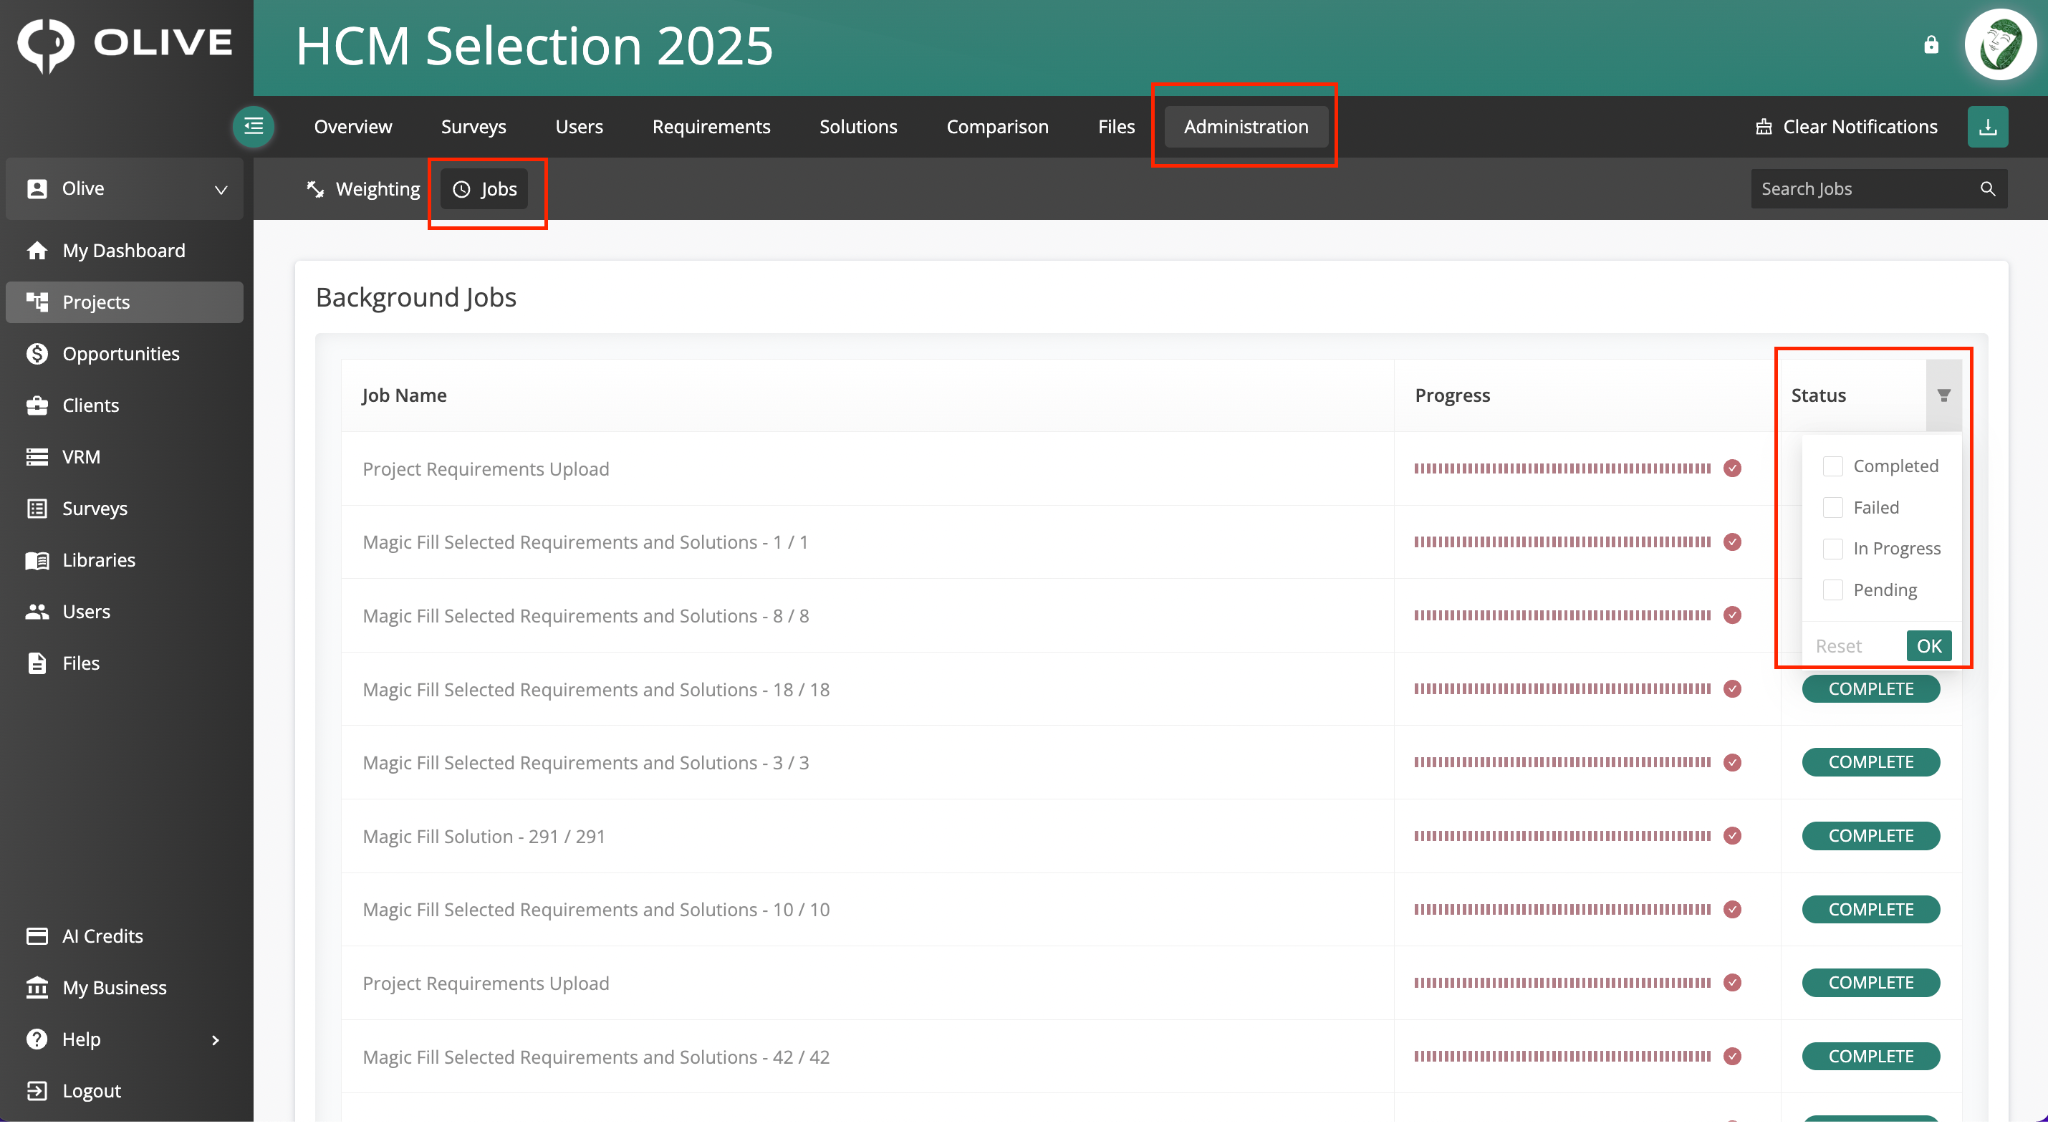
Figure 2: The Jobs sub-tab — monitor background job statuses and filter by Running, Complete, Failed, or Pending
|
💡 Tip: Check the Jobs sub-tab after triggering an export or scoring recalculation. Wait until the job shows Complete before downloading any related output. |
|
⚠️ Important: If a job shows a Failed status, do not attempt to re-trigger the process immediately. Note the job details and contact your Olive administrator so the issue can be investigated before you retry. |
What's Next?
Once your Administration settings are configured, you're ready to start evaluating vendors. Here's the recommended setup order:
- Set your Scoring Scale and Stars before evaluators start scoring responses
- Configure Section and Department Weighting to reflect your project's priorities
- Share what each star level means with your team so everyone evaluates consistently
- Use the Jobs tab to confirm any exports or background processes have completed successfully
For additional support, contact your Olive administrator or reach out to the Olive support team through your organisation's support channel.